


Seasons > Father’s Day > Ways to Celebrate Father’s Day > Father’s Day Cards to Make > 2 Ways to Make a Toolbox Father’s Day Card
If Dad likes to work with tools, make a toolbox Father’s Day card for him.
1.Fold a red piece of paper so the ends overlap.
-
2.Fold it again 1/4 inch (1 cm.) to 1/2 inch (2 cm.) over from the first folds. It doesn’t have to be exact, but both folds do need to be the same distance from the previous fold. This just gives a little depth to make it look more three dimensional than a flat card.
-
3.Make a handle by folding black paper in half. Cut out a “U” with the two tops of the “U” along the fold.
-
4.Glue the handle to the top of the toolbox by making 2 new folds on either side of the original fold so there is a surface to glue it on.
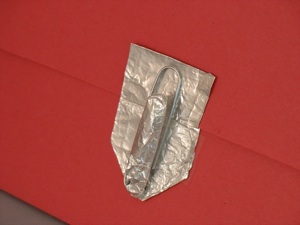
Optional: Make a latch for the toolbox with some tinfoil and a paperclip.
1.Tear off two small pieces of tinfoil and fold the edges to make each into a rectangle shape.
-
2.Fold the bottom 2 corners of the bottom rectangle.
-
3.Rub both rectangles with a rounded surface, such a a marker, to smooth out some of the wrinkles.
-
4.Squeeze a third small piece of foil into a wad to fit inside the middle of the paperclip. Hold the paperclip in the front of the bottom rectangle, and press the wad of tinfoil from behind the rectangle so that the tinfoil pushes through the paperclip and holds the paperclip in place.
-
5.Glue both rectangles to the toolbox.
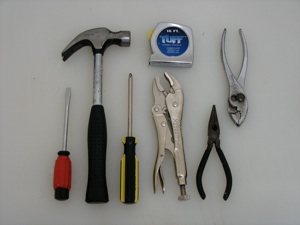
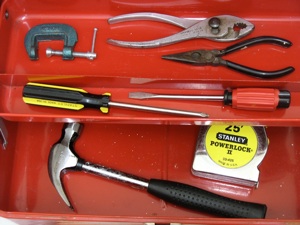
“Fill” the toolbox with tools. Enlarge this photo, and print it out. Cut out the tools and fasten them to the open toolbox with double stick foam tape, or cut paper loops to fasten them on so they stick out from the paper. Just be careful not to fasten them across folds, or the tools will end up squashed when you close the toolbox (fold the card shut.)
For an easier version enlarge the photo to a full page and print it out. Write your message in the middle, and glue it to the inside of the red toolbox card.
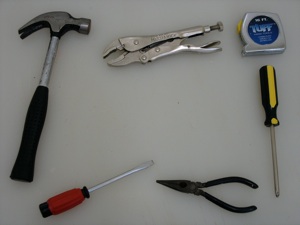
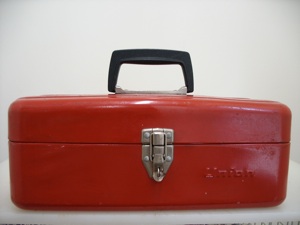
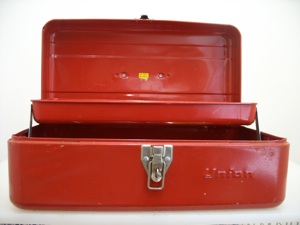
Second way to make a toolbox card: enlarge these 2 photos and print them both so the photos fill the bottom half of each page. Fold each sheet in half, with the outside of the toolbox on the outside of the folded card, and the photo of the inside of the toolbox on the inside of the of the folded card. Glue them together, and trim any overhang. Don’t forget to write a message of appreciation.
Optional: If you use card stock, the paper is thick enough to simply print the pictures on both sides of the page--no gluing or cutting.
optional third view photo

Seasons > Father’s Day > Ways to Celebrate Father’s Day > Father’s Day Cards to Make > 2 Ways to Make a Toolbox Father’s Day Card