


One sheet makes a half circle, and 2 sheets are needed to make a full circle.
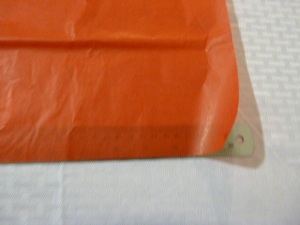
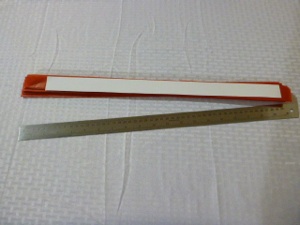
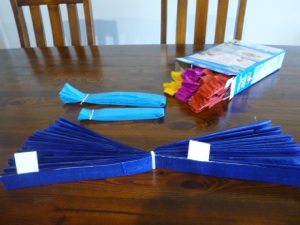
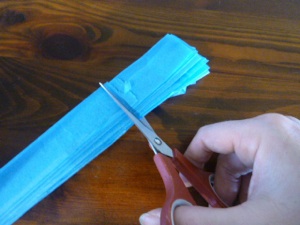
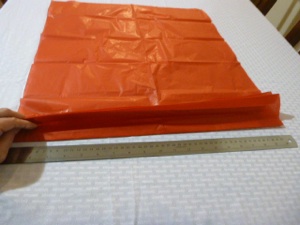
You will need 3 rulers that are as long as the width of the paper, or 3 strips of poster board (or thin cardboard.) Cut each strip the width you want each rib to be. About an inch (2 cm.) is good for these large sizes. In the photos, 2 poster board strips were cut the same size as the metal ruler.
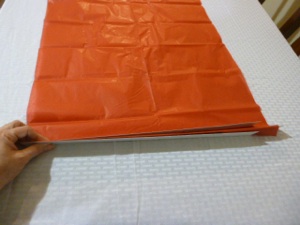
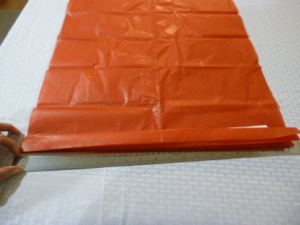
Lay one poster board strip or ruler under the paper and one strip on top of the tissue paper.
Stand the 2 rulers or strips on their edges with the tissue paper sandwiched between,
Put the third strip on the back side of the new fold--this presses the paper down evenly next to the ruler to hold the tissue paper in place as you make the fold. Press the new fold with your free hand to make a nice crisp fold.
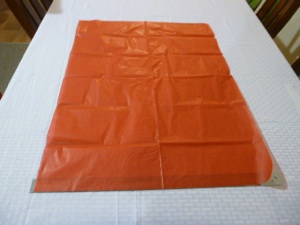
To make larger discs, you need larger paper. Tissue paper comes in a lot of colors, and is quite inexpensive, so it makes a good choice. But it is so slippery and tears so easily that it can be tricky to work with. I have tried lots of ways to fold tissue paper, and through trial and error have come up with this solution. The following way may seem complicated, but it really is the easiest way to fold it. Once you get the hang of it, it goes pretty quickly--you can get one done in about 15 minutes.
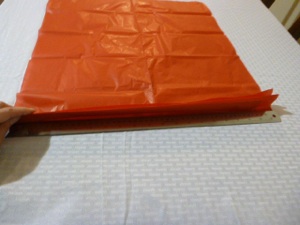
Lay the newly folded tissue paper (with the strips of poster board sandwiched between), flat against the unfolded paper.
Pull the bottom ruler out from between the layers of tissue paper, then slide it back under the unfolded tissue paper.
Stand them on end again, pull out the top ruler that is closest to you (the one that is no longer next to the bottom ruler), and put it against the far side of the bottom ruler, and press the new fold with your free hand. Keep repeating until you have folded the full length of the tissue paper.
NOTE: The bottom ruler always stays on the bottom--each time you pull it out, slide it back under the unfolded paper to make the next fold. The two top rulers always stay on the top--one on each side of the bottom ruler--pull out the one closest to you (it is no longer next to the bottom ruler), and move it to the far side of the bottom ruler to make a new fold.
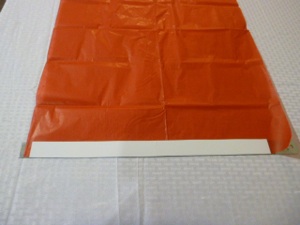
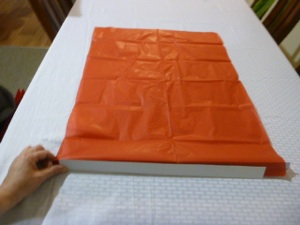
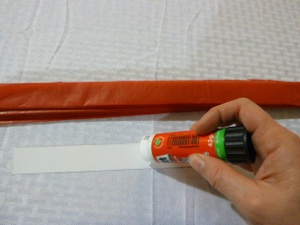
After all the paper has been folded, pull out all 3 strips of poster board or rulers. Glue a strip of poster board to each end (the first and last folds) of the folded tissue paper.
Be sure to rub the glue onto the poster board and not on the tissue paper because the glue will tear the tissue paper when you try to spread the glue on.
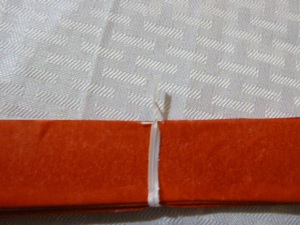
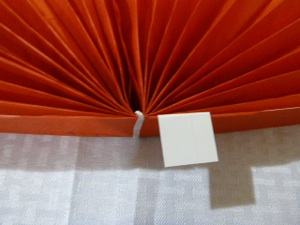
Fasten the folded tissue paper in the middle--you can use wire, such as twisties, or thread.
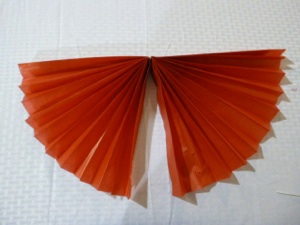
Pull the edges of the folded tissue paper together to make a fan. You may need to adjust the wire in the middle to the right or left, to make sure that where both sides come together, they are the same length. Glue the poster board edges together.
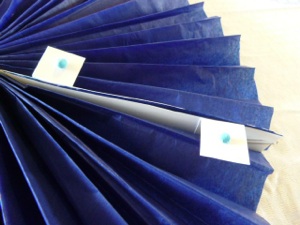
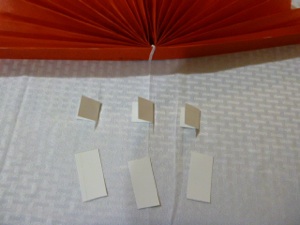
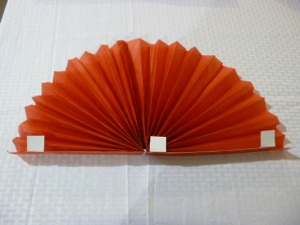
Make poster board tabs to hang the tissue paper fans or discs. Cut short strips out of poster board or card stock (stiff paper.) The size shown here is roughly 1 inch by 2 inches (2x4 cm) Fold these strips in half.
Glue one half of each strip to the strip of poster board glued to the tissue paper.
Fold the tabs toward the fan shape. Glue the tabs on both ends and in the middle for half circles and whole circles.
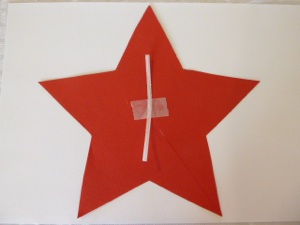
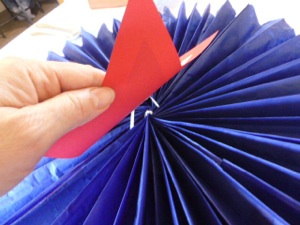
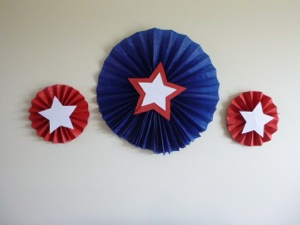
To put a decoration in the middle, such as a star, cut out the shape and then tape a wire or thread to the back of the shape. If the shape it flimsy (such as a paper napkin), glue it to a piece of paper before fastening it to the fan-shaped disc.
Use mounting putty (Sticky-tack, Plastitak or Blue-tack) to hang these decorations on the wall so as not to pull the paint off of the wall. JUST BE CAREFUL NOT TO GET ANY PUTTY ON THE TISSUE PAPER OR IT WILL TEAR IT AND RUIN THE DISC. I had to completely throw away my first disc because I didn’t know this.
Fasten the thread or wire around the middle where the fan is fastened.
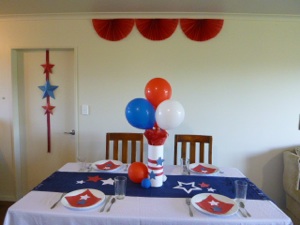
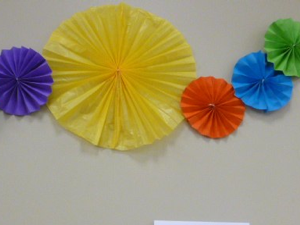
Crafts > Crafts for Adults by Materials > Paper Party Decorations > Fan-style Discs > How to make Large Discs from Tissue Paper
Solutions for rips
-
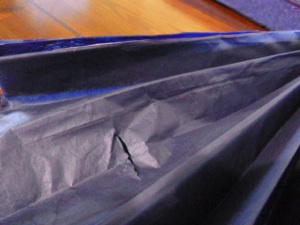
1.Tape the torn section on the back side of the disc so the tape doesn’t show. Clear tape shows up, too, so it is best to keep it on the back side which will be against the wall.
Storage Solutions
These are too fragile to store as open discs. Folded up, these actually take up very little space, so if you treat them carefully, they can be used over and over again. Slide the folded discs into an empty cereal or cracker box for safe keeping. Just be careful not to tear the folded discs that are already in the box-- the tabs can easily tear the folded discs that are next to them as you slide more into the box. Here are some tips:
-
1.cut the tabs so they are no longer than the width of the folded discs.
-
2.Trim the corners of the tabs so they are rounded so there is less chance of sharp corners tearing the other folded discs.
-
3.Fold the tabs flat against the folded discs.
-
4.Insert a whole stack of folded discs rather than one at a time.
-
5.Optional idea: cut strips of cardboard to go between the stacks of folded discs so there is less chance of tearing them as you insert them.
Solutions for rips
2. If the tear is near the edge, re-fold the disc like a folded fan, and cut off all the ends where the rip is. It will be a smaller circle, but without a tear.

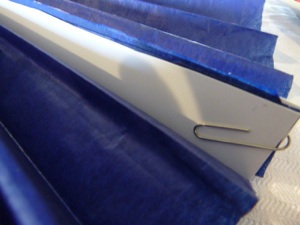
There is a gap between each quarter circle, so a half circle has one gap that needs to be glued, and a full circle has 4 gaps that need to be fastened. Leaving one gap unglued, but fastened closed with paper clips, allows the disc to be folded flat like a fan for storage.
Crafts > Crafts for Adults by Materials > Paper Party Decorations > Fan-style Discs > How to make Large Discs from Tissue Paper