


Seasons > Christmas > Decorations for the home > Christmas decorations for the Front Door > How to Make a Giant Gingerbread House
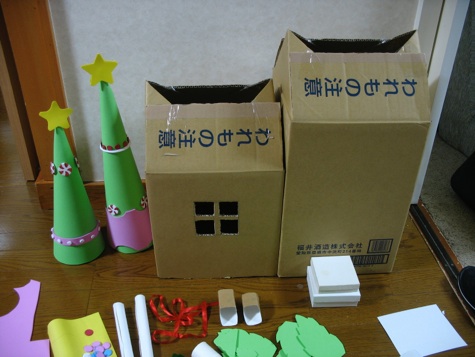
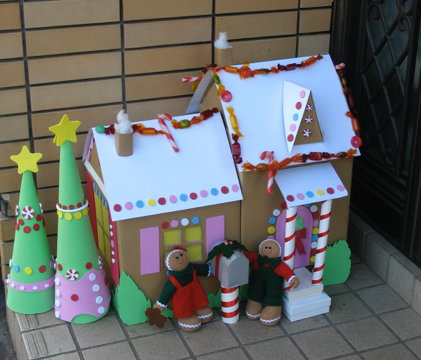
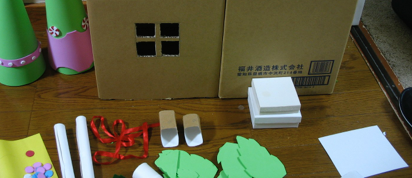
There is nothing like a giant gingerbread house to fire up the imagination of a child (or a child at heart.) The best way to make it interesting (and convincing), is to add lots of details (which also happens to make it harder to spot mistakes.) Really, this idea works for any size, from giant down to tiny--it just depends on the boxes you can find. The important thing is to find brown boxes that have little or no writing on them. You can even make them out of paper milk or juice cartons, or cracker or cereal boxes--just cover them with brown paper bags or construction paper.
First, fold in the two sides of the box’s side flaps to form a triangle, then tape the front and back flaps to the points. Don’t worry that there is a hole in the top--that will be covered by the roof. (Technically, if you want a window cut in the box, you should do that first, then glue yellow paper or a plastic sheet to the inside of the box to cover the holes. But it’s kind a lot of work, and by the time you add a lot of detail, no one will notice that the yellow paper squares representing the window are pasted to the outside.) If you plan to put the gingerbread house outside, and are worried that rain or snow might splash them, cover the boxes with clear contact paper. Also, if the wind blows a lot in your area, put rocks in the boxes before you fasten the roofs on.


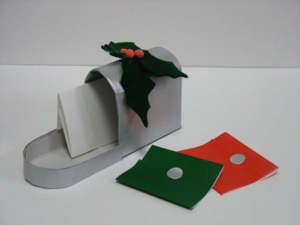
Mailbox
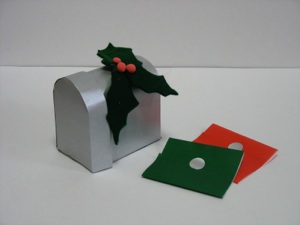
This mailbox really opens and shuts. It is made out of a kleenex box with silver paper taped to the outside. Tinfoil would work, too, although it may be difficult to keep the foil from wrinkling. Adding details makes it more interesting--here felt holly leaves and berries decorate the top. The finished mailbox is glued to a white toilet paper tube for a post that has been wrapped with a ribbon to make it look like a candy cane.
open
closed
Roof: Cut poster board or foam sheets to make the roofs--they should stick out about an inch or two beyond the walls of the house. If you plan to put the house outside, and are worried about rain or snow getting on it, use foam, or if you use paper, cover it with contact paper. If you fasten the roof on with double stick tape rather than glueing it on, you can open the roof and put rocks in once it is in place rather than putting them in before you put on any other decorations onto the house.
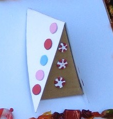
Gable: This is an extra roof decoration that is totally optional, but my mantra is, the more decorations, the better. Cut a triangle roof as shown in the photo at the left. Cut a smaller triangular cardboard face and glue both to the roof above the porch. Add “candy” decorations.
Chimneys: smash brown toilet paper tubes flat, then open them round again, and smash them flat so the previous fold is in the middle. Open them again and squeeze all 4 corners to help them be square rather than round. Cut the ends to fit the pitch of the roof and glue in place. Glue batting into the chimneys for smoke.
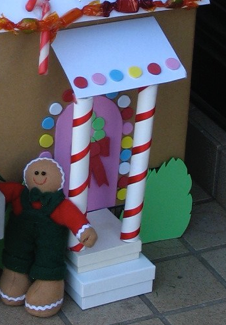
Porch: Glue two small white gift boxes to each other, then to the house where the door will be. Glue the door on the house above the steps. Make 2 porch pillars by cutting paper towel tubes up the length, then squeeze them to the diameter you want them to be, and tape to hold them that diameter. Wrap with copier paper or paper towels to make them white, then use red ribbon to twist around to make them look like candy canes. As an alternative, you could use the cardboard tubes that are on some wire coat hangers. Cut a porch roof and fold a half inch over for a flap to glue to the house. Glue or tape the pillars to the box steps and roof. This whole part is a bit flimsy, so you may want to glue these to the box once the house is in place where it will be displayed.
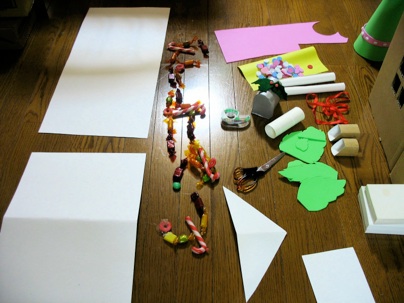
“Candy” Decorations: The thicker these are, the more real they look. For most of the “candy” decorations as well as the bushes, door, and window shutters, I cut the shapes out of foam sheets. You can make them even thicker out of air drying clay, such as Hearty. Along the edges of the roof, I ran a string of fake candy. If you can’t find a string of candy like this to buy, you can make your own--cut small shapes out of styrofoam packing, or shape them out of air drying clay such as Hearty. Run fishing wire through all the pieces, then wrap each one in colored plastic sheets, sold at craft stores. Sometimes dollar stores (hundred yen stores) sell them in their gift wrap section. You could even save wrappers from real candy, and re-wrap them around the fake candy.
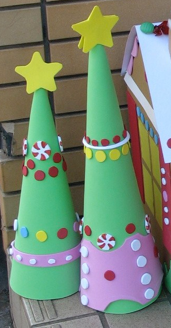
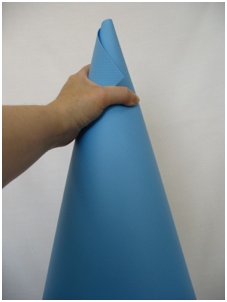
Trees: Roll foam sheets or poster board into cone shapes. Tape or glue in place. Cut the bottoms so they can stand up. Cut out more foam shapes to decorate them. Glue in place.
roof
roof
porch roof
gable roof
bushes
porch pillars
porch roof
porch
chimneys
ribbon for candy cane stripes
pink foam sheet for door and shutters
fake candy
mail box and tube for
post
-
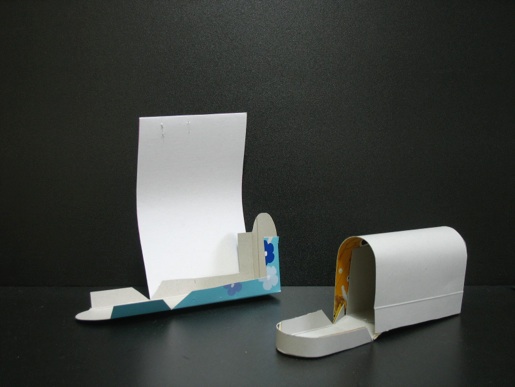
1.Cut off one end from a kleenex box--the end becomes the bottom of the mailbox, and the sides become the door and the back end of the mailbox.
-
2.Cut the sides of the box to be rounded (door and back end.) Cut one side so that it can move open and shut as the mailbox door.
-
3.Cut the back side off of the rest of the box so it is the right size to fold over and form the domed roof of the mailbox. Either glue or staple it to the base of the mailbox (end of the kleenex box.)
-
4.Cut a narrow strip and glue or staple to the door (along the outside edge--if you glue it to the inside, it will get in the way of closing the mailbox.)
-
5.Cover the mailbox with silver paper or foil.
-
6.Cut out green felt leaves and add red berries, which can be made from felt, beads, or air drying clay such as Hearty (as in photo.)
-
7.If you want it on a post, glue a white toilet paper tube to the bottom of the mailbox for the post. Wrap red ribbon around the post to make it look like a candy cane and glue in place.
-
8.Glue a cardboard square to the base of the post to keep it from falling over.