Sunday School or Bible Clubs > Crafts > Paper Resurrection Egg Sets
Paper Resurrection Egg Set
These paper egg sets are designed to imitate the plastic resurrection egg sets which have small objects inside that represent the parts of the Easter story--a rock to represent the empty grave, and a tiny cross to represent Jesus’ death, etc. Since these paper eggs are much cheaper to make, you can give a set to each child! Use these eggs to help tell the resurrection story, or use them as a prompts to help the children review the story.
You can make it into a craft by letting kids fold and cut out the eggs, or color the pictures, or decorate a pocket folder to hold the eggs, or decorate the plain fronts of the eggs to look like Easter eggs (see detailed instructions below.)
How to Make Paper Resurrection Eggs
One sheet represents the last supper through Jesus’ death, and the second sheet represents the various resurrection appearances.
-
1.Print out one sheet per student.
-
2.Cut off both ends on the solid lines.
-
3.Cut the sheets in half along the solid line between the rows of pictures.
-
4.Fold each strip in half along the dotted line.
-
5.Fold the two remaining dotted lines.
-
6.Cut the folded strip into an egg shape: Follow the outline of the egg shape on the first panel--be sure to cut through all 4 layers. Be careful NOT to cut the 2 sides of the eggs where the dotted lines are, or none of the eggs will be connected.
-
7.Open an accordion fold of 4 eggs.
-
8.Tape them end to end, or use each set of 4 eggs as a separate set.
Alternative Craft: Make a booklet instead of eggs. Cut off the two ends, but then FOLD the sheet in half along the cut line, then fold along the dotted lines the same as for making eggs.

Decorate eggs with Q-tips and acrylic paint or stamp pads. (See instructions below)
Decorate eggs with markers--rows of the same design look good.
Decorate eggs with paper napkins--glue with glue stick.
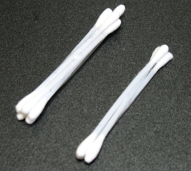
Make Q-tips into stamps for decorating all kinds of eggs, including real eggs. Tape three together, then cut in half to make them into two stamps. Also, 5 taped around a sixth Q-tip makes a flower shape. The sixth one keeps the 5 Q-tips in the shape of a flower. Before taping them together, press the cotton ends against the table to make sure they are all the same length (except for the 6th one that needs to stick out the back to hold the 5 in shape.) If even one is shorter or longer than the others, it will make it difficult to stamp flower shapes. A single Q-tip can make dots by using the end, or leaf shapes by using the side.
cut
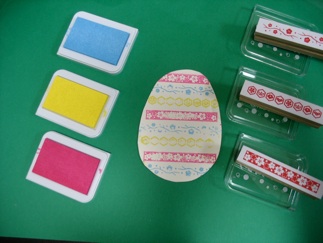
Inexpensive stamps and stamp pads are sold at dollar stores or craft stores (hundred yen stores. ) Any small design will work, and sometimes you can even get roller stamps.


8 Ways to Decorate the Accordion “Eggs”
(also see photos below):
-
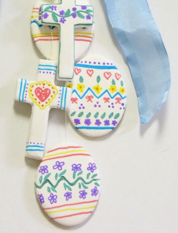
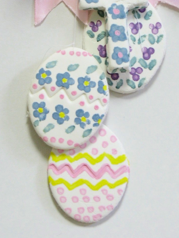
1.Use dot stickers to make flowers or rows
-
2.Use strips of tape or ribbon to decorate the eggs.
-
3.Use Q-tips as stamps to make flowers or rows
-
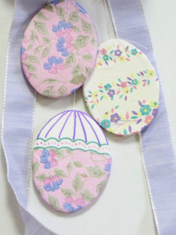
4.Glue on napkins with floral or Easter designs
-
5.Draw rows of patterns with markers
-
6.Use small stamps to decorate the eggs.
-
7.Use small stickers to decorate the eggs.
-
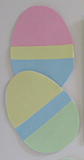
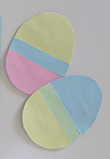
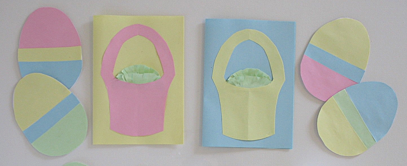
8.Cut egg shapes out of pastel colored paper: Stack several sheets of paper, and cut out 4 or 5 eggs at once--each a different color. Cut These egg shapes into 2 or 3 pieces, and then glue them onto a background egg, but glue them back together in different color combinations as shown in photo below.
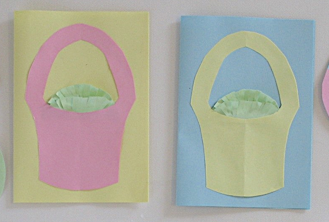
How to Make a Pocket Folder to Hold the Egg Sets
Preparation:
-
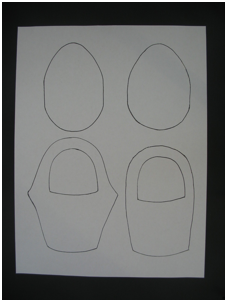
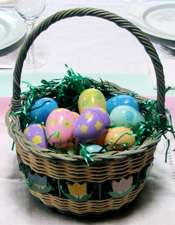
1.Download the basket pattern and print out.
-
2.Cut out one Easter basket shape for each child.
-
3.Cut a contrasting color of paper in half--each half sheet forms a pocket folder, so you need one half sheet per student.
-
4.Cut green paper into ovals small enough to fit inside the tops of the baskets, one per student. Pastel muffin liners can be used instead.
Assembling the Pocket Folders
-
1.Fold the background paper in half.
-
2.Glue the bottom and side edges.
-
3.Fold the green oval (or muffin liner) in half and cut small slits around the edges (but not the folded edge.)
-
4.Use your fingernails to curl the cut edges, or bend them around a pencil. These don’t have to be perfect--just make them stick out a bit.
-
5.Glue the basket shape to the front of the pocket, and tuck the green “grass” in the top of the basket--glue in place.

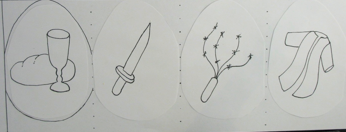
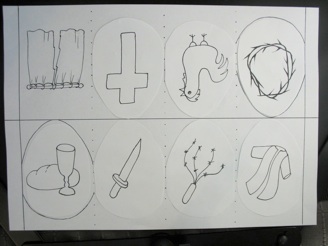
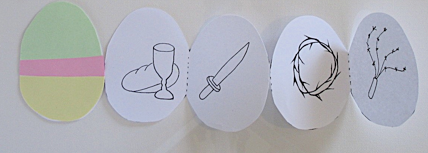
What the Pictures Represent (Jesus’ Death):
From left to right:
-
1.Bread and wine served at the last supper (since it is hard to make unleavened bread and a cup recognizable in a simple line drawing, I have chosen to use easily recognizable symbols.)
-
2.Sword used by Peter at the garden of gethsemane
-
3.Whip used during Jesus’ trial
-
4.Royal purple robe put on Jesus during his trial
From left to right:
-
1.Crown of thorns put on Jesus during his trial
-
2.Rooster that crowed before Peter denied Jesus 3 times
-
3.Cross where Jesus died
-
4.Temple curtain that was torn from top to bottom to represent how people no longer had to go through a priest to talk to God.
8 Ways to Decorate the Front of Each Accordion “Egg”
Sunday School or Bible Clubs > Crafts > Paper Easter Crafts-2013 > Paper Resurrection Egg Sets
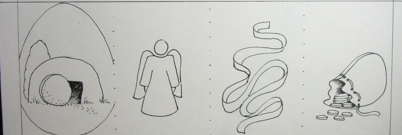
From left to right:
-
1.Empty grave: Jesus conquered death and rose from the dead
-
2.angel: one or two angels appear in several accounts of resurrection appearances. Although none of the descriptions of angels includes wings, I drew the angel with wings so that it is easily identifiable as an angel.
-
3.cloth: used to wrap Jesus’ dead body--now empty because He is alive!
-
4.money pouch: the soldiers were paid to tell a lie--that Jesus’ body was stolen, rather than what they saw--an angel roll the stone away from the grave
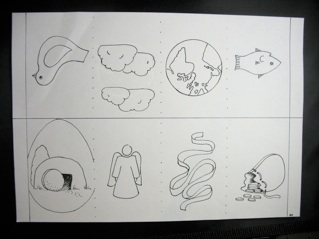
From left to right:
-
1.fish: This can be used for two stories: when Jesus appeared in the room, and ate fish to prove he was not a ghost, and when the disciples fished all night and caught no fish, Jesus told them to put the nets on the other side.
-
2.globe: The great commission--Jesus told us to go into all the world and preach the gospel and make disciples
-
3.clouds: Jesus returned to heaven and disappeared behind clouds
-
4.dove: The Holy Spirit came on the disciples at Pentecost. Although the Holy Spirit was represented by flames above the disciple’s heads, that is harder to recognize in a line drawing. Instead, I used the symbol from the time the Holy Spirit rested on Jesus when he was baptized.
What the Pictures Represent (Resurrection):