Seasons > Christmas > Decorations for the home > Girl’s Bedroom > Ideas for using dolls > Doll Houses Decorated for Christmas




It took quite a few years to fill this house with furniture. Much of the furniture is home made, such as the beds, sofa and easy chairs. Much of the rest of the furniture was purchased at dollar stores. Unfortunately, they don’t seem to sell these items any more. You can buy furniture, dolls, and houses or house kits at specialty stores, including Hobby Lobby, a craft store. Be warned--this is not a cheap hobby if you go that route! But little girls are pretty happy with simple offerings, especially if they don’t see the expensive stuff!! And you don’t feel so bad if they break or lose something if you didn’t pay an arm and a leg for it. You can find inexpensive Christmas decorations, too. Check dollar stores, Walmart, and craft stores.
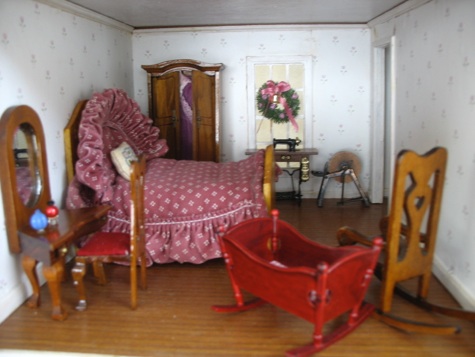
The bed and night stands were purchased at dollar stores. The wreath is a branch of a dollar store tree twisted into a circle. The basinet is a tiny basket with another tiny basket on it’s end to form the canopy above the baby’s head. I put it on a small box instead of legs. I glued on fabric around the top and sides. The “doll house” was a gift, so I can’t tell you where to get it. You can make your own out of a whipped cream carton. Just add lots of details out of paper or felt. The tiny teddybears were dollar store finds.
I made the bunk bed out of balsa wood, so it was easy to cut with a box cutter. (You can tell it is a boy’s room with the unmade beds and pillow under the bed, not just the truck, plane, and wagon!) The tree is from a dollar store, with chenille wire and sequin bead decorations glued on. I think the wreath was a decoration on a Japanese Christmas cake. I collected the wagon and toys over the years, so who knows where I got them! Keep your eyes out for tiny objects at dollar stores, craft stores, and toy stores.
All the furniture, except the bed, was purchased at dollar stores. I made the bed by gluing a balsa wood head board and foot board to a small rectangle piece of wood (pine?). The bedspread was cut off the fabric car seat cover from when my oldest was a baby, so I didn’t even have to make the ruffle! The tiny pillow was cross stitched by a friend. The bottles on the dressing table are beads glued together.
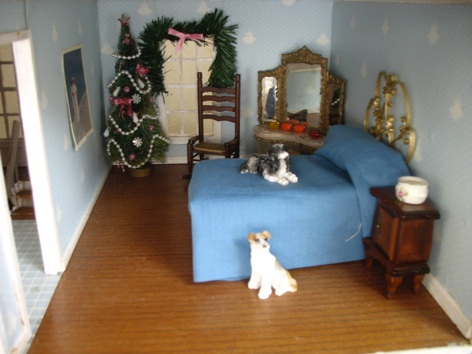
I made this bed by glueing small wood cubes for legs, to the bottom of a rectangle of wood. The “wrought iron” headboard is narrow strips of a Coke can cut with tin snips, bent with pliers, and spray painted gold. The chair, night stand, and dogs are dollar store purchases. The dressing table is left over from my childhood. The swag over the window is a branch of a dollar store tree cut off and taped to the window. The tree was from a craft store, and I added bead strands, sequins, and bows.
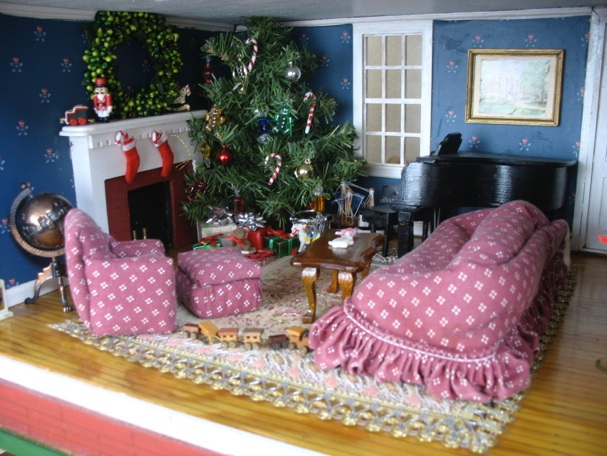
I made the sofa and easy chair out of wooden blocks and dowels, then glued more remnants of the baby car seat cover to cover them--they are not fine furniture, but my girls were happy with them. For a better look at how to put them together, see the versions without fabric below. The tree and ornaments were dollar store purchases. As you can see, the tree was actually a little too big, so I just bent the top over so it would fit anyway. The wreath is too big, too, but it solves the problem of how to make it stay in place! Gifts are easy to make, since you can wrap anything--even styrofoam.
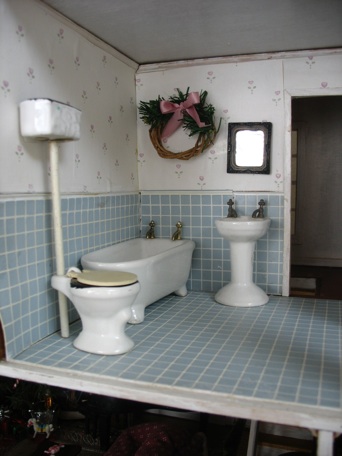
Even the bathroom gets a wreath. I made this out of a tiny vine wreath, a short branch cut from a dollar tree, and a tiny pink bow. You can probably find a tiny vine in your yard, to make into a wreath! If not, make a “vine” wreath out of twine by twisting it into a loop, then keep looping it through the middle hole each time around the loop.
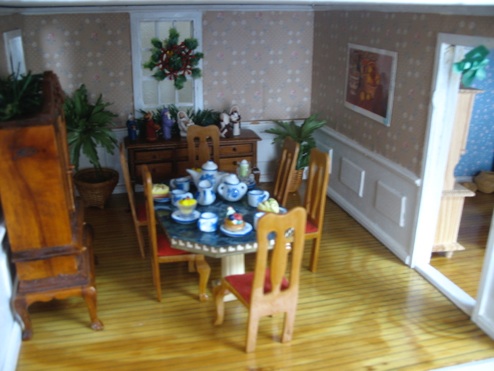
The table was left over from my childhood, but the chairs, china hutch and sideboard were all dollar store purchases. My oldest daughter used Sculpy (a clay that is hardened in an oven to make the tiny nativity set that is on the sideboard on the back wall. The only “expensive” purchase was the set of dishes--a Christmas present from one sister to another.
The decorated Christmas tree, cat, table and chairs were all dollar store purchases. The unfinished china hutch cost a dollar at a craft store. My second daughter made the pie out of Sculpy (oven hardening clay sold in craft stores.) See how to make a vine wreath in photo above.
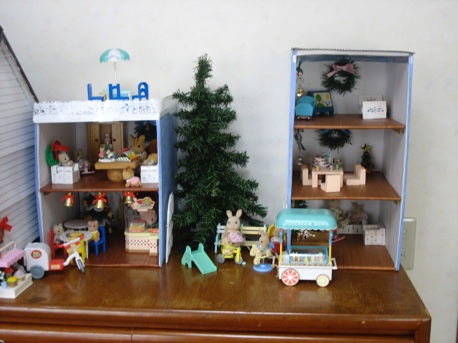
If your children are crazy about little dolls or animals, but you are not crazy about how much they cost, supplement them with home made items. I purchased one or two new items each birthday and Christmas, then made the rest of the items myself. If working with wood is not your thing, don’t be afraid to make them out of cardboard. Teach your girls how to handle things with care, and they should last for years. Cover boxes with contact paper. Cover the floors with wood colored contact paper. To make more than one floor, either glue 2 or 3 identical boxes on top of each other, or cut floors to fit the insides of the boxes. Glue cardboard strips along the sides of the walls to hold each floor up (as in the photos to the left.) Each floor board will be stronger if you cut 2 pieces of cardboard and glue them together with the corrugation running in perpendicular directions. Cut windows and doors, if you like, but they won’t be missed if you don’t. The park between the 2 houses uses a dollar store Christmas tree that really helps it look like it is outdoors.
Christmas decorations:
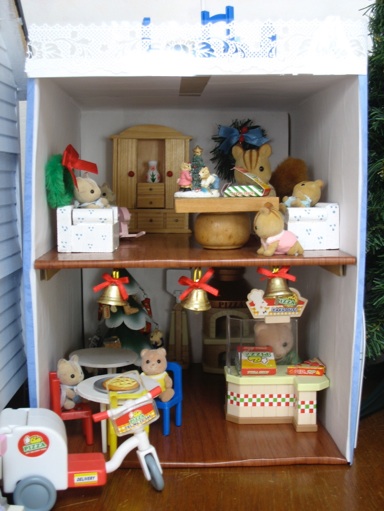
The ground floor of this house is a pizza parlor that has Christmas bells taped to the ceiling. The second floor is the living quarters with a chenille wire wreath on the left wall, and a dollar store Christmas tree branch wreath on the back wall. The flat roof provides a porch, though it’s hard to see through the “wrought iron” fence (plastic lace in the gift wrap section of hundred yen stores.) You can see the porch a bit better in the photo above. The blue chairs are from a hundred yen store stacking game.
How to make the furniture:
The second floor table is made with a square wood scrap glued to a round knob pedestal. The easy chairs are made from a block of wood on the bottom, a narrower square of wood for the back, and 2 short lengths of dowel for the arm rests. I painted them white with blue dots.
Christmas decorations:
The ground floor of this house is the living room with a tiny tree in the corner--a spool of thread is the tree stand to hold it upright. A bead wreath hangs in the window.( This is a quick craft project for your child--push green and red beads onto a chenille wire and form into a circle.)
The second floor is the dining room. There is a silver chenille wire swag on the left wall with blue bows and a silver bell. The wreaths on the second and third floors are branches cut from a dollar store tree that have been shaped into wreaths with tiny bows added.
How to make the furniture:
The sofa on the ground floor is made the same way as the easy chairs (see instructions above.)
The second floor table is made with a square of balsa wood glued to 4 square dowel lengths. The chairs are 2 squares of balsa wood glued to each other--no legs! Sorry you can’t see the bed on the top floor. It has a square headboard and footboard glued to the rectangle horizontal piece (see the diagram on right).
Seasons > Christmas > Decorations for the home > Girl’s Bedroom > Ideas for using dolls > Doll Houses Decorated for Christmas

base block for seat
narrow block for back

dowels for arm rests
Easy chair, front view:
base block for seat
dowels for arm rests
Easy chair, side view:

Bed, side view


