


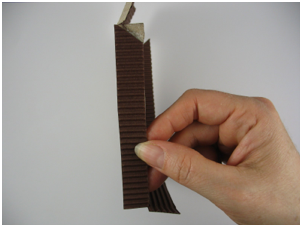

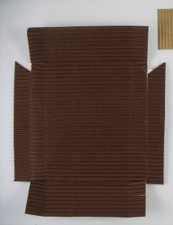
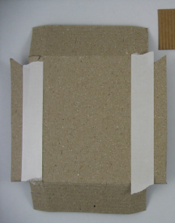
Since the back of the paper is a different color from the front, the sides of the barn have to be double so they they can be folded back on themselves--so that the walls are the same color on both the inside and outside of the barn.
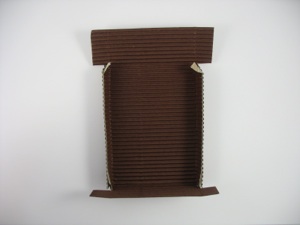
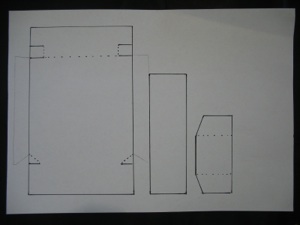
Fold the walls and floor forward on the dotted lines shown on the pattern.
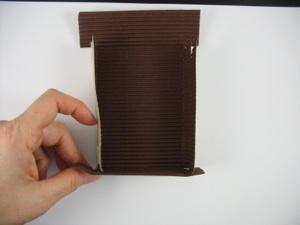
This photo shows the walls without the extra flap. So if your paper is the same color on front and back, you can leave off those extra flaps on both sides that are shown in the 2 photos to the left.
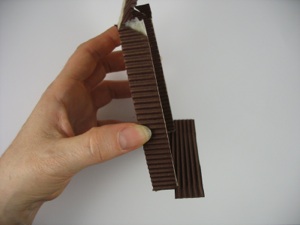
Fold the flap on the floor up onto the wall before gluing the wall back on itself. Do this on both walls--to sandwich the flap between the 2 layers of the wall.
This photo shows the wall folded back on itself. If you are using paper that is the same on both sides, glue the floor flaps to the inside of the walls.
Fold the tiny flaps near the roof (circled in red) and fold the roof forward, then glue (or use double stick tape) to fasten the roof to the tiny flaps. The side view is on the left, and the front view is in the middle. If the paper is stiff, the double stick tape may not be strong enough to hold the pieces together. In that case, a glue gun or quick drying super glue may be the solution. In some countries, there are different grades of double stick tape sold. If both stronger and weaker double stick tape are available, choose the stronger bonding type.
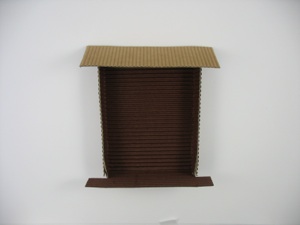
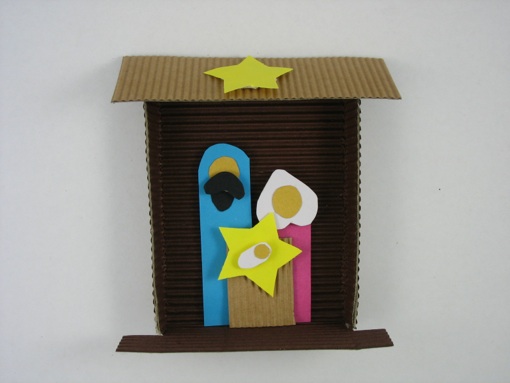
Cut a roof from a contrasting color of paper and glue or tape the roof to the barn. It is now completed and ready for figures.


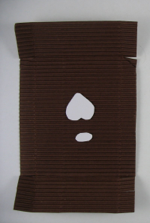
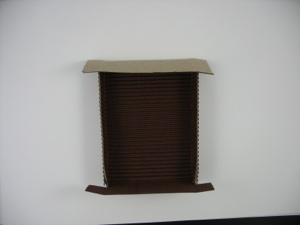
Download the pattern for the barn and cut it out of brown paper. The one shown here is made from corrugated paper to make it look a bit like boards. This version is specifically made so that it will stand on it’s own. Because of this, the dark color will contrast with light colored walls. You may want to choose a lighter color if it is to be hung on a Christmas tree, or used on a bulletin board with a dark background, so it will show up well.

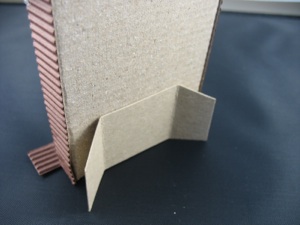
Optional: Make a stand on the back of the barn. Cut a stand from thin cardboard and fold the sides. Glue to the back of the barn. This provides extra stability for the barn to stand up, and folds flat for storage.
Sunday School > Crafts > 3 Paper Nativity Crafts > Flat Roofed Paper Barn
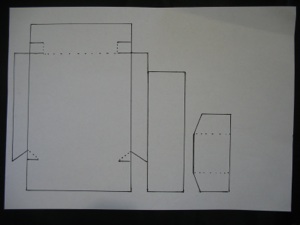
Note: If your paper is the same color on the front and the back, only cut out the part of the pattern as shown above--just cut off the flaps on the sides of the barn pattern and don’t use them. If your paper is a different color on the front and back, and you want the inside and outside of the barn to be the same color, use the pattern as is.


