


Holidays > Easter > Decorations for the home > Paper Easter Crosses, for picture and filagree designs

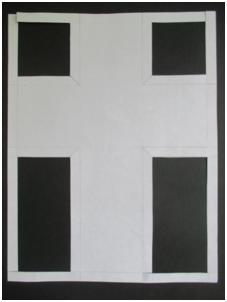


Cut out pattern. Be very precise.
WARNING: cut along the bold lines, and fold along the fine lines.
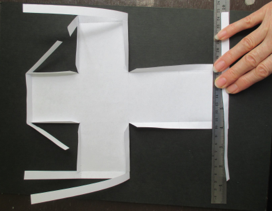
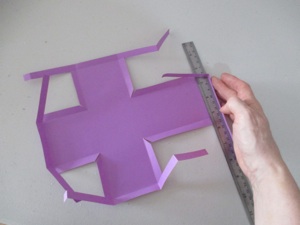
You can cut out 3 crosses at once. Paperclip them together as shown above so that the sheets do not shift while you are cutting.
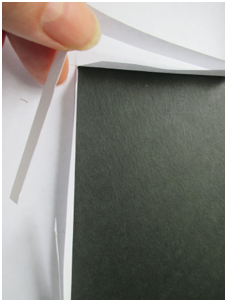
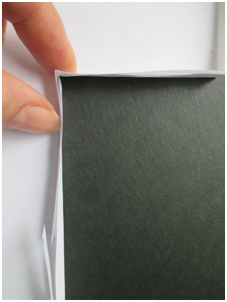
Use a thin ruler or straight edge to fold along all the fine lines to make sure that the fold is not crooked. Then take away the straight edge and fold again so that it is a nice crisp fold.
Be careful to fold straight--if it is even a little bit crooked, it will not turn out well.
crooked
straight
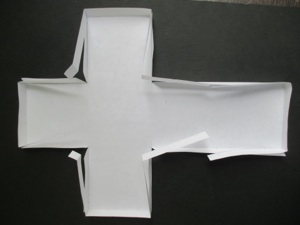
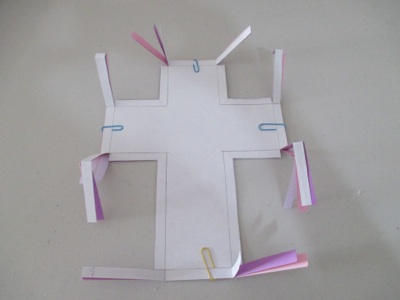
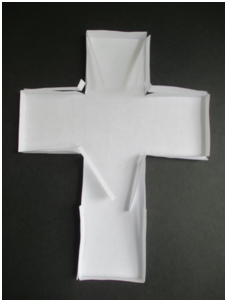
It can look a bit like a spider at this point, but all of the strips are necessary. If you accidentally cut off any of the strips, just cut more strips and glue them onto the walls of the cross.
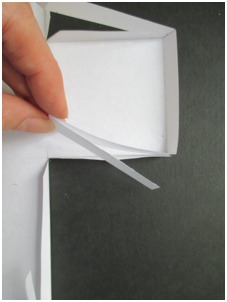
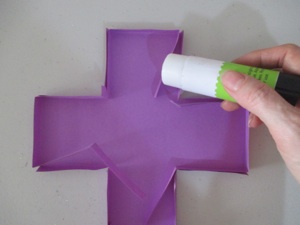
It is difficult to put glue on the long strips when the cross is folded, so unfold (flatten) and turn the cross over to the back side. Put glue on the long strips of all corners. Put glue on all the corners a second time to make sure there is enough glue, and to keep it from drying out before all the pieces are in place. It is good to put the glue on with a piece of scrap paper behind the cross so your table doesn’t get covered with glue.
Flip the cross back to the front, and glue the long strips to the inside of the walls of each corner, one corner at a time. See more detailed instructions below.
These long narrow strips strengthen the sides, and cover the gaps left in the 4 corners where the arms meet the main column.
Make sure all of the long strips are go on the inside of the side walls when gluing.
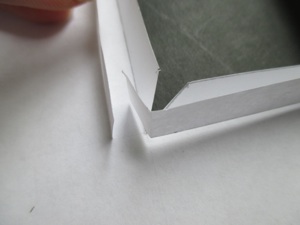
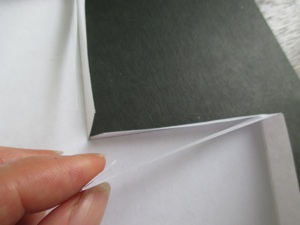
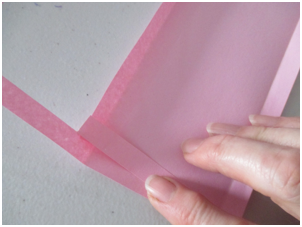
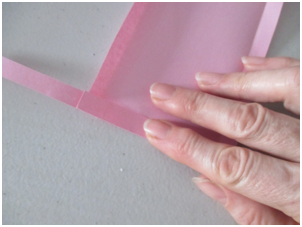
The place where the arms connect with the main column are the tricky bits. On the top side of the arms, the last quarter inch needs to be folded, as shown by a fine line (and photo on the left). Glue this long strip to the inside of the top wall of the arm. Next, glue the long strip from the top section to it’s wall, and over the folded quarter inch from the arm wall (photo on the right). This should give you a nice crisp corner. Repeat for the top side of the left arm.
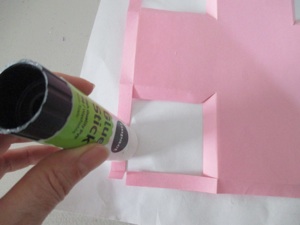
The other tricky bit is the bottom corner where the arms join main column. Fold the long strip on the bottom of the arm where it is marked with a fine line (see left photo). This will form the corner where the arm connects with the main vertical column. Glue this strip on the inside of the wall of the cross--along the bottom wall of the arm, and the side of the main column. The long strip coming up from the bottom will overlap with this strip a bit. Repeat gluing the walls of the other side of the cross.
right arm of cross
top section of cross
top section of cross
right arm of cross
right arm of cross
right arm of cross
right arm of cross

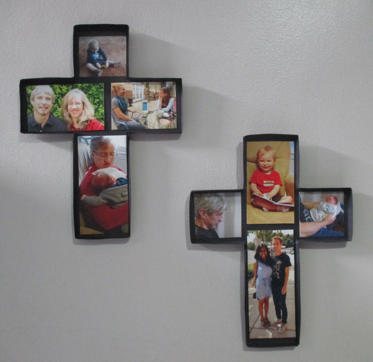
To make the picture crosses, cut photos of your family to fit inside the cross, and glue in place. This is a good reminder that Jesus died for each of us, not a nebulous “everyone.”
To hang the crosses, you can use mounting putty (Fun Tack, Blue Tack, etc.) because they are so light. If you have nails to hang them on, you can tape or glue rings of thread or wire such as twist-ties to the back of each cross. Just make sure it is in the middle, or the cross will hang crooked!
Finally, fold the long strips on the bottom of the cross to the inside of the walls of the main vertical column, and glue in place.

These filagree crosses look pretty hung together as a group. The colors and patterns look a bit like decorated Easter eggs!
The picture crosses can be a visual reminder that Jesus took the punishment for each one of us, for all the wrong things we have done. Even though the fact that Jesus died on the cross is horrific, God used that unimaginable event to give us the huge blessing of forgiveness--that is what makes Easter such an amazing, joyful reason to celebrate!!
Make each of these crosses from a single sheet of paper. Heavy paper such as card stock or poster board can be used, which will make the crosses sturdier, but copier paper works as well. See instructions below.
Store these carefully, and they can be used for years to come. One simple way to do this is to use an empty cereal box. Re-glue the open end. Turn the front of the box into the top lid of the box: cut the front of the box on 3 sides to form the cover (leave the fourth side uncut to act as the hinge for the lid). You can stack crosses in 2 or 3 layers in the box--just make sure they are directly on top of each other so they don’t get bent or warped. Stack picture crosses back to back. The cereal boxes can be stacked as well.
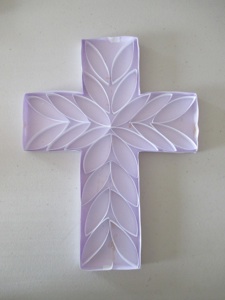
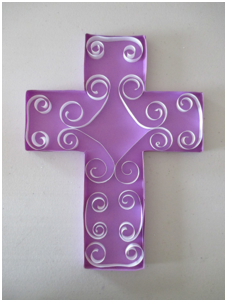
view how to decorate filagree crosses : Wheel version , Curly version , Leaf version ,

Wheel version
Curly version
Leaf version


