Seasons > Autumn > Home Decorations > Thanksgiving candy cups, and Centerpieces > How to make a Paper bag Thanksgiving Tree
How to make a Paper bag Thanksgiving Tree
Make the tree without leaves and put it in the middle of the table. Cut out leaves for everyone to write what they are thankful for. Provide tape or glue to fasten the leaves to the tree.
(adapted from the Family Fun website)
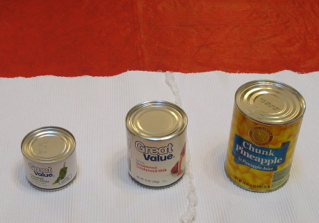
Get 3 unopened cans out of your pantry--they should be full so that the weight keeps the tree from falling over. The shorter the can, the longer the limbs can be, so the tallest can will be the trunk, then shorter 2 cans will form the upper portions of the tree with most of the branches.
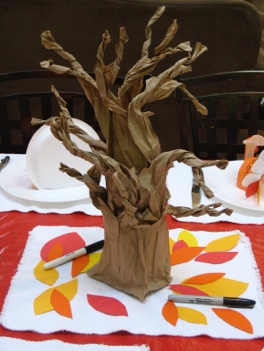
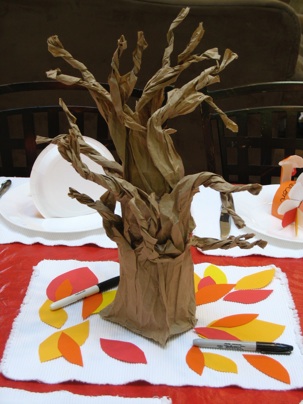
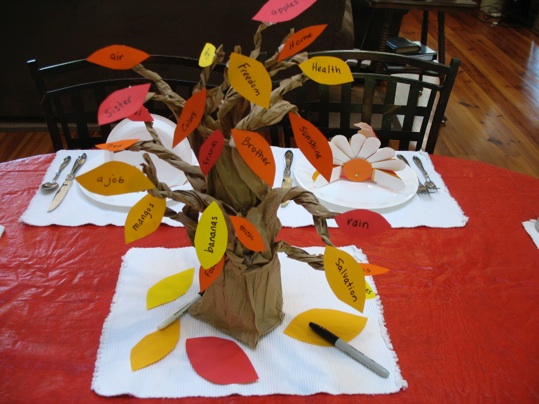
Twist 3 brown paper lunch bags to make them rough like bark. Put the cans in them and cut 4 or more branches in each bag. Twist each branch separately.
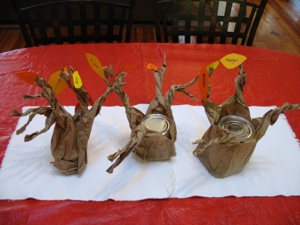
Stack the 3 cans on top of each other to form a bare tree. Cut out paper leaves of different colors and spread them out on the table, or put several on each plate. Provide pens so each person can write things they are thankful for on the leaves. Provide tape or staplers so each guest can help fill the tree with colorful leaves that have words of thankfulness written on them.
An Alternate thanksgiving tree
Cut a branch off of a tree or bush in your yard. Fill a can or box with sand, rocks or canned goods. Anchor the branch so it won’t fall over. Cut leaf shapes out of different colors of paper and provide pens and tape so the guests can write what they are thankful for, and cover the branch with colorful leaves.