


Seasons > Valentine’s Day > Ways to celebrate Valentine’s Day with the Family > Valentine Cards Designed By Kids

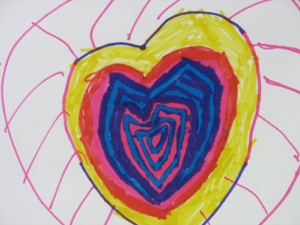
Concentric hearts: Draw a heart with marker, then draw smaller and smaller hearts inside, alternating different colors.
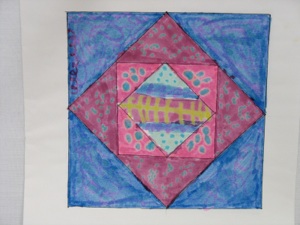
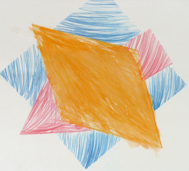
Concentric squares: This design is made by drawing a square, then another square inside, but rotating it so that the corners are in the middle of the straight sides. Color each square with a different color or pattern. This design was drawn with special markers that can draw on top of other areas already drawn with marker, to change the color. Even without these markers, interesting patterns can be made with regular markers, or cut squares from patterned paper.
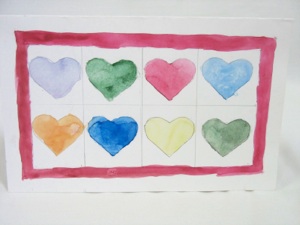
Repeating heart pattern: Use a heart pattern or cookie cutter to draw hearts in pencil. Paint each heart and the border in different colors. As an alternative, cut hearts out of various colors of paper or wrapping paper. Rearrange until a good design is achieved, then glue it in place. Heart stickers or stamps may be an easier option, though they can’t be rearranged.
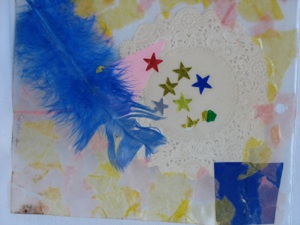
Suncatcher collage: This one was made by a two year old. Older kids will have fun making it too--they will just have more sophisticated designs. Lay out a piece of clear contact paper on a table. Give your child things to arrange or drop onto the contact paper, such as doilies, pre-cut hearts, sequins, feathers, and tissue paper to tear and stick on. When your child is finished, or loses interest, put another piece of clear contact paper on top. Trim any crooked edges, or pieces that stick out.
Thumb print picture card : This was designed by a 4 year old. Use several colors of stamp pads and markers to make thumb print pictures. Let the children press finger tips to the stamp pad, and then the paper, then use markers to finish the pictures--as in the picture above, adding heads, feet and tails to turn the blobs into birds. If your child needs inspiration, you can probably find a book in the library with more ideas. If you don’t want to have to worry about getting permanent ink all over clothes and furniture, make sure these are all made with washable ink.
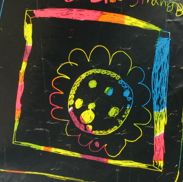
Scratch paper card: Cut scratch paper to fit a plain card, or colored construction paper that has been folded in half. Give it to your child to draw a picture. If your child tends to not like how pictures turn out, you may want to give him several sheets to practice on, then let him choose the best design to mount on the card. Scratch paper is sold at toy stores and craft stores, and usually comes with a wooden stylus to scratch off the black to reveal the multi-colors beneath. If not, use toothpicks or bamboo skewers to draw the pictures.
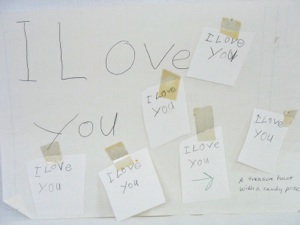
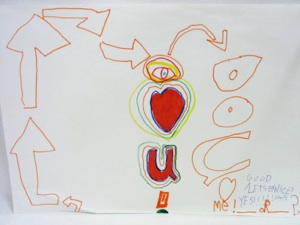
Treasure hunt “card”: These can be pretty tricky to make, so your child might need your help. Obviously, this one was one done without any help--the clues are more heartwarming than helpful! I went around and collected the clues afterward and taped them to the card. If you wonder how the prize was found, probably the enthusiastic help of the giver was all that was needed! It can get really confusing if you write all the clues first, so if you do help, encourage your child to FIRST hide the prize, then write a clue to find it. Then hide that clue and write another clue to find that clue. Keep writing and hiding clues till you run out ideas.
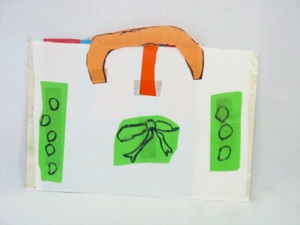
Suitcase full of love card: Write several love messages on small pieces of paper. Fold a bigger piece of paper in half and tape the sides to form the suitcase. Decorate the outside, add a handle, and a latch if you wish. Put all the love letters in the suitcase. Another option is to add a handle and latch to an envelope that has the top slit open. You can even recycle old envelopes if they have been opened carefully, and you have stickers or paper cut outs to glue over the address and stamp.
Substitute pictures for words card: With a little help from mom or dad, your child can probably come up with a lot more pictures to use in place of words...draw an open tin can to replace the word “can” or draw a honey bee to replace the word “be,” or a doughnut to represent “don’t.” Older children will enjoy the fun of adding and subtracting letters from pictures to get the word they want, such as bunny - b + f to make the word “funny.”
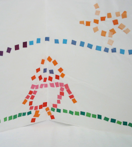
Mosaic card: Cut small squares of various colors of paper and show your child how to glue a small area with glue stick, then affix the squares to form a picture. Another way to glue them on would be to dip a q-tip in glue, and dab it on the paper, then put the colored square on the glue.
Perhaps an easier way to make a mosaic would be to give your child small circle stickers in various colors to make a picture.
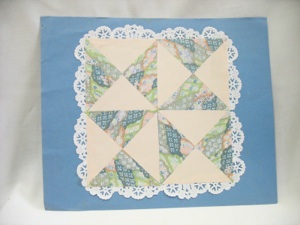
Quilt card: This looks more complicated than it is. Give your child 4 squares of color coordinated paper, 2 in a solid color and 2 in a pattern, such as wrapping paper, origami, or scrapbooking paper. Sometimes dollar stores sell scrapbooking paper. Show your child how to cut from corner to corner to make triangles. Arrange the triangles into a quilt pattern on a background and glue them in place. If you want a lacy edge, cut the outer edges off of doilies and tuck them under the edges of the quilt before the glue dries.
Stencil card: Use stencils to outline various shapes stacked on top of each another, then color in with colored pencils or markers.
These cards were designed by teenagers so don’t expect elementary children’s cards to look like these!!
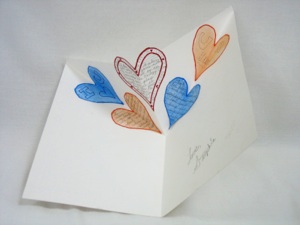
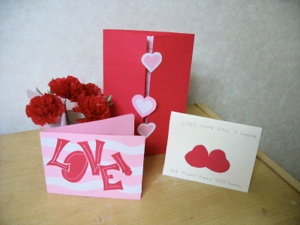
Pop-up card : fold the card in half, then open it and pull the middle top down as you fold the card shut again. Glue on heart cut-outs with love messages written on them. Glue this inside another card so the front of the card will be a rectangle.
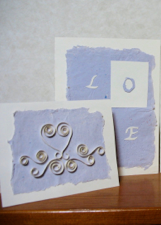
Quill card : Cut very thin strips of paper, and wrap them around the point of a pencil or toothpick to form spirals. A bit of double stick tape wrapped around the tip of the toothpick can keep the paper from slipping as you form the spiral. Arrange the spirals on a plain card and glue in place.
Paper cut-out card : Cut hearts or letters to spell words such as “Love.” Arrange them then glue to cards. The tall card has the opening in the middle instead of on the right side. The hearts are glued to just one side or the other to form sort of latch for the card. Younger children can make similar designs with sticker hearts and words--all they have to do is stick them on.
I love You ! ! !
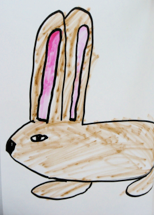
Somebunny loves you!
Animal picture card : Kids love a good pun, so if you can tickle their funnybone with a good one, it may inspire them to draw something they wouldn’t otherwise be interested in. Another way to motivate is to ask your child to draw his pet or favorite stuffed animal. A photo may be useful if the pet won’t sit still. Your son may especially relish gluing googly eyes onto the picture to make it look funny. With or without the pun, an animal picture makes good subject matter for a card.
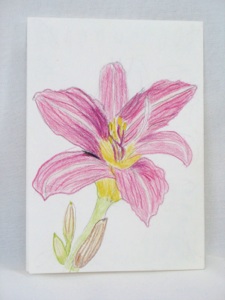
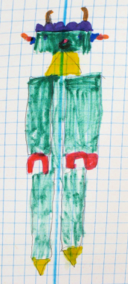
Flower picture card : Put a pink or red flower in front of your child to inspire this artwork. She may not need any motivation other than colored pencils or markers to get started. Boys are less likely to want to draw a flower. You might inspire your son by suggesting he draw a robot or monster. The novelty of using graph paper may be all the motivation he needs to get him started. You can point out how to use the graph paper to make it symmetrical by drawing a line down the middle, then draw half of it on one side of the line, then count the squares to draw the same thing on the other side of the middle line.
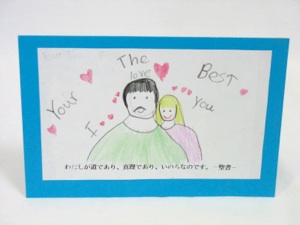
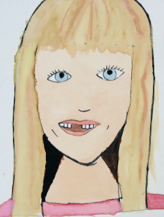
Self Portrait card : Hand your child a mirror and ask her to draw herself. If your child is not used to drawing, a mirror might be too intimidating. If so, back off and let her draw what she feels comfortable with. Even if your child is used to drawing, a project like the lower picture will take quite a bit of time. It is best to break it down into 3 stages. The first stage is to draw it in pencil. The second stage is to draw over the pencil in permanent marker. The final stage is to color it with water colors. If you child is not used to painting with water colors, you can make it a little easier by using special colored pencils that can be turned into water colors by painting with a wet brush after the color has been drawn on with the pencils. These pencils are available at craft stores and art supply stores.
If your child doesn’t produce amazing artwork, don’t worry about it. The least artistic pictures done on this page were done by my son (note the card with 2 small red hearts, far right in the cards-by-teenagers row) who is now studying to be a graphic designer. You never know!!! Just provide the materials and inspiration, and let them develop their own style at their own pace.
Seasons > Valentine’s Day > Ways to celebrate Valentine’s Day with the Family > Valentine Cards Designed By Kids