


Seasons > Mother’s Day > Ways to Celebrate Mother’s Day > Apron Mother’s Day cards for kids to make
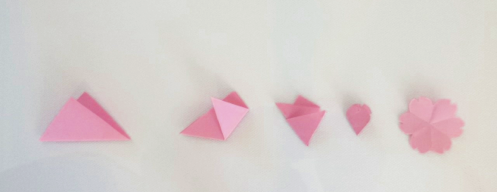
It’s a little bit like magic--you fold the paper, cut off the end, and when you open it, it is a flower, and you are left wondering how you managed to do that! The fun thing is, you can make 3 different designs of flowers using the same technique--just cut it a little differently.
-
1.Cut out a square pattern
-
2.Fold it in half along the dotted line to form a triangle.
-
3.Fold the 2 side points along the dotted lines.
-
4.Cut all the layers following the solid line to cut out all the petals at once.
-
5.Open all the folds to reveal the flower.
-
6.Optional: glue a middle to each flower with circles cut with a hole punch, or draw it in with a marker.
Note for teachers of classes: All five pattern squares in each row are the same design and size as the outline on the far left of that row. To figure out how many pattern sheets you need to print out, decide how many of each design and size you want for each apron. For example, if you want one large “pansy” with 2 small “pansies” on either side of the large one to decorate each apron, you can make 2 and a half aprons with one sheet of patterns. If you have lots of students, you can let them share patterns, or let them make different designs so the whole sheet is used up. Another option would be to print out several sheets of patterns, cut out the rows of patterns that you want to use (discard the rows that you won’t use), glue these to a new sheet, and photocopy them in the quantities you need. If you have a paper cutter, you can cut out several sheets of patterns at once, but be careful: if they slide even a little bit as you cut them, the patterns will not be usable! Also, once you cut them, they will no longer be next to the finished outline, so it will be harder to tell the size of the flower until it is cut out. If you make each sheet with one size of flower patterns, it will be easier to keep track of them once they are cut apart. Another way to keep track of the various rows as you cut them out is to collect the squares from each row as they are being cut, and put them in labeled envelopes, or glue the square with the finished flower outline to the front of each envelope.
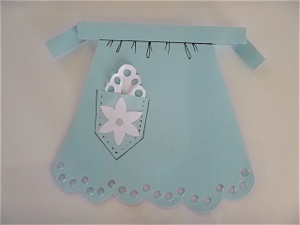
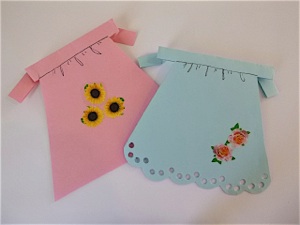
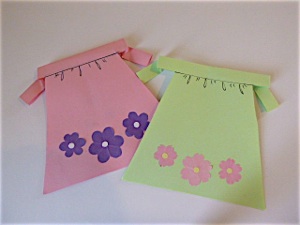
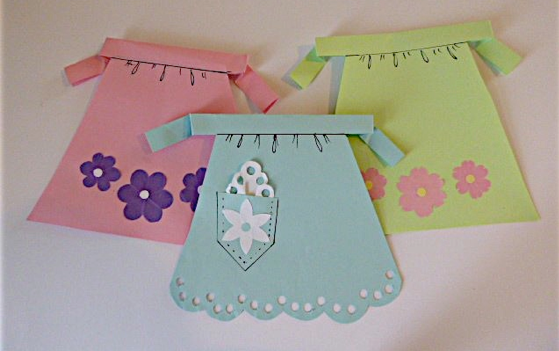
These apron-shaped Mother’s Day cards are quick and easy to make. You can add pages to make them into booklets for extra space to write all sorts of words of appreciation. There are lots of different ways to decorate them--you will be surprised at how many designs your children will come up with!
Quick version
-
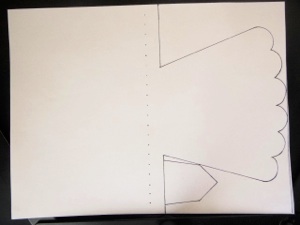
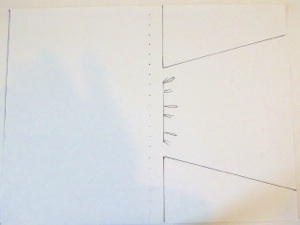
1.Print the pattern on colored paper (choose the straight bottom or scalloped bottom.) To make the card into a booklet with several pages, lay the pattern on top of one or two sheets of white paper (depending on how many layers the children will be able to cut through at once.)
-
2.Fold them together on the dotted line.
-
3.Staple the layers together on the waistband. Try to line the staples up with the line on the waistband so they don’t show.
-
4.Cut all the layers in the apron shape.
-
5.Another option for making pages is to cut them out with a paper cutter and staple or glue the pages into the booklet instead of cutting them together with the apron pattern. These pages should be cut slightly smaller than the pattern so they don’t stick out past the edges of the card.
-
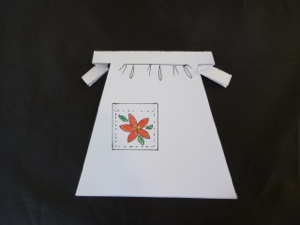
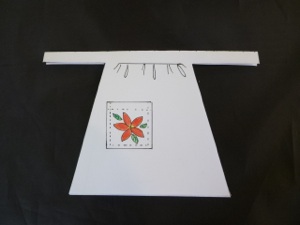
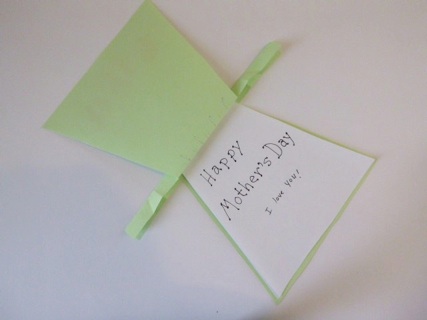
6.Fold the two ends of the waistband as shown in the photo.
-
7.Write a note of appreciation on each page of the booklet.
-
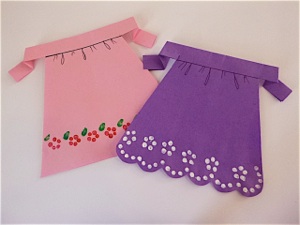
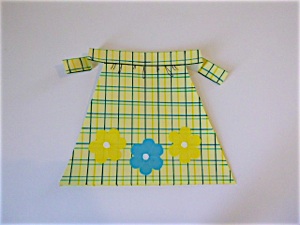
1.Print the plain apron or scalloped apron on colored paper and decorate with purchased stickers, such as flowers or butterflies
3. Glue on cut out flowers (see instructions below for an easy way to make these)
2. Use a hole punch to make the edge look like eyelet. If you want to go all out, make a hanky for the pocket in the same way.
-
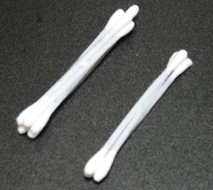
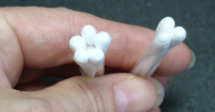
5.Use stamps to decorate the aprons. Q-tips make great inexpensive stamps. Use the end of one to make rows of dots or use the side to make leaf shapes. Tape 3 together for a stamp, or tape 5 around a 6th that holds the rest in position to form flower stamps. If you cut them in half, you can make 2 stamps out of them.
4. Draw designs with markers or glue one items such as ribbon or rickrack.
More Ways to Decorate Aprons
2
3a
4
5
3b
Hint: keep one stamp per color rather than one stamp per child, because the colors will get mixed, and everything will turn brown!
cut

-
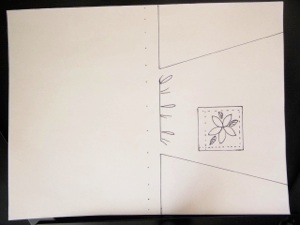
1.Print out the apron-shaped Mother’s day card on white paper.
-
2.Color in the flower on the pocket.
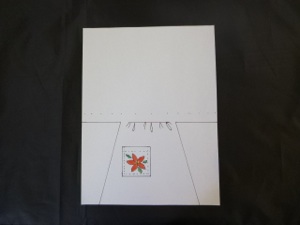
2. Fold the paper on the dotted line.
-
3.Cut out the apron shape.
-
4.Write a message on the inside of the card.
-
1.Fold the two ends of the waistband as shown in the photo--first toward back, then forward again, but at an angle.
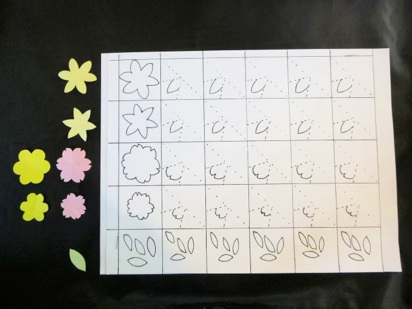
How to make the cutout Flowers with the downloadable pattern
These patterns make 3 different flower shapes: the pointy petals look sort of like a daisy, the notched petals look sort of like a cherry blossom, and the round petals look sort of like a pansy (don’t cut the “v” in the round petal). I say “sort of” because these flowers all have 6 petals, which is not the accurate number of petals for any of them, but it is the easiest way to cut them! The pattern sheet has 2 sizes of each design. All three flower designs are made in the same way--see instructions on the left.
Note: If you want a smaller flower, refold the flower, and cut the same shape a little smaller--when you open it up, there will be a smaller version of the same flower shape.
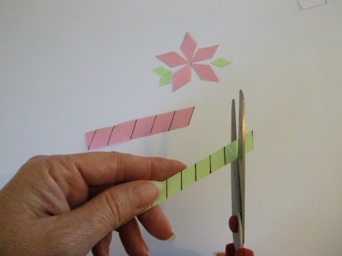
For a quick way to make lots of leaf and petal shapes, cut out strips of green paper for leaves, or colored paper for flowers. Then cut each strip on the diagonal--to make diamond shapes--stylized leaf and petal shapes. If you are a perfectionist, you can round off the sides, but it will take more time. Group 5 petals in a circle to form a flower. This technique is handy if you want to cut out the flower and leaf shapes for a lot of children so all they have to do is glue it on. The gluing will take a bit more time since there will be more pieces for each flower. Of course, if you stack 3-4 strips to cut at once, the cutting goes even faster!
Because the U.S. letter sized pattern goes right to the edge of the page, your printer may leave off part of the scalloped edge. If so, use the lid of a glue stick to finish drawing the missing lines.
Use this pattern for the quick version above--it has the pocket decoration to color for a quick project.
Use this pattern for all the decorating options shown above --it is plain so you can decorate in any way you wish. You may want to print this on colored paper
Booklet version
Apron-shaped Mother’s Day Cards
Seasons > Mother’s Day > Ways to Celebrate Mother’s Day > Apron Mother’s Day cards for kids to make