

Sunday School or Bible Clubs > Crafts > Easter crafts--resurrection
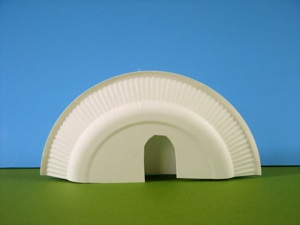
Paper Plate Grave
1. Cut a small paper plate in half.
-
2.Cut a doorway out of one side. Fasten the two sides together with double stick tape or staple together.
-
3. Color the plate with crayons, paint, or glue on bits of brown tissue paper or bits of a brown paper bag.
-
4.Cut a stone from more thin cardboard (such as a cereal box) and fasten it to the grave with a brad (see photo below.)
-
5.Add green paper cut into bush and tree shapes.
-
6. Write “He is risen” on black paper and fasten to the inside of the back “wall” so it shows through the doorway when the stone is rolled away.
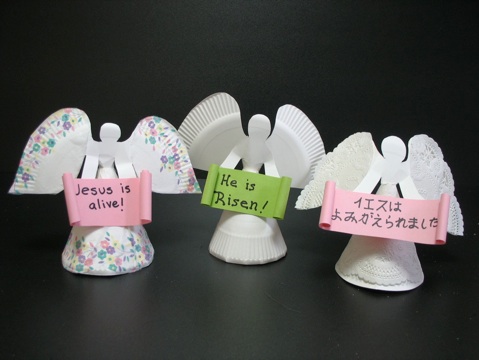
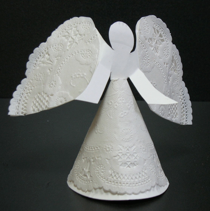
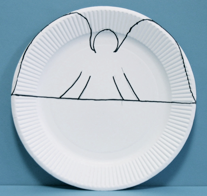
Paper Plate Angel
-
1.Cut a small paper plate in half.
-
2.Roll one half into a cone and staple it to form the skirt.
-
3.Cut the other half with wings, head, and two hands.
-
4.Fold the body (not the head) in half so that it fits through the hole at the waist and fasten with double stick tape.
-
5.Decorate the skirt and wings with paper doilies or paper napkins.
-
6.Write “He is risen” on a piece of paper and glue to the “hands.”
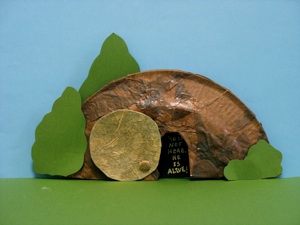

The stone rolls away

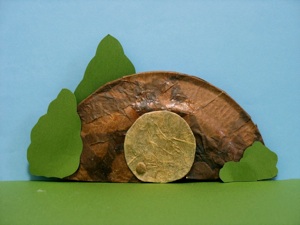
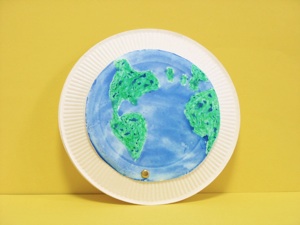
Paper Plate World or Grave
1. Cut a hole in a dessert sized paper plate to form a round window in the middle. Do not cut through the rim.
-
2.Cut a slightly larger circle out of another plate to form the door.
-
3. Color the continents onto the cut circle with green crayons, then paint over it all with blue water colors to depict the world, or make it look like a grave stone by gluing on bits of brown tissue paper or brown paper bag.
-
4.Poke a hole through the painted circle and the plate with a window, and fasten them together with a brad. (see photo above)
-
5.Glue a photo (see options to the right) to a third paper plate and glue or staple the window plate to the front of the picture plate.
-
6.For a special touch, if you make the door as a gravestone, the children can seal it with candle wax and press a button into the slightly cooled wax (The button should have a raised design on it )
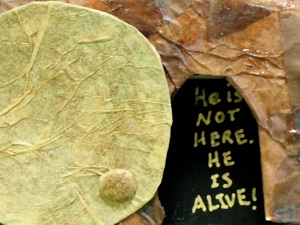
Ideas for things to put in the window:
If your emphasis is to teach the children that Christ died for them, each child should have his or her own picture inside the window. They could also write John 3:16 around the rim. If the emphasis is the great commission (“Go into all the world and preach the gospel) all the children could have the same photo, which could be a group of children from different ethnic backgrounds, or simply print out the verse, Matthew 28:18-20, or Mark 16:15. Another option is to have them write the names of friends and family members that they want to pray for to become Christians.
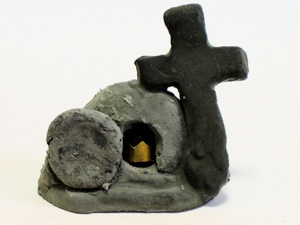
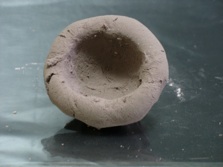
Cross, Grave, and Crown
-
1.Mix black and white modeling compound to make it gray
-
2.Form 2 balls. Flatten one to form the base.
-
3.Press a hole into the center of the other ball to form a bowl. Use a toothpick to make a door opening in one side. Rub a bit of water onto the rim and press it gently onto the base.
-
4.Make a much smaller ball and press flat to form the grave stone, rub with a bit of water, and fasten it to the grave.
-
5.If you use Sculpy, you can make the cross out of black clay, but if you use Hearty, the black is hard to work with, so it may be better to make the cross out of twigs.
-
6.Bake or air dry according to package instructions.
-
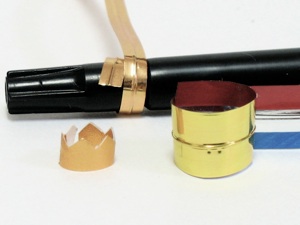
7.Make a gold crown out of gold paper or gold twist ties and glue it into the grave (You may need to use tweezers to place the crown in the hole.)
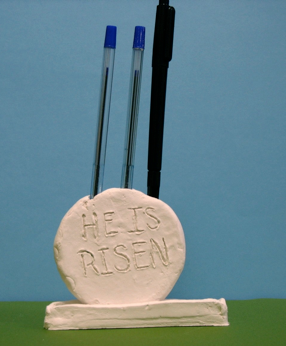
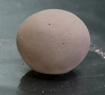
Grave Stone (Pencil Stand)
-
1.Make a ball out of clay (air drying such as Hearty, or oven baking, such as Sculpy)
-
2.Flatten the ball and write “He is Risen!” with a toothpick ( or let harden and write with a marker.)
-
3.If you are not making it into a pencil stand, the gravestone is finished. You can also flatten one side so it can stand on it’s own without rolling, or leave it round so it will roll, but make a trough for it to roll back and forth in (see trough in both photos and instructions in #6 below.)
-
4.To make it into a pencil stand, option #1 is quick and easy. Leave the stone lying on it’s flat side (as shown in the bottom photo) and poke pens or pencils into it to form the pencil stand.
-
5.Pencil stand option #2, the standing gravestone, is quite a bit more complicated but really cool! (shown in the top photo. ) First, poke pens or pencils into the side of the “stone.” (If you wrap them in plastic wrap first, you can leave the pens in until it dries without worrying that they will get stuck inside. If you are use a baking compound, you will need to fill the holes with pen-shaped tinfoil instead.) Then make a trough to hold the stone as explained in #6 below.
-
6.To make a trough, roll out the clay to about half a centimeter (1/4 inch) thick, and cut 3 long narrow strips, all the same size. Cut 2 small end pieces the same width as the 3 strips. Stand the two side pieces against the two sides of the bottom piece. (A bit of water will make them stick better.) Put the end pieces in place. Gently put the “stone” into the trough and roll back and forth to make sure it fits. Take the “stone” out of the trough. (For the grave stone option in #3, above, let both stone and trough dry and the project is done.) To make sure the stone doesn’t fall over with the pens and pencils in it, cut off the tips of 2 toothpicks and embed them in the trough. Now gently press the stone onto the 2 toothpicks to poke 2 holes into the stone, then remove the stone and let both the stone and trough dry. To use as a pencil stand, put the stone into the trough, and make sure the holes in the stone fit onto the 2 toothpicks. Now it’s ready for pens and pencils.
Sunday School or Bible Clubs > Crafts > Easter crafts--resurrection
Resurrection Banner
-
1.Cut shapes out of felt, and glue them to a background. For quick decorations on the eggs, cut strips (cut them straight, then bend them in a curve when gluing on). For smaller shapes, cut the strips into diamonds (cut a strip at an angle every 1/8 inch.) Diamonds can be put in rows like leaves, or in in a circle as flower shapes. Sometimes you can get pre-cut shapes that have sticky backs like felt stickers. Other options for decorations to glue on the eggs would be ribbons, beads, sequins, etc.
-
2. Fold the top inch to the back and glue a seam for a dowel to go through. Plastic drinking straws, disposable chopsticks, or bamboo skewers with the point cut off make inexpensive dowels.
-
3. As an alternative, make this into 3 smaller banners (one per week) that can be hung one above the other for children who come every week, or hung by itself for children who only come once or twice during the three Sundays leading up to Easter.
Save in-class time by cutting out the shapes before class and let the kids glue on the shapes in class.
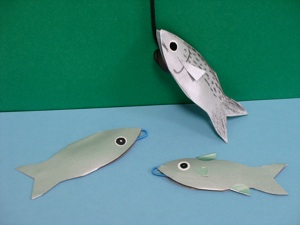
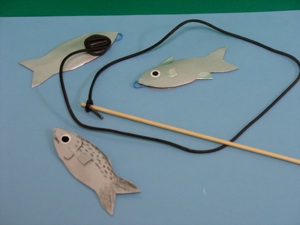
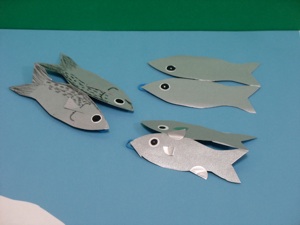
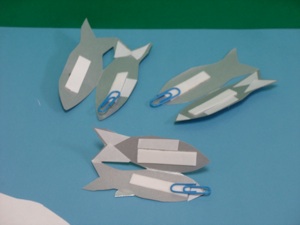


Fishing toy
-
1.Fold paper, and cut out fish shapes so one side is on the fold--the tail and body should remain joined. (Silver paper is sold at some hundred yen shops.)
-
2.Draw eyes, scales, and fins with crayon or markers, or use circle stickers--black and white for the eyes, and silver for the fins (folded in half.)
-
3.Put tabs of foam-style double stick tape in the middle of each fish on both halves, and regular double stick tape on just one side of the head and tail. This will give it some thickness to make it look like a real fish.
-
4.Before taping the fish shut, put a paper clip between both layers of foam-style double stick tape.
-
5.Make the fishing pole by gluing a magnet to a string, and tie the string to a disposable chopstick or bamboo skewer that has the sharp point cut off.


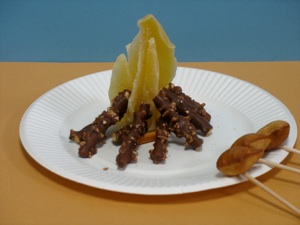
Camp Fire and Fish
-
1.Make the flames by cutting dried mango flat on one end, and cut a slit in the top of one “flame” and the bottom of the other “flame” and slide them together so they stand up.
-
2.Break pretzels or chocolate cookie sticks into logs and place around the “fire”
-
3.Poke toothpicks into fish shaped cookies, crackers, or gummy candy.
-
4.Let the children pretend to roast and eat the fish. They will especially be delighted to eat the fire and wood!!
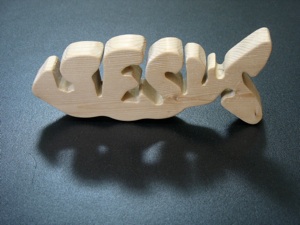
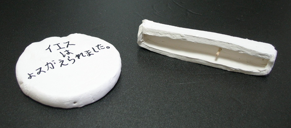
Ichthus, First Symbol of Christianity
-
1.Mix air drying clay to be any color you want. This one is actually made out of wood and requires equipment and expertise, but anyone can make it out of clay
-
2.Roll out clay at least a half inch thick (1 cm)
-
3.Cut or form into fish shape
-
4.Use a toothpick or plastic knife to write out the word “Jesus” and dig out the areas between the letters without separating the letters. (You may want to draw a pattern and photocopy one for each child. If this too difficult, just make a fish outline.)
-
5.Use a straw to make the eye.
-
6. Stand on it’s side to make sure it can stand, then lay flat to dry.
-
7. Paint with water soluble varnish, or varnish mixed with stain.
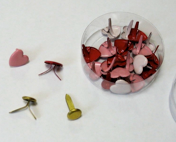
Brads