Seasons > Christmas > Decorations for the home > Silver and White Christmas Tree Decorations
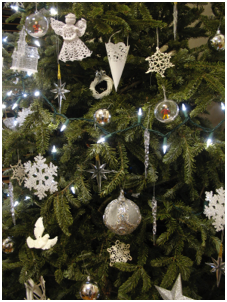
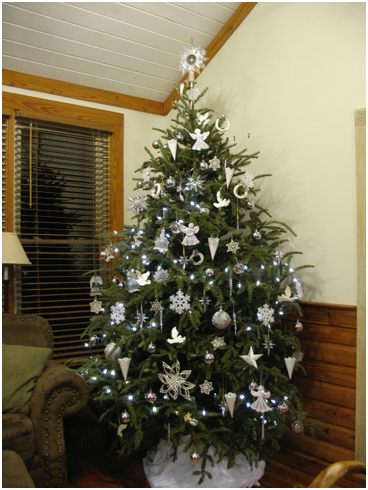
You will need roughly 10 each of 6 or 7 different designs to fill a 6 foot tree, and about 10 each of 10 or more different designs for a 7 foot tree. You will need even more if the tree can be seen from all sides.
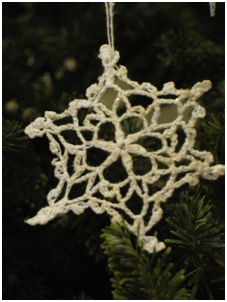
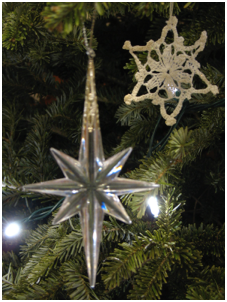
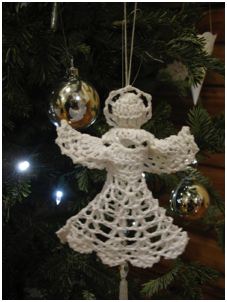
Snowflakes are a quick project, if you know how to crochet. Even if you don’t know how, this would be a great project to begin learning. There are several websites that have instructions:
If you don’t have the time or interest to crochet decorations, you can buy them: angels, snowflakes, and crosses are all available through the Oriental trading company.
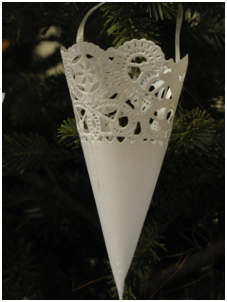
Make cones to fill with candy or small treats. Cut paper doilies in half, fasten to half circles cut from poster board and staple or glue in place. Poke holes and string ribbon through them to hang the cones from tree branches.
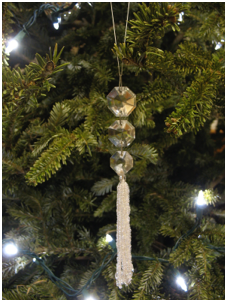
Jewel “tassels” are easy to make. Buy plastic or glass beads and fasten them together with metal rings. If you don’t want to make them, you can buy them--they are often sold with other Christmas ornaments, and you can sometimes find similar items at dollar stores.
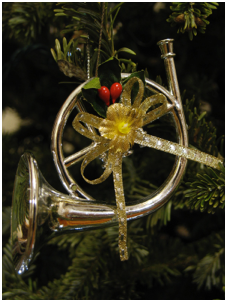
Metal or plastic musical instruments can add to the silver glitter on the tree. These are ornaments that can’t be home made, but are often sold with Christmas tree ornaments.
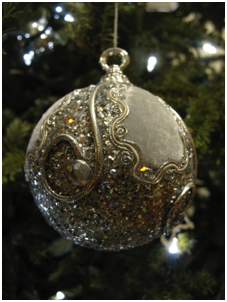
Big trees look better with at least some oversized balls. These can be expensive, but you can sometimes find some nice ones from the dollar store. You can try your hand at making them by gluing fabric, glitter, and fabric trims to styrofoam balls. Use trim to cover the seams between panels of fabric. Be careful to use glue that will not melt the styrofoam.
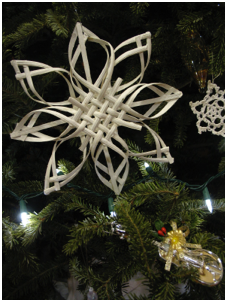
This oversized star is made of short lengths of basket caning. Weave into shape, and hold in place with clothespins. Soak in water over night then let dry. Once it is dry, glue in place. Paint white. It could be made out of strips of stiff paper as well, but skip the soaking step!!
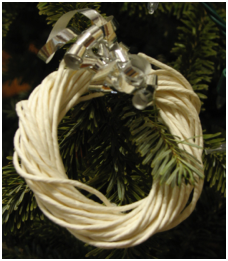
This white wreath is a quick decoration to make. Cut several lengths of paper string (2 yards/meters? It has been so long, now, that I have forgotten), and tie a loose knot in the middle, but be sure to leave a hole in the middle--this forms the base of the wreath. Twist the ends on both sides in through the hole in the middle, then out around the outside, then back through the middle hole. Finish the wreath by pushing the ends in between the strands. Add a silver bow (or the color you are decorating your tree with.) Small metal bells are often sold at dollar stores, so they would make an inexpensive embellishment to the white wreaths.
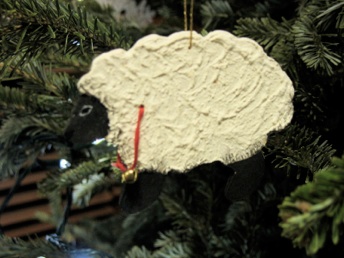
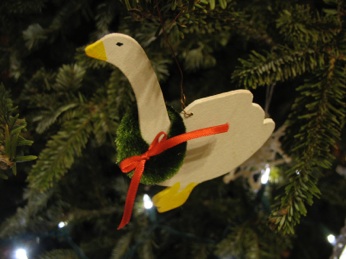
Unpainted wooden shapes are quite cheap, and are sold in most craft stores. Painting them doesn’t take much time. Most dollar stores sell acrylic paints and paint brushes. Of course, craft stores sell them, too, they just cost more there. Textured paint makes sheep look fluffy. Fine tip markers work well for drawing the dots for eyes. Add interest with details like ribbons, bells, or a chenille wire wreath. There are so many shapes available that these are good for making a commemorative ornament if you give your children an ornament each year to commemorate that year.
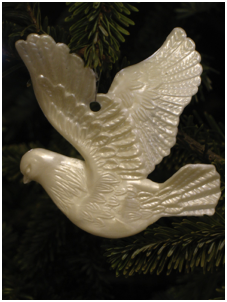
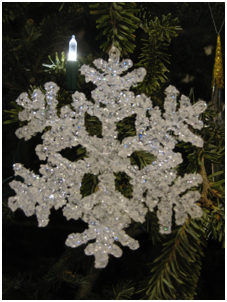
Plastic or glass decorations such as these church, dove, star, and snowflake ornaments, add a lot of sparkle to a Christmas tree. Don’t worry if you can’t find these exact items--these examples give you an idea of the kinds of decorations that are available. Dollar stores can be a good source for these. Although not all dollar store decorations are worth buying, if you choose carefully, you can often find nice ones. If you are buying sets of decorations, Walmart or other discount stores can be even cheaper than dollar stores! Hobby Lobby has a HUGE selection of ornaments that are organized by color, so they are easy to look for particular items. They discount fairly early in the season, and drop the prices even more after Christmas, so if you don’t mind picking over the dregs, this is a great place to look. If you are looking for a particular item, it’s still the best place to find a particular item, but plan to shop early, and expect to pay the full price.
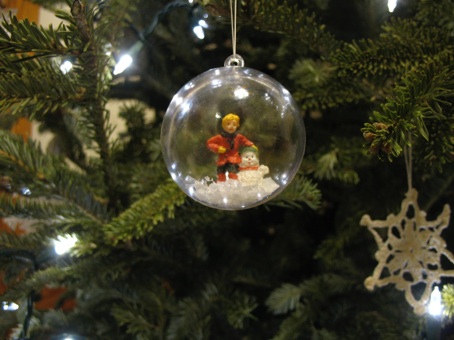
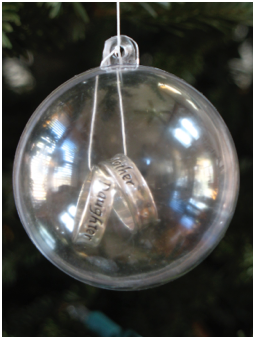
These plastic balls snap together, so the possibilities of what to put in them are myriad! Since they pop open again with a gentle squeeze, you can change what is in them if you decide to change your color or theme later on. I didn’t make the boy and his snowman--I bought the figure at a dollar store -- it was one of the figures that goes with miniature villages (of course the houses are too big to fit in the balls, but the figures provide all kinds of vignettes for in the balls.) Craft and hobby stores sell these kinds of figures, too.
These balls are also great for creating commemorative ornaments as well. You could put photos of your wedding or new baby in the middle. My daughter bought mother--daughter rings when she was in middle school. Years later I found them, and popped them in the ball as a token of that bond.

Start decorating with the strings of lights--if you put the lights on later, some of the ornaments will get knocked off. A timer to turn the lights on and off every day can be really helpful, especially if the electrical outlet is in a hard to reach place. Next, I like to arrange 10 of the same kind of ornaments all at once, to be sure to spread them out evenly. Keep the most interesting ornaments from eye level down to waist level. Every once in awhile, I sit down to look at the ornaments to see where there are gaps, or too many of one kind of ornament in an area. The colored balls go on last to fill in any empty spots.
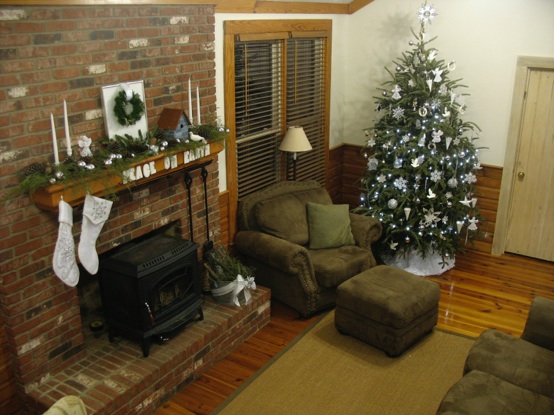
Whether you have a real tree or artificial one, hide the base. You don’t have to buy an expensive tree skirt--you can just wrap a sheet around the base. If you shop after Christmas, you can get very nice ones for very little. If you want to make your own, cut a large circle out of felt, cut a hole in the middle for the trunk of the tree, and a slit to enable you to slide the skirt over the base. Decorate it with felt Christmas shapes, if you like.