


Seasons > Mother’s Day > Ways to Celebrate Mother’s Day > 10 Mother’s Day gifts for kids to make
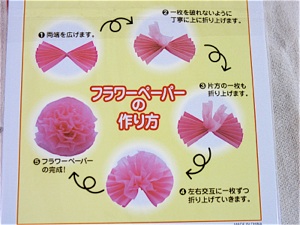

To make make the tissue paper carnations:
!. Cut 3 or 4 sheets of tissue paper to 2 1/2 inches (5 cm.) by 4 1/2 inches (9 cm).
2. Accordion fold every half inch, starting from the 2 1/2 inch side. Fasten in the middle with florist’s wire that will form the flower’s stem. (Florist’s wire is sold in the gardening section of dollar stores, and craft stores)
3. Spread out from the middle, and pull the layers of tissue apart. Don’t worry if it tears some--you can’t tell on the finished flower.
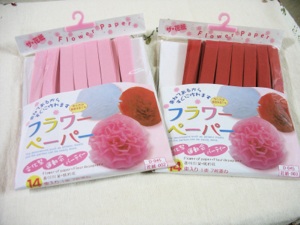
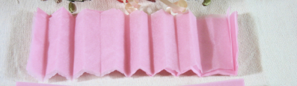
Some hundred yen stores sell pre-folded tissue paper, but it makes huge flowers. For carnations, cut each strip in thirds, then unfold each third and cut it in half along the middle fold. Separate each half into two stacks of 3 or 4 sheets each. Refold and fasten with wire in the middle. Follow steps 1-3 above to make the flowers. If you do this, each pre-folded strip will make 12 carnations.
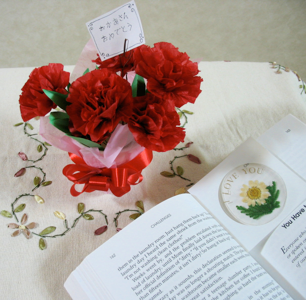
To make these tiny potted carnations, follow the instructions below for making 5 or 6 flowers. Then bend the loose stem ends of the wires into the letter “J” going opposite directions so the flowers stand up in the paper cup. Cut leaves out of green paper and tape them to the stems. Cut a 9 inch square of tissue paper, lay it on the table, put the cup of flowers in the middle of the square, and lift the 4 corners up the sides of the paper cup. Tape the 4 corners to the cup with double stick tape. Tape a bow to the front of the cup. If you want to include a gift card, bend a wire into a fork shape, and slide the card between the tines.
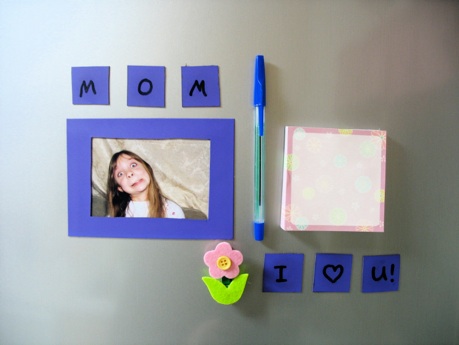
Here are several presents to make for your mom to put on her refrigerator:
1. Magnet picture frame: Buy a sheet magnet at a hundred yen store. Cut in half, and cut a rectangle out of the middle of each half to form two photo frames. Decorate each frame with dot stickers, or acrylic paint. If you want to, you can cut the middle rectangle into smaller squares, and write messages on them.
2. Glue a magnet to a pen or pencil, so Mom will always have a writing utensil handy. Decorate as you feel inspired, or leave plain.
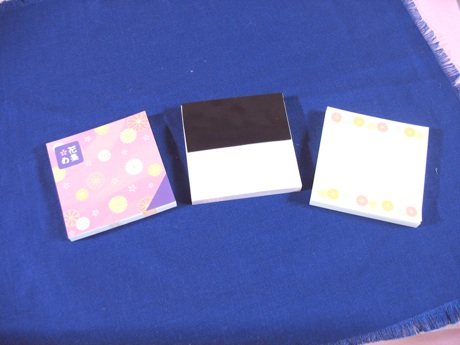
3. Glue a sheet magnet to the back of a note pad so Mom will always have paper handy. If the pad is too thick, tear into smaller pads (100 sheets instead of 300 sheets), and glue sheet magnets to the back of each for “refills.”
4. Glue a magnet to a wooden clothespin for a handy holder. Decorate with a felt flower.
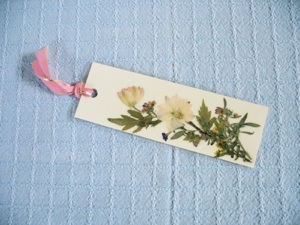
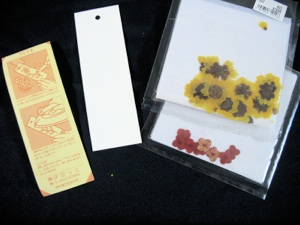
Make a bookmark using pressed flowers. To make your own pressed flowers, just pick flowers, put them between the pages of a fat book such as a phone book, and leave them to dry for several weeks. If you are in a hurry (because it’s almost Mother’s Day) you can buy packets of dried flowers and bookmark sets at craft stores. Glue flowers to a narrow strip of card stock. Punch a hole and tie a ribbon through it if you want, but it is not essential.
Decorate an umbrella:
Buy an umbrella, stamps, and acrylic paints at a hundred yen store or craft store.
1. Open the umbrella
2. Brush paint onto the stamps. You can make your own stamps by cutting erasers or potatoes or EVA foam into your desired shapes.
3. Press the stamps onto the umbrella.
4. Let the umbrella dry.
5. Be sure to wash the paint off the stamps, or the paint will harden and make them unusable.
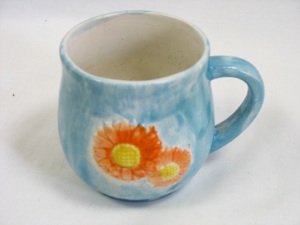
Make a teacup candle:
1. Buy a tea cup and a box of candles at a hundred yen shop.
2. Ask an adult to help you.
3. Melt the candles in a tin can in a pot of water (low heat.) If you want the wax to be brown like tea or coffee, break bits of brown crayon into the wax and let it melt, too.
4. Use a pencil or stick to take out out the wicks (be careful--the wax is hot.)
4. Pour the wax into the teacup
5. Tie one wick to a pencil or stick, and lay it on the rim of the cup so that the wick hangs down into the center of the candle.
6. Let cool and harden. Cut the wick to one inch (2 cm.)
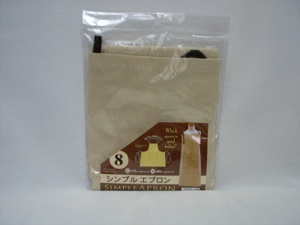
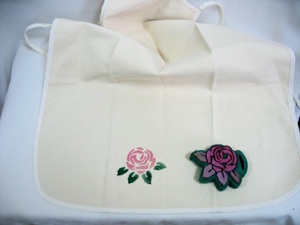
Decorate an apron:
1. Make or buy an apron at a craft store (hundred yen store)
2. Spread acrylic paint on your children’s hands.
3. Press handprint onto apron.
4. Repeat with different colors, Let dry.
-
5.For stamp alternative, spread paint on a stamp and press stamp to apron. (shown in photo at left.
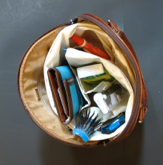
Make a purse organizer:
1. Buy a sheet of flexible plastic and fabric or felt at a hundred yen store
2. Use scissors to cut the plastic sheet 4 to 6 inches wide, but as long as possible
3. Cut the fabric as long as the plastic, but 4 times the width.
4. Fold both sides of the fabric to the middle, (this should not affect the length--it should still be the same length as the plastic)
5. Sew or glue the fabric so that it has pockets wide enough to hold your mom’s wallet, glasses case, pens, keys, etc. (take out the items to sew or glue!)
6. Fold the sewn fabric in half so the pockets are on both sides of the folded strip, (this should not affect the length--it should still be the same length as the plastic)
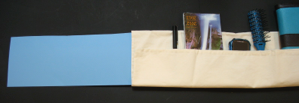
7. Sew or glue a seam along the bottom, and slide the plastic into the fabric sleeve.
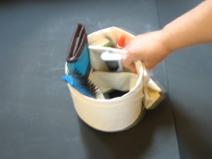
8. To use as a purse organizer, roll the plastic strip with cloth cover into a cylinder, and while still holding it in this shape, put in purse. Let go so it expands to the size of the purse. Fill pockets with stuff.
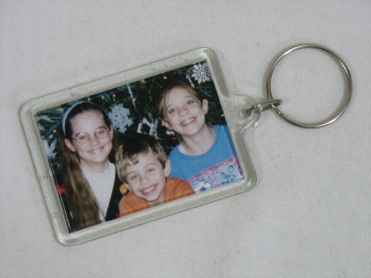
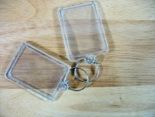
Make a key chain:
1. Buy a key chain that can hold a picture.
2. Get Dad to take a picture of you, and develop the photo
3. Cut the photo to fit, write a love note on the back, and put it in the key holder.
Alternative method:
1. Take purikura picture in a booth at 100 yen store
2. Buy “Shrink-it” plastic at a hundred yen store
3. Draw a picture with a love note, and cut out the shape with scissors
4. Punch a hole with a hole punch--DO NOT SKIP THIS STEP!
5. Bake the plastic to shrink it in the oven (ask for help from an adult.) Don’t forget to press it flat with a book while it is still warm. Be sure to follow all the instructions that are written on the Shrink-it package.
6. Stick the purikura photo onto the back of the shrunken cooled plastic
7. Fasten the keyring that came with the “Shrink-it” in the hole.
unfold each third, and cut on middle fold
cut strip into thirds
whole strip as it comes out of the package

cut here


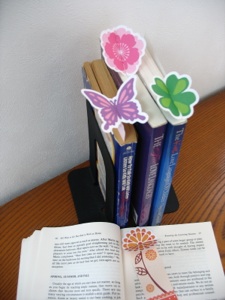
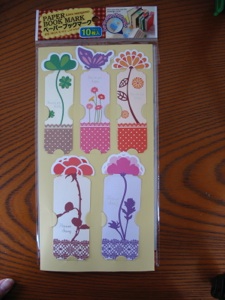
These cute bookmarks were purchased at a hundred yen store. I thought they were cool how the ends of the bookmark opened to decorate the ends of the book , and, of course, they make a nice present as is. However, I also thought it would be a really easy idea to copy them to make similar bookmarks if you have pretty stickers. Cut long strips of paper and fold them in half. Fold the 2 ends (not the folded end) back an inch, or enough to fasten the sticker to the two folded edges. Trim the excess paper around the edges of the sticker. Now fold the sticker end shut, and decorate the sides (like the photo on the right.) When the bookmark is inserted into the book, the sticker end can be opened to show the pretty sticker (like the photo on the left.)


My daughter made me this apron when she was in middle school. To make one like it, cut fabric in this shape, then hem the edges and run a draw-string around the neck and tie in the back.
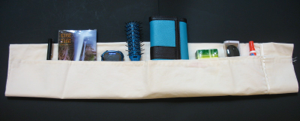
fold the fabric to the middle and sew pockets as shown.
fold the fabric in half so there are pockets on both sides.
Sew a seam along the bottom and one end.


Slide the plastic sheet in the open side.
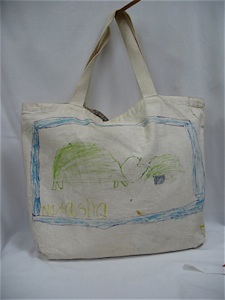
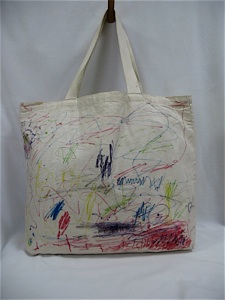
Decorate a Canvas Bag:
Buy a canvas tote at a dollar store, craft store, or order by the dozen from Oriental Trading Company. These were decorated with fabric markers, but you could stamp a design as in the apron and umbrella above.
Older children might like to design something on the computer and print it onto special iron-on paper.
There are also companies that will transfer photos onto various items, so you can take a photo of your child’s favorite work of art and have the company apply picture.
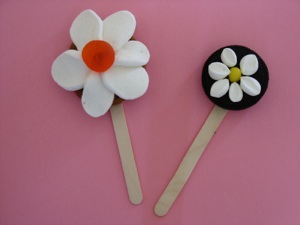
Make a Daisy cookie:
1. Buy cookies or cupcakes, marshmallows, m’n’m’s, and icing.
2. Use kitchen shears to cut each marshmallow into 4 circles. (If the scissors get sticky, sprinkle them with cornstarch.)
3. Spread icing on each cookie or cupcake
4. Arrange marshmallow “petals” around an m’n’m to make a flower on the top of each cookie or cupcake.
Alternative:
“Glue” a popsicle stick to the back of the flower cookie with icing and let harden. Ice a cupcake and sprinkle crushed cookie crumbs on the top to look like dirt. Put the cupcake in a small flower pot. Poke the stem of the cookie flower into the cupcake. Just for fun, add a gummy worm to the top of the dirt.