Holidays > Easter > Decorations for the home > How to make Easter Signs

-
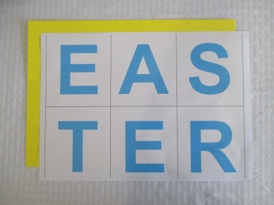
1.Print out the letters in a large font, then cut out each letter. Obviously it is much less time consuming to cut out a rectangle around the letter, than to actually cut around the outline of each letter. But if you want colored letters and can only print in black, go ahead and print it out on black, and use it as a pattern to cut it out of colored paper--it doesn’t take that long to cut out around the letters.
-
2.Glue the letters onto slightly larger sheets of colored paper to form borders around the letter rectangles. Whether you make them with 2 colored layers or only one, the bottom layer should be taller to allow space to fold the paper to the back and make a seam for the string to go through.
-
3.Fold each rectangle at the top so the margin is the same width all the way around the letter card. Fold the top edge to the back, unless you want to do something special--for example, the yellow letter cards shown above fold to the front, then have a paper doily glued on top for a special decoration reminiscent of decorated Easter eggs.

Add words to tell the story behind the cross. Although the cross is a symbol of the death of Jesus, the cross has become so common that it’s meaning has become obscure. Choose a word, or a couple of words to put the meaning back into the symbol. I have chosen the word, “forgiven” because that is what happens to each one of us when we believe what happened on Good Friday. Other words you could use might be : reconciled, cleansed, Jesus died for me, God so loved the world,
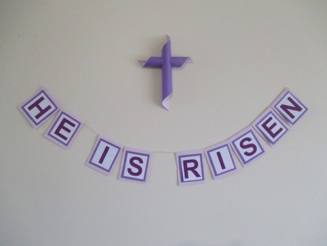
This banner proclaims the good news that tells why Easter is the most important day in all of history. Other options for words might be “Jesus is alive!” or “Hallelujah ,“ or even “Happy Day!”
-
1.Line up the letters in the correct order, then flip them to the back. Be careful to flip them top to bottom rather than to the left or right because word will end up going in the opposite direction.
-
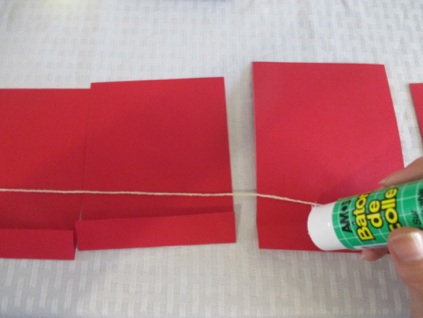
2.Lay the string across the backs of the letters.
-
3.Fold the colored paper over the string, and glue the flap down. Be careful to keep the string out of the glue so that you can adjust the spacing once the sign is hung. Test it by pulling the string a bit once it is glued.
-
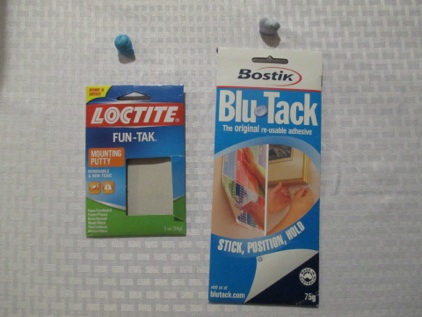
4. If you use mounting putty to hang them, put the mounting putty on the back of the letters on each end, BUT be sure to wrap the end of the string around or through the putty--if you don’t, the string will slide out, and the whole thing will fall to the floor. It is quite hard to get the string back through the seam once the paper is glued, so be careful about this. You could tape the ends of the string to keep this from happening. If the banner is long or large, you may need to put mounting putty on several or even all of the letters.


Choosing the words for a sign
Making the sign
Hanging the sign


Note: Mounting putty is sold where office supplies are sold, including discount stores such as Walmart. Some of the mounting putty brands are: Plastitack, Fun-tak, Bluetack, etc.
Note: Masking tape is another option for hanging light objects on a wall without pulling the paint off. Make a loop of tape and put it on the back of each letter.


