


Seasons > Christmas > Activities for the home: Fun Ways to Celebrate Christmas > How to Make a Clothespin Nativity Set
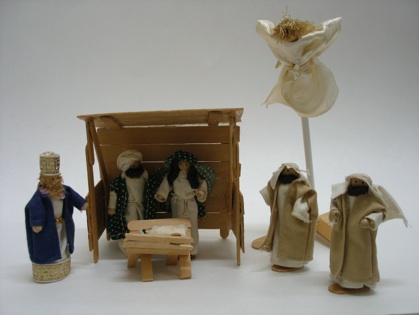


Home made nativity sets can be as big or as small as you want to spend time on, (or time in one year). You could make Mary and Joseph and the baby Jesus the first year as a starter set. The next year, make some shepherds the next year, make the wise men, and the next year make a bunch of angels.
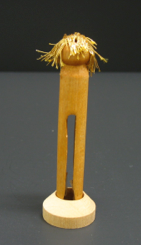
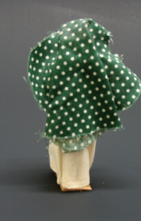
Clothespins are sold at dollar stores. However, if you spend a little more to buy them at a craft store, you can also buy stands that fit the clothespins. If you go with the dollar store clothespins, you will need to sand down the rounded tips, and glue on the end of a tongue depressor to make them stand up.
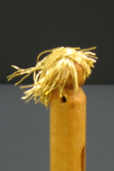
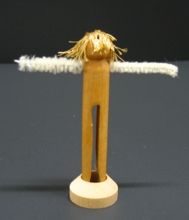
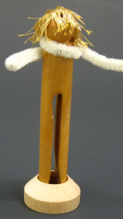
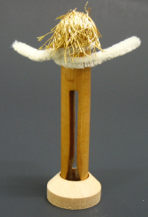
If you have an electric drill and a vise, you can drill holes through the tops of the “body” to push a pipe cleaner through for arms. If not, simply glue the pipe cleaner to the top of the body. Glue beads to the ends of the wires for hands, and bend the arms down once they are dressed. Draw faces on them, or at least eyes. Kids do NOT like faceless dolls!!

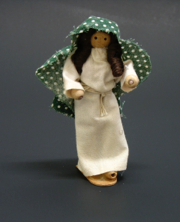
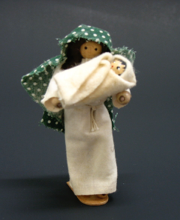
Make a dress (see instructions to the right) and oval head scarf and dress the doll. Tie string for a belt. Glue hair around the face. Hair only needs to be in the front since there is a scarf to cover the back. Hair can be made from a length of pipe cleaner, or you can buy strips of “hair” at a craft store, or cut brown embroidery thread to the desired length and glue to the head.
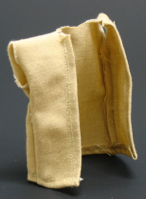
This is a rough pattern of what the dress pattern looks like. It should be twice as long as the doll is from the neck down. Fold the fabric in half or quarters, and cut out the neck hole, and the sleeves, allowing extra fabric for the sleeves and bottom if you intend to hem them. It is easy to hem both before you sew the side seems, and impossible after!

folded in quarters
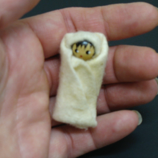
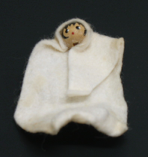
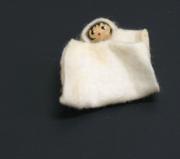
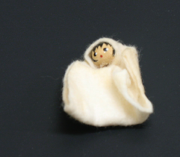
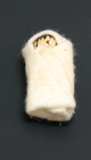
To make the baby Jesus, draw a face on with a fine tip permanent marker. Cut a rectangle of white felt and glue the bead to one end. Fold the sides down around the face.
Fold the bottom of the felt up under the chin. Fold one side over the front, then fold the opposite side over the front and glue in place.
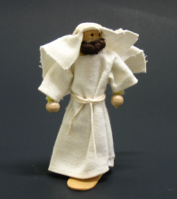
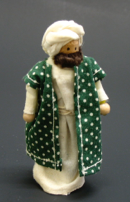
For all the male dolls, make them in the same way as Mary, but instead of glueing hair to the head, cut a shorter length and glue it to the face for a beard (pipe cleaner, “hair” from the craft store, or embroidery thread. Make a sleeveless tunic or coat. It is similar to the dress, except it has no sleeves, and the front slit goes all the way to the hem. The shepherds were poor, so make their clothes in neutral colors. Cut a head scarf (oval or triangle), glue it to the head, and tie a string around the crown of the head.


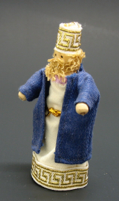
The wise men brought rich gifts, so we assume they were wealthy. I used trim to decorate the hem, added a gold belt, colorful coat, and made a turban from more trim. Joseph was poor as well, so you could make a a head covering like the shepherds, but if you want to make him look a little different, glue a turban to his head--take a strip of white cloth and glue the end to the back of his head. Now twist the cloth and wrap around the head several times. Glue the end in an inconspicuous place.

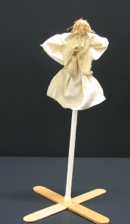
The angel outfit is probably the easiest to make--cut out a rectangle with a neck hole, and tie a belt on with a string. I used white satin which ravels easily, so I did put a thin strip of white glue around the edge with my finger to keep it from raveling--20 years later it still looks pretty good! I used gold fabric to make the wings, but a short section of white sheer ribbon would probably look pretty good, too. The angel doesn’t have a head covering, so will need some hair. I unraveled a gold cord for this, but embroidery thread would work, too.
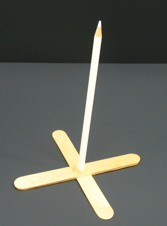
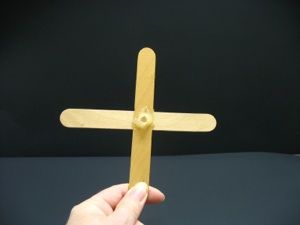
If you want to make the angel in the sky, you will need to make a stand. I used 3 tongue depressors (wider than a popsicle stick, and sold at craft stores. I glued 2 across each other, then cut the third one to glue on under the tongue depressor that was on top, or it would wobble, and not stand up at all. I glued a pencil to the middle of this stand with a glue gun. I out glue between the “legs” of the clothespin, and pushed it on to the pencil. It eventually came apart, which made storage easier, and it still held just pushing the parts together again.
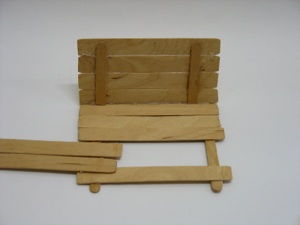
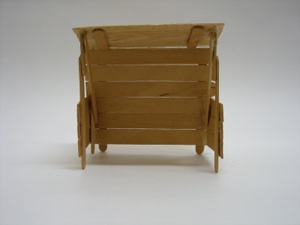
The stable is made from popsicle sticks and tongue depressors and glued with a glue gun. These are sold at dollar stores, Walmart, and craft stores.
This shows the back and roof already assembled and glued together, with the sides ready to be glued on.
This shows the back and roof already assembled and glued together, with the sides ready to be glued on.
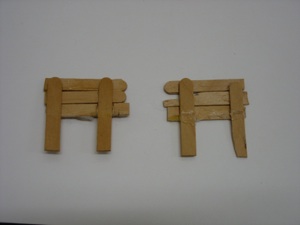
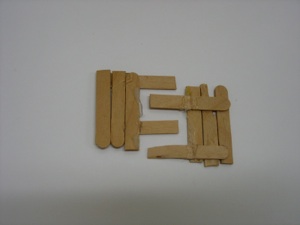
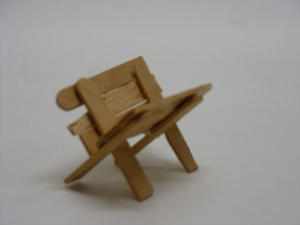
The manger is made out of popsicle sticks, too. I cut 4 legs, and 3 popsicles for each side. The important thing here is to glue on the legs so they don’t bump into each other when you put the two sides together.
You can glue on two legs toward the middle and two toward the outside, or as this one, put one near the edge and one farther in. Tape it together and try it out before you glue it!!
Slide the finished sides together and glue together in the middle.
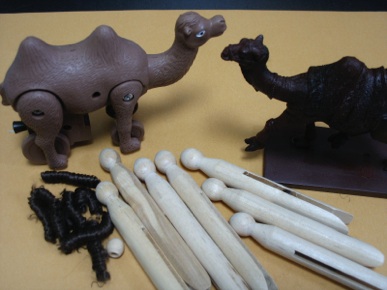
Sometimes you can find camel toys or figures at dollar stores, too.