Amy’s Free Ideas


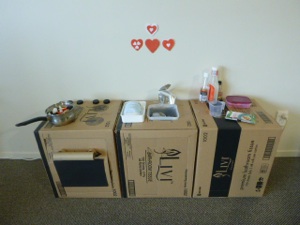
Make a Cardboard cupboard with counter (bench) (On the right)
Make the cupboard just like the sink, but leave off the sink and faucet.

Make a sink:
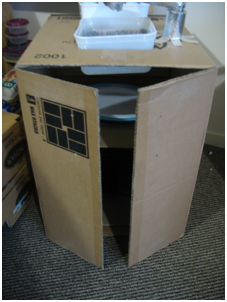
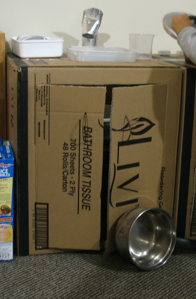
Find a large cardboard box. Cut 2 doors in the front, in an I shape--a cut about 1-2 inches from the top and bottom, and a third cut down the middle that intersects with the top and bottom cuts. (See photo above for correct way to make doors.)
Make a stovetop and oven:
-
1.Find a large cardboard box
-
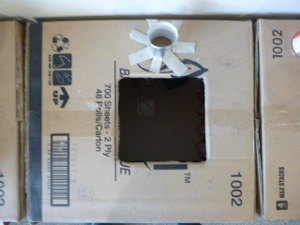
2.Cut a door in the front--an upside down “U” shape, but square, of course.
-
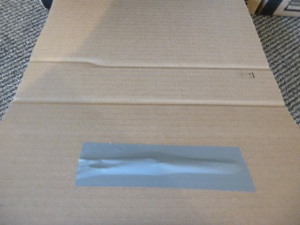
3.Make a “window” in the door by gluing a black piece of paper to the door.
-
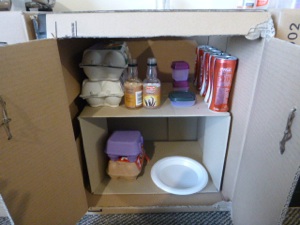
4.Make a shelf inside by putting a smaller box inside the big box--one that is half the height, but only slightly narrower than the big box.
Make a faucet
-
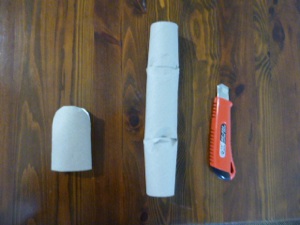
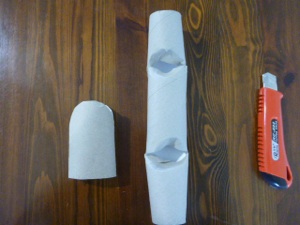
1.Collect 2 toilet paper tubes and and a paper towel tube.
-
2.Cut strips in one toilet paper tube about 2 inches tall all the way around the bottom end. Rub glue stick all over the top half of the tube and cover with aluminum foil. Press out as many wrinkles as possible.
-
3.Bend the cut strips out--it looks a bit like an octopus. Glue this tube to the box behind the sink.
Family Fun > Play with your Toddler > How to make a Cardboard kitchen
Family Fun > Play with your Toddler > How to make a Cardboard kitchen

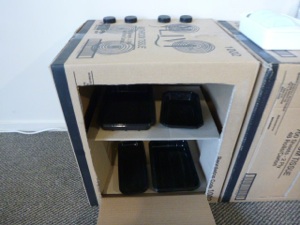
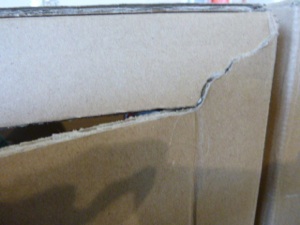
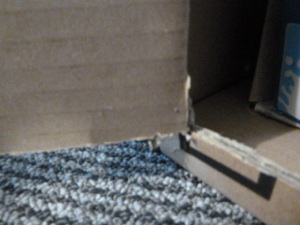
NOTE: If you are tempted to use the flaps of the box to be the cupboard doors (see photo above) there are 2 problems--the doors always hang open, and the box is quite weak--as soon as your child leans on it, it will buckle.
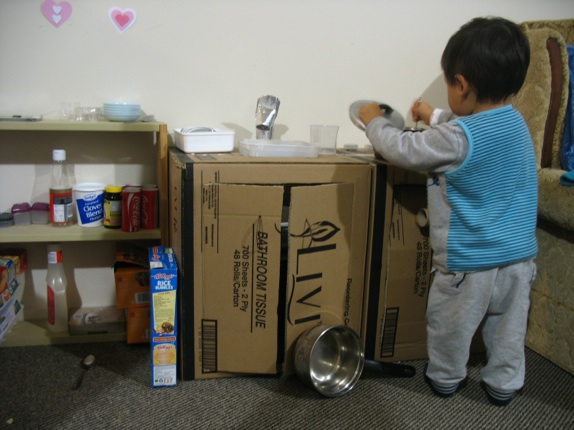
Make a shelf inside by putting a smaller box inside the big box--one that is half the height, but only slightly narrower than the big box. Slide this box in through the flaps, then tape the flaps closed. Stock the shelves with dishes and empty containers. view how to make food and utensils
Make door handles in one of three ways--
1. Glue toilet paper tubes for handles, OR
-
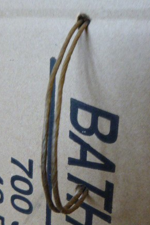
2.Punch 2 holes in each door, and make a wire loop that goes through the 2 holes. Twist it on the inside, and tape the ends on the inside so no one gets hurt. OR
-
3.Punch 2 holes, push a short length of rope though each hole, and tie on the inside.
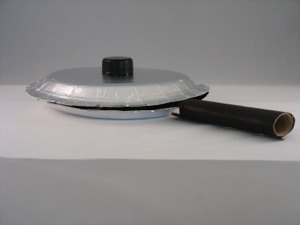
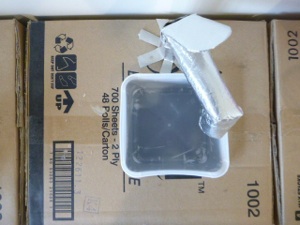
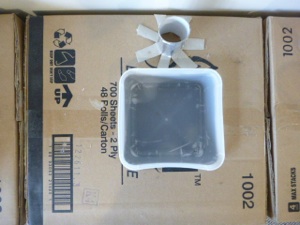
To make the sink, find a plastic container such as an ice cream tub or cook whip tub. It should have a lip, or the bottom should be slightly smaller than the top. The sink in the photo above is an ice cream tub.
Children don’t seem to mind that a cardboard kitchen still looks like cardboard--they immediately know it is a kitchen built just for them, and get busy preparing pretend food. My children were convinced that I could make anything out of cardboard. But if you want to jazz it up with color, contact paper may be the best option (sheets of plastic with adhesive backing.) You could glue paper onto it instead, such as a roll of newsprint or copier paper or wrapping paper. If you prefer the stainless steel look, you could glue on tinfoil. Paint is not a very good option--cardboard requires several layers of paint, and it till looks bad

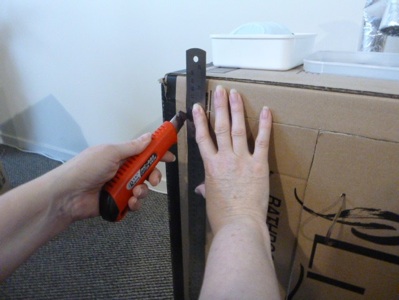
Before folding the doors open, score the place you want the door to hinge open with a knife or box cutter. DO NOT CUT ALL THE WAY THROUGH or you will have a hole instead of a door. If you don’t score them first, they might bend crooked, and then the doors won’t open. If possible, bend the doors open for the first time with the scored line on the edge of a table or counter top to ensure a straight bend.
The 4 corners where the doors intersect with the rest of the box tend to get a lot of stress when the door is opened over and over, and over time, will rip. This weakens the whole structure of the cupboard.
To relieve this pressure and avoid ripping, cut about an inch (2 cm.) at the top and bottom of each door.

-
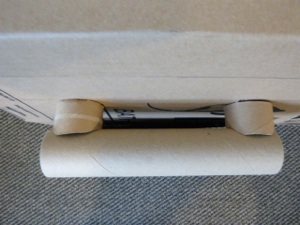
1.Make an oven door handle with a paper towel tube and toilet paper tube. Cut off both ends of the toilet paper tube, and cut 2 “bites” out of each small piece so that they both fit snugly against the paper towel tube.
side view
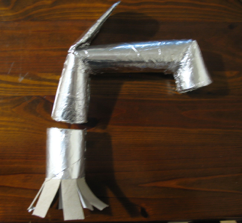
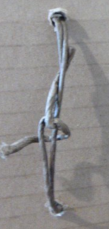
Cut 2 slits in the paper towel tube, and bend in these places to form the faucet. Glue the notched places so it stays bent. Cover with aluminum foil and glue in place. Slide the faucet into the silver toilet paper tube already glued to the counter top behind the sink. The faucet should swivel. If the faucet doesn’t fit inside the toilet paper tube that is glued to the sink, cut a slit in the faucet so you can squeeze it smaller than the base--so it will fit inside. Do not glue it because you want the faucet to swivel.
Flatten the second toilet paper tube for the lever that turns on the water. Cut it so the top is rounded. Glue on aluminum foil, and press out as many wrinkles as possible. Glue it to the top of the faucet.
Cut a hole in the top of the box the size of the bottom of the container. Press the container into the hole. You may need to slash the corners of the hole to make it bigger if the plastic container won’t press all the way down.
Make a faucet (see instructions below) and glue it behind the sink.
front view
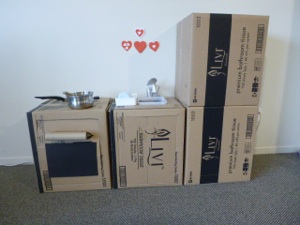
complete kitchen view
Make a Cardboard Refrigerator
-
1.Glue 2 boxes on top of each other.
-
2.Make shelves as explained above.
-
3.Make doors like the doors on your refrigerator. If they open in the middle, cut doors like the sink. If they open on one side, cut it like the oven, but opening toward one side.
Either glue this to the door, or poke 2 holes in the paper towel tube and in the oven door. String wire through the paper towel tube, through the 2 pieces of toilet paper tubes, and through the holes in the oven door. Twist the ends of the wire together. Cover with tape.
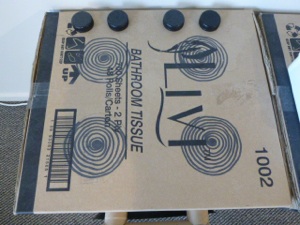
Draw burners on the top with a black marker
Make knobs for “turning on the burners” with plastic bottle caps. You can simply glue these to the box, but if you want the knobs to turn, glue smaller caps to the box, then place bigger caps over the smaller caps. Yes, they do come off, but you really can turn them. I used coke bottle caps to glue to the box, then juice bottle caps to rest on top of them for the knobs that really turn.