Seasons > Easter > Activities for the Home > Easter crafts and decorations to make > How to Make Easter Banners

5. Outline with black
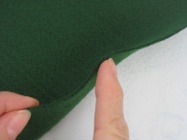
This is optional, but it really does make the design look better if you do. Cut thin strips of black felt. Glue the black strips around the edge of each piece of felt--you may need to stretch it to fit around curved edges. Felt strips are easiest to cut with a rotary blade and metal straight edge or ruler. You can cut them with scissors, but it is hard to keep the width uniform, and it takes a lot longer.
Note: An alternative method is to glue black yarn as the outline. For me, this method was more trouble than it was worth because of the fibers.
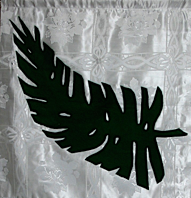
Print several copies of the patterns that you like, then use colored pencils or markers to try out different color combinations on each copy. The pattern books above give color suggestions for each pattern, but no color photos. You may also want to see what colors of felt and backgrounds are available. If you can’t get the colors that you want, you may prefer to choose a different design that goes better with the colors of felt and fabric you can get--if you can’t find dark green felt, you may not want to make a palm branch banner.
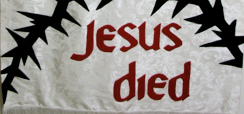
Another consideration for color is the season. Red and green are colors often used for Christmas. In America, pastel colors are often used for Easter decorations. I like to use purple, black, and white for Easter: purple from Jesus’ trial when a royal robe was put on him, black for when he died and the sun turned dark, and white, from the cloth that was wrapped around his body and was left in the grave when he rose from the dead. White also represents purity.
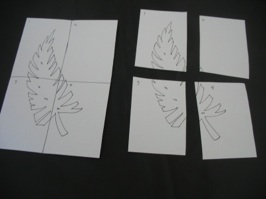
2. Enlarge the Pattern:
Whether you make your own design, or copy it from a book, a photocopier will the the easiest way to enlarge it to the size you need. You may have to enlarge it several times before you get the size you want. Make 2 small copies--leave one as a reference, use the other one to make the enlargements--cut it into quarters and label it before making the enlargements. Otherwise the parts of the design you end up with may become hard to recognize, and therefore hard to reassemble. Once you get all the parts the size that you want, tape them together. If it is a complicated design, make a second copy, because after the pattern is all cut up, it can be confusing to try to assemble the banner without the help of the whole picture. A small copy doesn’t help with precise positioning.
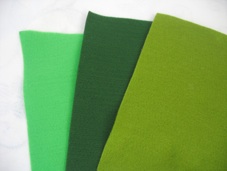
3. Cut out the shapes from felt
Pin the pattern pieces to the felt and cut out the various shapes.
Another option is to trace the pattern onto freezer paper, then lightly iron it onto the felt. This keeps the pattern from shifting at all, so it is easier to cut the pieces precisely. Once the shapes are cut out, peel off the freezer paper. If you iron it on too long, or the iron is too hot, it sticks to the felt too much, and is hard to peel off, and can stretch the felt piece out of shape when you try to remove the freezer paper. So keep the iron cool, and iron each piece quickly. This method is precise, but it does take a lot of extra time. It can be helpful if you are having lots of people to help cut out the pieces--not everyone is as careful as you would like them to be!
4. Glue all the pieces to the background Using the original pattern as your guide, arrange all the various pieces on the background. Lift the edge of each felt piece and rub a bit of white glue along the edge with your finger. Press in place. Leave flat to dry. For larger pieces, you should glue in the middle of the piece so it doesn’t sag. NOTE: Be very careful to not put too much glue on, because it looks really ugly if it bleeds through to the front. The only way to fix it is to cover that area with another design element on top of it--some designs allow for this, but others don’t.
Seasons > Easter > Activities for the Home > Easter crafts and decorations to make > How to Make Easter Banners
Banners are a great way to decorate a large area, whether they are for your home or church. However, pre-made banners are really expensive!! They can cost $100 to $200 for one-color silk screened ones, or $400 for hand made banners. Happily, if you make them yourself, they can be very reasonably priced.
How the Banners are Used :
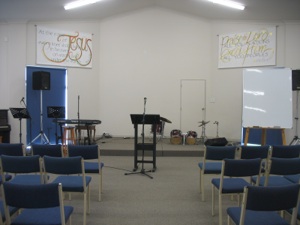
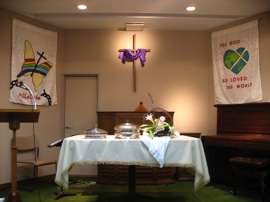
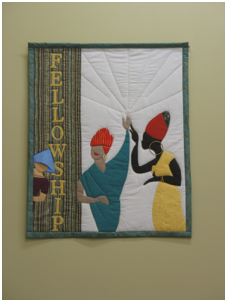
You can hang a different banner for each week leading up to Easter, or if you have a large space, keep adding banners as the season progresses. These additional banners can be the same size, or smaller, to group beside the larger ones. For examples of this, see Ways To Decorate the Church with Banners
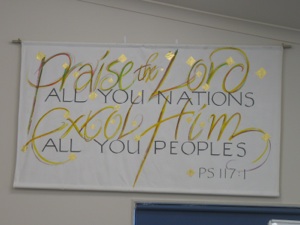
Tips for Words on Banners
Make patterns for words by typing a phrase on your computer and printing it out. Use the printed letters as patterns to cut out felt letters.
It is important to glue the letters on straight, as well as centered, so use a ruler or yard stick to lay them out straight. Measure both ends of the stick from the top or bottom edge of the banner so the line of letters doesn’t slant up or down.
NOTE: If you are making banners for the church, make sure the font is large enough to be seen from the farthest point. Take the printed sheet to the church and hang it so you can go to the back and see if you can still read it.
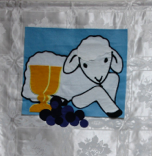
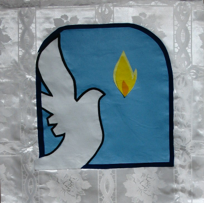
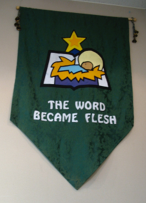
The main design elements can also help determine the color of the background--a white lamb or dove will not show up on a white background--it needs a color behind it for it to show up.
The color of the wall or carpet can also help determine the color the the banner. A white banner disappears against a white wall, but really pops against a darker wall.
Tips for Choosing The Design
Tips for Choosing The Colors
Choosing The Size and Shape
How to Make a Banner in 5 Easy Steps
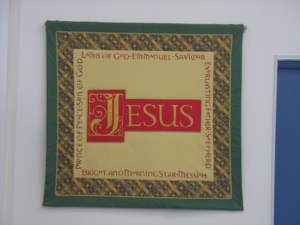
The Image and Message
These books have a lot of nice designs, so you can just look through the pages and choose one. The image and the words both are important for getting your message across. You may like the phrases the books suggest, or you may want a different emphasis. You could write the words on a separate narrow banner on either side of the banner that has the image for more versatility.
The Location
Look at the space, and decide if one banner fits better, or if two or more would fill the space better. Will it hang outside, in the foyer or hall, or will it be in the sanctuary or living room? The spaces help determine the size, and perhaps has bearing on the message. Also the colors of the walls and carpet may help determine the colors of the banners, too.
-
1.Hem the background
Finish all raw edges on the background fabric by sewing a hem on all sides. Sew a hem at the top of the of the cloth to insert a dowel for hanging. Sew trim to the bottom hem to make the bottom look finished, or put a second dowel on the bottom. Now the banner is ready to have the design glued on.
NOTE #1: If you don’t have access to a sewing machine, you could hem the edges with Iron-on fusible webbing. Gluing is not a good option since it is hard to keep glue from seeping through such thin fabric, and it looks really bad when it does.
Note #2 : Use a book to make sure your corners are square.
Note #3 : Walmart sells tablecloths very inexpensively right around Christmas. Depending on the size of the tablecloth and the banner size you want, you may be able to get one or two banners out of it. The nice thing is, 3 edges are hemmed.


Easter Decorations for the Church > How to Make Easter Banners
Easter Decorations for the Church > How to Make Easter Banners
A round hem is the most difficult to sew. Baste (sew large stitches) around the edge, and pull to gather. Iron flat, then hem sew in place.
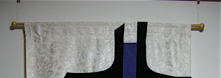
Finishing off a central point with a large tassel adds a nice touch.
An angled bottom looks good when there are two banners hung near each other. it also looks especially good with a fringe-style trim on the bottom.
This bottom can also be a bit of a challenge to hem because of the point in the middle, but it looks cool.
If one banner does not fill up the space, consider making several banners to better fill the space.


If your church has a quilter or artist, ask them if they would be willing to make banners for the church.
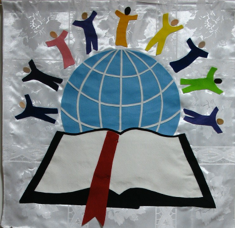
These banners were painted on fabric.