


Sunday School > Crafts > Seasonal Crafts > Paper Nativity in 3 Scenes
To make a nativity scene with Mary, Joseph, and the barn, download the pattern, cutting on the outlines and folding on dotted lines. See below for detailed instructions, or Watch the Video
To make a paper nativity set with 3 scenes made out of paper, download the patterns, choose the patterns that you want, and print them out. Cut out on the outlines and fold on dotted lines. If you do not have space to make them stand, you could hang them on the wall or door. I recommend using painter’s tape or blue-tack to hang them so that when you take them down you do not peal the wall paint. When removing from the wall, always pull slowly to avoid pulling off paint.
Seasons > Christmas > Activities for the home : Fun Ways to Celebrate Christmas as a Family Paper Nativity in 3 Scenes
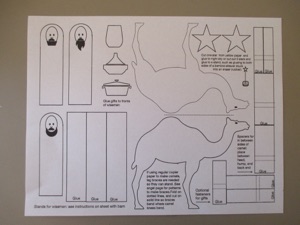
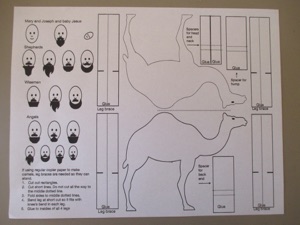
All 8 pattern are included in this DOWNLOAD, but only print the pages that you want. For example, there is a page that has faces and the camel in case you want to print on brown paper, then glue the faces onto the figures. This is especially helpful if you want to cut the figures out of colored paper, since you won’t be able to color faces on red or blue paper.
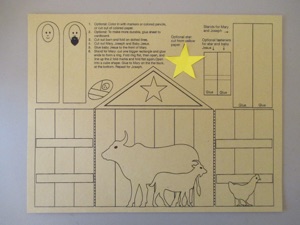
Another option is to print on colored paper. This eliminates the need to color it in. However, making the set is a bit more complicated. For example, if you want the barn to be brown, you can print it on brown paper, then also print that page again on white paper for Mary, Joseph, baby Jesus, and the star.

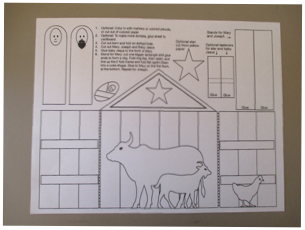
For the easiest option for making the scene, just color in the faces and the star. But if you want more color, color in everything. When you color it, do so before you cut it out-- It is easier to color on a large sheet of paper, and less chance of wrinkling the paper or coloring off of the edges of the small pieces.
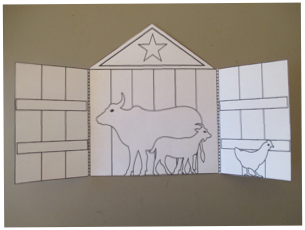
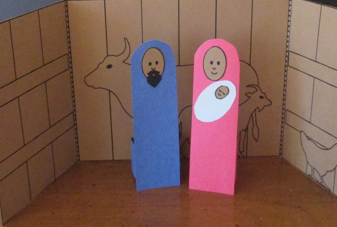
Cut out the barn. Fold on dotted lines. The sides should meet in the middle, following the middle line. Open the “doors” to make it stand up. Fold the “doors” closed to store the set for next year’s Christmas season.
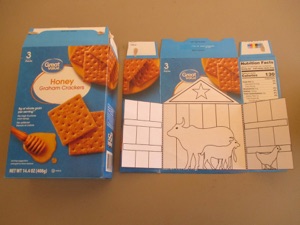
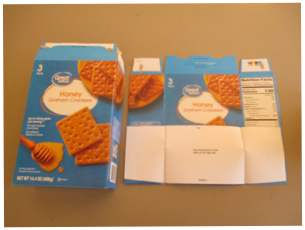
You can use the extra part of the box to glue on the backs of the other figures to to make them sturdier, too, especially if children will be playing with them.
If you want to make it sturdier, find an empty cardboard box that fits. Glue it to the colored side so the back of the barn will be brown or gray.

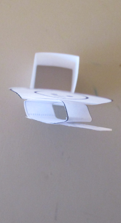
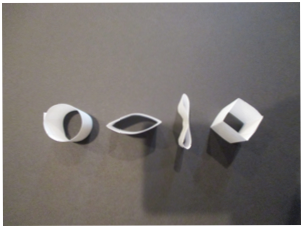
To make the figures stand up, cut out the large rectangles. 1. Glue the ends together into a loop. 2. Fold the loop flat, 3. open and line up the two folds and fold again. 4. When you open it up, it will be a cube.
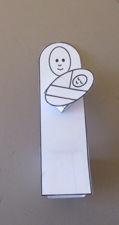
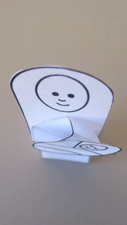
You can glue the baby Jesus directly to the front of Mary, or, if you want to make it stick out a little, you can make a spacer, similar to the stand. Cut out the smaller rectangle and then glue the ends together into a loop, but this time fold on one dotted line. Open and fold on the second dotted line. When you open it up, it will be a rectangle rather than a square. Glue one side to the baby, and the other side to the front of Mary.
Glue it to the bottom of the back of Mary. Make sure that the hole is top and bottom. Otherwise, if you glue it so the hole is visible from the side, it may be hard to make Mary stand up straight. Repeat for Joesph.
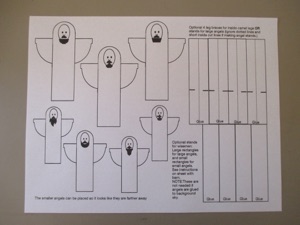
Repeat making stands for all of the people--shepherds, angels, and wisemen. Make sure the stands are glued on with the hole facing up and down to ensure that they will stand up straight.
Glue the gifts onto the wisemen directly onto their fronts, or glue them on like the baby Jesus so they stick out a little bit and look a little less flat.
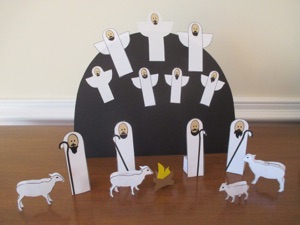
If you choose to glue the angels to the night sky background, you do not need to make stands. Arrange them on the background so that the smaller angels look like they are farther in the distance.
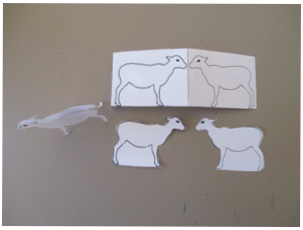
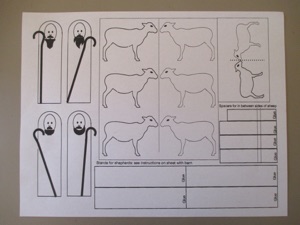
To make the sheep, cut out the rectangle around them and fold on the dotted line. Hold it up to a window or light to make sure you are folding them so they exactly line up. Next cut them out, but be careful not to cut the noses apart--this should stay connected.
If you want to make more sheep, print out more of the shepherd page.
Make a spacer just like the baby Jesus. After the sheep is cut out, make it stand on a table or flat surface. Glue both sides of the spacer and insert it between the two sides of the sheep. It should stand on it’s own now. If you have trouble making it stand, you can cut off the legs, and the sheep will be lying down.
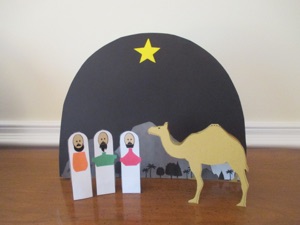
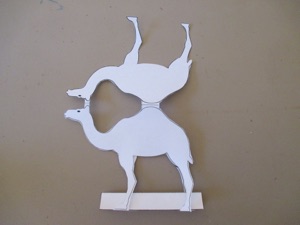
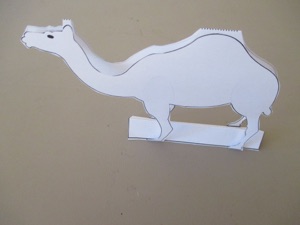
Cut out the camel in the same way as the sheep. Fold along the dotted line, then cut out the two sides at the same time. Hold it up to the light to make sure you are lining up both sides before you cut. Another option is to cut each side individually rather than folding and cutting both sides at the same time. NOTE: DO NOT CUT THE EAR AND HUMP APART. These parts need to remain connected to make it easier to stand.
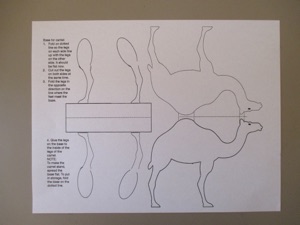
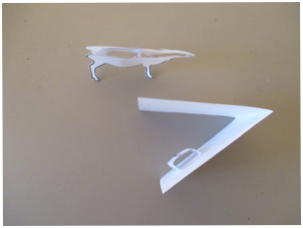
The braces may look complicated, but it is not as bad as it looks. To make the braces, fold on the dotted line and cut out both sides at once (see next photo.)
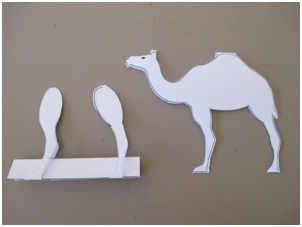
If you are making the camel out of thin copier paper, you will need to print the page that has separate leg braces because the paper is too thin to hold the camel standing--the legs just splay apart if made with copier paper without the braces. If the paper is thick, you will not be able to see the lines through the paper.
Next fold the brace legs on the dotted lines where the feet meet the stand. Put glue on the brace legs and glue them to the insides of the legs.
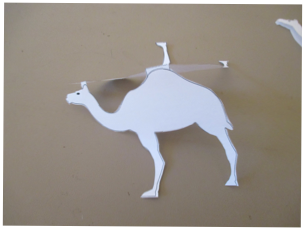
If you cut the camel out of stiff paper such as card stock, you do not need to make braces for the legs. You can just fold it, cut it out and stand it up. If the legs tend to spread apart, you can put a spacer between the 2 sides like the sheep.
Spread out the stand to make the camel stand. To put away in storage, fold flat along the dotted line. If you have trouble making the camel stand up, you can cut off the legs and it will be a camel that is lying down, but you will need to make a spacer like the sheep have.
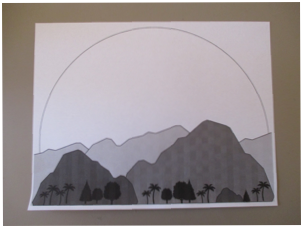
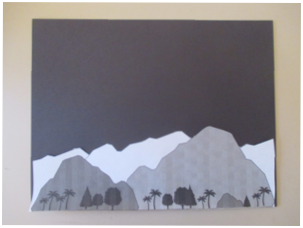
Backgrounds are optional, but they can add the night sky to each of the 3 scenes. You will want a sheet of black or dark blue paper to use.
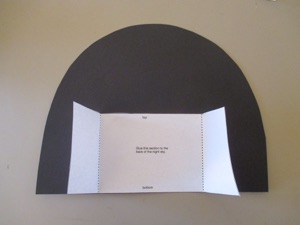
The second background sheet is the stand. Cut out the stand and fold on the dotted lines. Glue the middle section of the stand to the middle of the back of the background sheet. Spread the sides of the background to make it stand up. NOTE: if you put it on upside down, the background will not stand up--It will keep falling forward.
Print the background sheet and cut out the mountains. Glue the mountains onto the black or dark blue sheet. You can leave it as a rectangle, or use the circle on the background sheet to cut out the black or dark blue sheet into a dome.
The background for the shepherd scene is heavier than the other backgrounds because of all the angels fastened to it. You may want to cut the stand out of card stock or an empty cardboard box if the stand with regular copier paper keeps falling down.


Hole
Spacer
Spacer
Spacer
Stand


Do not cut
1.
2.
3.
4.