


Seasons > Mother’s Day > Ways to Celebrate Mother’s Day > Teacup Mother’s Day cards for kids to make
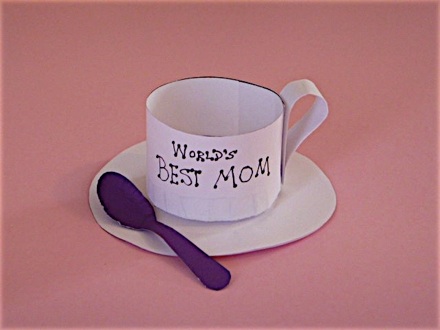
Fasten the cup to the saucer with tape: Put the cup on top of the saucer, and tape the cup to the saucer with 2-3 pieces of clear tape on the inside of the cup.
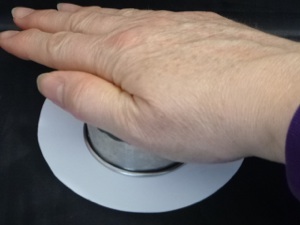


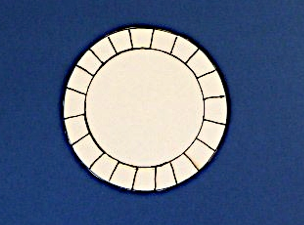
Optional saucer indentation
Some people like to include all the details! If you a want the saucer to have the circle impression in the middle like a real saucer, place the folded cutout saucer on a soft but firm surface (short carpet, sofa, bed, etc.) and gently press a ring into the middle of it ( small glass, biscuit cutter, paper towel tube, toilet paper tube, etc.) It should leave a round indentation in the middle. Be careful not to press too hard, though, or it will crumple the saucer.

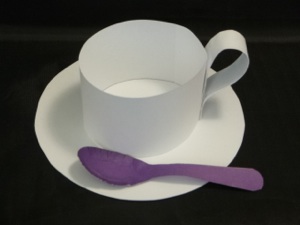
cup


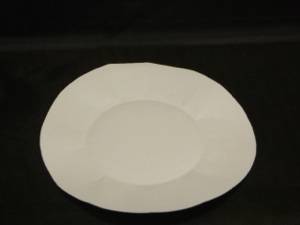
saucer
cup bottom
-
1.Fold the paper with a picture of a spoon on it on the dotted line.
-
2.Glue the two sides together.
-
3.Cut out the spoon.
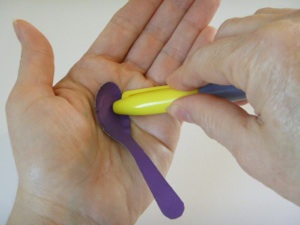
4. Place the bowl of the spoon on a soft surface such as your hand, a sofa, or carpet. Use a rounded object (like the end of a closed marker) to gently rub the bowl of the spoon. Don’t worry if the edges look a little wrinkled.
5. Make a curve in the handle by pulling the handle handle between your fingers or partially wrap it around a pencil or pen. Don’t wrap it all the way around, or it will make the handle into a coil. You just want a little bend in the handle so that it is not flat--to make it look more like a real spoon.
6. Glue the spoon to the saucer next to the cup.
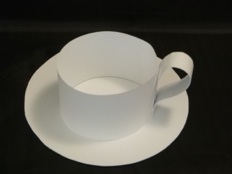
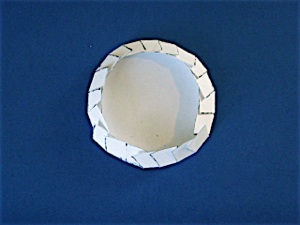
It is much easier to fasten the cup to the saucer without making a bottom. But some kids will be very unhappy that the cup has no bottom. For these kids, here is a way to make a bottom for the cup. These instructions should replace number 5 above (obviously not the number 5 for making the spoon!)
-
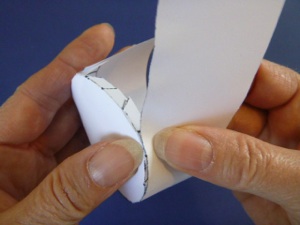
1.Cut out the smaller circle that looks like a sun.
-
2.Cut all the lines up to, but not crossing over the middle circle.
3. Fold all of these flaps onto the middle circle.
4. Put glue on the cup strip, then press one flap at a time to the bottom inside edge of the cup.
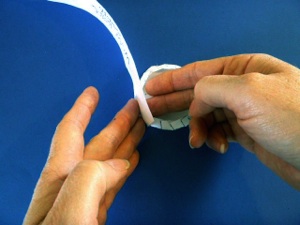
5. After all the flaps have been glued to the cup strip, glue the ends of the strip together--the ends should overlap.
6. Glue on the handle as explained above.
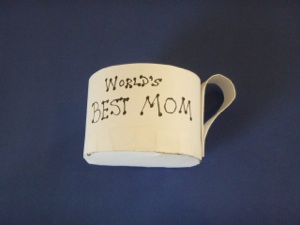
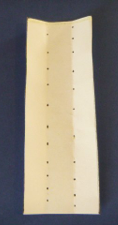
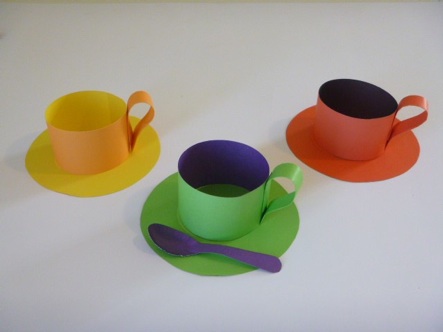
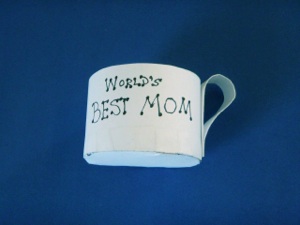
These paper teacups may look complicated to make, but they are not! Simply glue a strip of paper into a ring, add a handle, and you have a cup. Download the patten and print it on white paper or colored paper (the paper shown here has different colors on each side of the paper.) Card stock (stiff paper) is good if you have it, but regular white copier paper works, too.
-
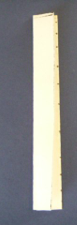
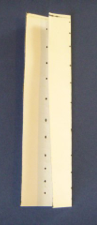
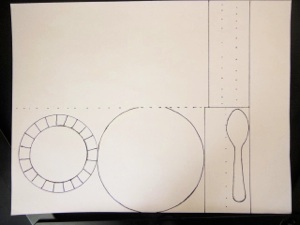
1.Cut out the 3 rectangles on the right end first (cup, handle, and spoon rectangle) before you cut out the circles. This is so that the rectangles do not get folded in the next step. Do not cut out the spoon yet, either. See instructions below.
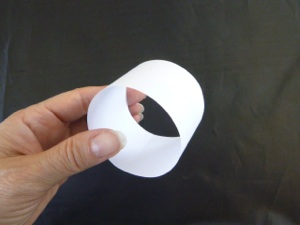
2. Next, fold the rest of the page on the dotted line, and cut out both layers of the circle (saucer) together. Be careful not to cut the short edge that is on the fold, because this is the part that hinges the two sides together so it opens as a card. If you cut it by accident, all is not lost. Just glue or staple the two circles together near where the dotted line is. The cup bottom is optional. See instructions below.
3. Open the circle (saucer), and write your message on the inside. (Once the teacup is on the top, it will be harder to write on!)
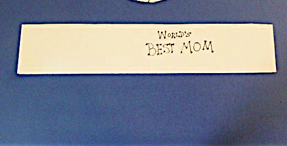
4. If you want the cup to have a message, now is the time to write it on the cup strip. Keep it short, so you can read it on one side after the cup is made. How about “World’s Best Mom” or “Thanks Mom”?
5. Make the cup by gluing the 2 ends of the strip together to form a loop (this one is overlapped about an inch (2 cm.)
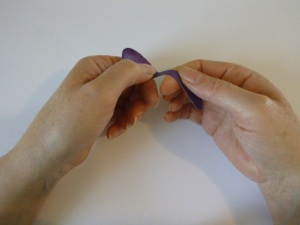
6. Make the handle from the smaller rectangle. First, fold it into thirds along the dotted lines. Open it back up and put glue on the middle, fold one side over, put glue on that folded piece, and glue the other side.
7. Glue both ends of the handle together--it should look like a teardrop, not a loop. Next glue the tear drop shaped handle to the side of the cup.
Optional Spoon
Believe it or not, this is made out of paper, too, and it isn’t hard to make!
Optional bottom of the cup
4. As you glue most of the flaps to the side of the cup, it might get harder to do because the side of the cup will get in the way of gluing on the flaps.

Seasons > Mother’s Day > Ways to Celebrate Mother’s Day > Teacup Mother’s Day cards for kids to make