Seasons > Easter > Activities for the Home > 10 ways to decorate hard boiled Easter Eggs
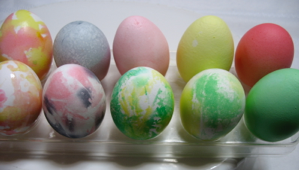
10 Ways to decorate Hard boiled eggs
Dye bath recipe for dipping eggs
1/8 teaspoon food color powder (.65 ml.) (or 1 to 2 teaspoons liquid food color)
2 teaspoons vinegar (with 5% acidity) (10 ml.)
1 cup water
Dilute food color in 1 teaspoon vinegar, then add remaining vinegar and water. Be sure to put the mixture in glass, plastic or stainless containers, never aluminum or iron. You will need one container per color, that are deep enough to completely cover an egg, and also wide enough to be able to get the egg back out of the dye bath
Strong Dye Recipe for coloring eggs by methods other than dipping
1/8 teaspoon food color powder (.65 ml.)
(or 1 to 2 teaspoons liquid food color)
1 Tablespoons vinegar (with 5% acidity) (15 ml.)
1 Tablespoon water (15 ml.)
Dilute food color in 1 teaspoon vinegar, then add remaining vinegar and water. Be sure to put the mixture in glass, plastic or stainless containers, never aluminum or iron. If you are going to do a lot of colors, you will need a lot of containers that can hold small amounts but won’t tip over easily.
A dye bath is the simplest way to color hard boiled eggs. Mix several colors using the above recipe, and dip the eggs into the dye bath. The longer it is left in the dye bath, the darker the color will be. For example, an egg dipped in red without leaving it in the dye bath will make a pink egg, but if you leave it in the bath for several minutes, it will turn a dark red.
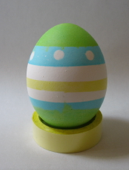
A simple dye bath may be exciting the first time to try it, but may leave some kids longing for more exciting designs. A fun way to add designs to the eggs is to put stickers, tape, or rubber bands on the eggs, and then dipping them in different colors of dye, adding or taking off stickers for each new color. Don’t put it in too many colors, though, or it will turn brown (especially red and green.) If you dry the egg with a kleenex after each color bath, you can immediately dip it in a new color, without having to waiting for it to drip dry.
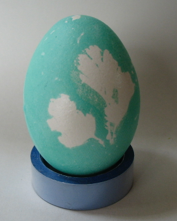
Another way to add designs to dye bath eggs is to coat flowers and leaves in oil, stick them on the egg, then slip the egg into the toe of a stocking and tie it shut. Dip the whole thing in the dye, and when you take off the stocking and leaves, a stenciled image will remain.
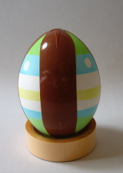
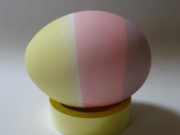
If you don’t put the egg all the way down into the dye, you can dip the two ends into two different colors, and even turn it sideways and dip it in more colors. Just be careful not to let your fingers touch the dye, or it will leave a mark on the egg.
One of the easiest ways to get a wild design on the egg is to put dots of strong dye on a small piece of damp cloth, then wrap it tightly around the egg--using plastic wrap to keep your hands clean, of course. Each time you open the cloth, a totally different design emerges. You can use the cloth on a second egg for a lighter version, then you need to add more dye for the next egg. To get the dye on the cloth, stick a straw into the dye, put your finger over the other end of the straw, but don’t let go until it is over the cloth, or you will have a mess to clean up! DO NOT tip the straw, or the dye can dribble out before you are ready.
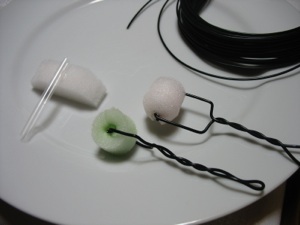
A fun way to make designs on eggs is to make rollers, and roll the strong dye onto the eggs. This is not nearly as complicated as it sounds. Cut strips of sponge, glue a plastic straw to the middle of each strip, then trim the ends and glue them together. (A glue gun makes an immediate bond.) Then bend a wire to form a handle. It really only takes about 5 minutes to make one, if you have the supplies on hand. Make a roller for each color, or just rinse out when your kids want to paint with a new color.
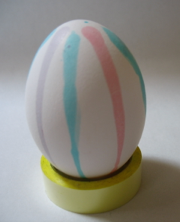
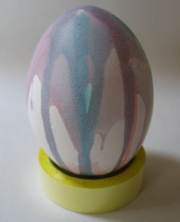
Dribbling drops of dye over the egg can create interesting designs. You never know exactly where the trickle is going to go--sometimes straight, and sometimes curvy. Just use a straw to pick up a few drops of dye by dipping the end of a straw into the dye and putting your finger over the other end. Move the straw over the egg, and when you take your finger off the straw, the dye will pour out over the egg. DO NOT tip the straw, or the dye can dribble out before you are ready. Keep the dye in the container shallow so that not too much dye can be picked up at a time.
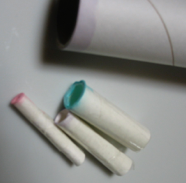
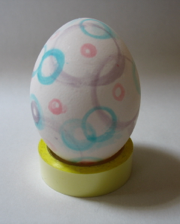
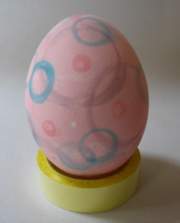
“Paint” circles on your eggs with cardboard “straws” made out of thin cardboard, such as cereal boxes, or toilet paper tubes. Wrap the cardboard around various diameter objects, like pencils, pens, or bottle caps, and tape them. Remove the item that you used to make the straw, and dip the end of the straw in strong dye. If you twist the straw back and forth, it makes a better ring than if you try to use it like a stamp. It also makes better circles once it gets a little soggy. Dab the circle with a bit of kleenex to wipe up any extra drips before making your next circle.
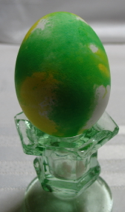
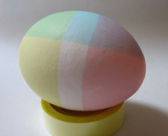
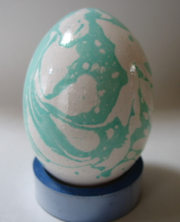
Pour a few drops of oil on the surface of the dye bath, and mix it with a spoon just before you drop an egg in. The oil swirls will protect that part of the egg from the dye, and will form a swirly pattern on the egg. After you pull the egg out, wipe the oil off with a dry kleenex.
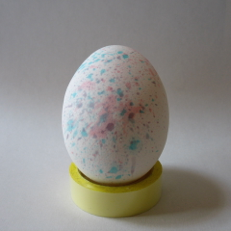
Spatter paint your egg by dipping a toothbrush into the strong dye and drag a toothpick or skewer along the bristles of the toothbrush to spray the dye onto the egg. Make sure you protect surrounding areas such as doing this in a large pot, or cardboard box that has one side cut off.
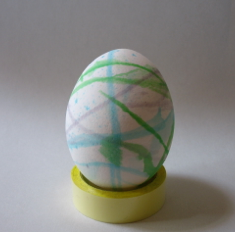
Decorate your egg using cotton string. Tape both ends to form handles, and get it wet before you dip it in the strong dye. Then let the kids wrap the string around the egg any way they want.
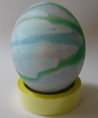
If you want a really wacky way to decorate the eggs, spin them in a bowl on a lazy susan (sold at many 100 yen stores.)
Here are some tips:
1. Put a small bowl on the edge, not center of the lazy susan, or the egg won’t roll
2. Put a damp paper towel under the bowl if it slides
3; Drip 2 colors of strong dye on the ends of the egg because they seem to remain white if you put the drips in the middle of the egg. Use a straw dipped in the strong dye, then put your finger over the opposite end, and release your finger once it is over the egg. DO NOT tip the straw, or the dye can dribble out before you are ready.
4. Cover the bowl with plastic wrap to guard against splatters and runaway eggs
5. Spin the lazy susan back and forth rather than around and around to get the egg spinning, and the dye spattering
How to hard boil an egg
Put eggs in a single layer in a sauce pan and fill with cold water to one inch above the tops of the eggs. Bring to a boil, then turn off the heat, cover, and leave for 24 minutes. Pour out the hot water and cool them down with cold water. Dry off, and they are ready to be dyed.
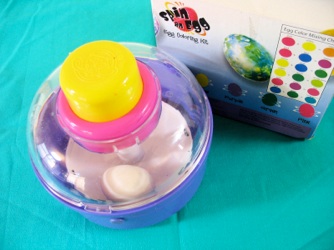
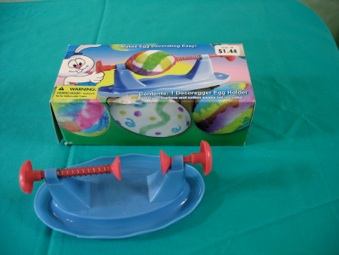
These are two fun gadgets, if you can find them (both sold at Walmart):
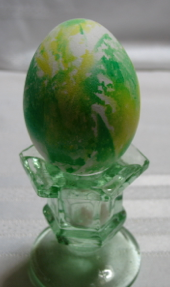
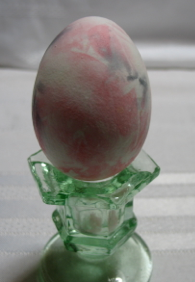
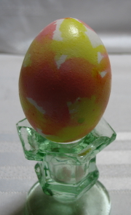
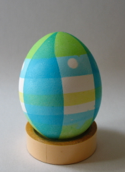
This stand is really handy for holding the egg while you paint. It has a suction cups so that it doesn’t slide around on the table.
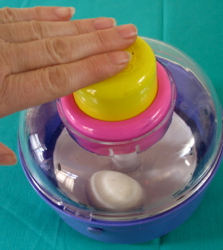
The spinner is a really fun way to dabble paint onto the eggs--just push the big yellow button and watch it spin.
Seasons > Easter > Activities for the Home > 10 ways to decorate hard boiled Easter Eggs