


Seasons > Easter > Activities for the Home > 10 Easter crafts for kids
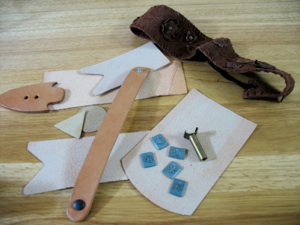
Make a leather pouch or wallet for an Easter decoration. It can be a reminder to not follow Judas’ example--to let desires lure them from following Jesus. Craft stores and toy stores sell leather sets that come with stamps to hammer designs into the leather. If a pouch is too hard for your children to make, they could decorate a strip for a bookmark or bracelet--wet the leather and hammer in a design with a regular screwdriver and Philip’s screwdriver. If you can’t find leather, make a pouch out of cloth instead.
Most of these crafts were inspired by the events in the last week of Jesus life on earth. If the samples don’t look professional, that’s because they are kid-made.


Seasons > Easter > Activities for the Home > 10 Easter crafts for kids
Egg candles are a fun switch from the real thing. There are different ways to decorate them--These are decorated with cut-outs from thin sheets of colored wax that are simply pressed onto the candles. It works on any candles, not just egg shaped ones. Another way to decorate egg candles is to dip them into different colors of melted wax to get gradient colors. The egg candles and thin sheets of wax can be ordered from the Hearthsong company. Or you can make your own by cleaning out real eggs and pouring melted wax into them (from candle stubs, if you want--just use one of the wicks from a melted candle) Melted wax can easily catch on fire, so either melt it over a low heat source such as a warming plate, or do it in a double boiler--I just stick empty tin cans in a saucepan of water. Melting wax requires adult supervision. These eggs were decorated by my children when they were in elementary school. If you want it to look like an adult made it, you can buy pre-made cut out flowers to press onto the candles--they will look pretty, but there won’t be much creativity going on!
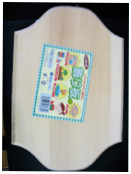
Paint Easter scenes on a triptych. If these triptychs look too complicated for your children to make, think again--these were painted by my children when they were still in elementary school. They did look at Bible story books to help them paint the pictures. It does take more than one afternoon to finish, but it is worth it--my youngest is in college, and we still use these as Easter decorations every year. I bought the unfinished triptychs at an American craft store, but if you are not afraid of a saw and screwdriver, you can buy wood at the 100 yen store, cut it and screw hinges on.
The 3 scenes on the inside of these triptyches depict Jesus’ death, resurrection, and ascension. The scenes on the outside depict the triumphal entry, the last supper, and the great commission.
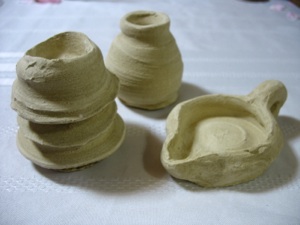
Make an oil lamp. These were made out of air drying modeling clay (kaminendo). Olive oil burns very well with wicks from old candle stubs that you can pull out with pliers before you throw the stubs away--the wicks can be as short as one inch ( 2 cm.). I think my girls made the lamps on the left before they even began first grade, but we still use them every year to light our passover supper. You can buy a child’s potter’s wheel (many American toy stores carry these.) It is quite difficult to get the hang of using it, so it would be best to save the potter’s wheel for when your children are at least in later elementary grades (see child-made and adult-made samples at right.)
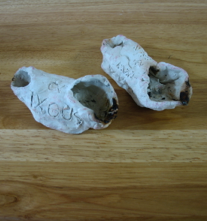
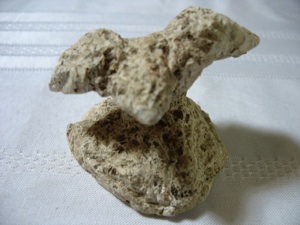
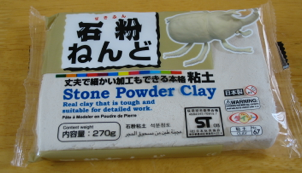
Carve an object representing Jesus’ last week, and use it for Easter decorations (see suggestions below.) Carving can be adjusted to just about any age, depending on the medium used. 4 or 5 year olds can carve a block of oasis (green foam used for flower arrangements) with a spoon and table knife. Elementary aged children can carve a bar of soap, or plaster of paris that was mixed with vermiculite (the sparkly stuff that is used in potting soil) before it sets--they will feel like they are carving “real” stone (see picture on left.) Japanese 100 yen stores also sell a “stone” modeling clay that can be carved after air drying. By the time they are in middle school, they will probably prefer carving wood or real stone. 100 yen stores sell carving tools and small blocks of soft stone for making name stamps (hanko.) The concept of cutting away what you don’t want is a hard one to grasp, so any age would benefit from using oasis for the planning stages of their carving project. Step one: draw the object on paper, Step 2: cut out 2 paper patterns at the same time, and fasten them onto opposite sides of the oasis to help them figure out which parts to cut away. Step 3: take off paper and finish carving object. Step 4: Repeat the process in a more difficult medium. If you happen to have a model to look at, it is helpful, as long as it doesn’t have too many details.
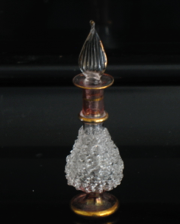
Make perfume --as a reminder of when the woman anointed Jesus’ feet with the expensive perfume, and an example for us to follow, as Jesus deserves our most precious possessions, especially our spiritual gifts. Hearthsong as well as craft stores sell kits for making perfume. Or get a library book to learn how to make it from scratch.
Make child-sized sandals to represent Jesus washing the disciples’ feet--get free carpet samples for discontinued lines, and have child stand on it. Draw an outline around both feet and cut out. Punch 3 holes in the soles and let them string soft cording through the holes.
Advanced--make a tiny pair of sandals for Easter decorations, and as a reminder that we need to be servants, if we are going to follow in Jesus’ footsteps.
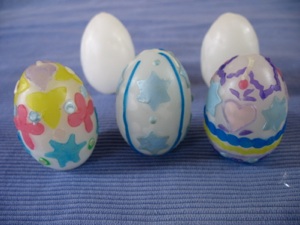
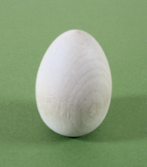
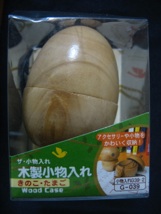
Paint a wooden egg--you don’t have to worry about it breaking, and no one will know it’s not real, unless you tell them. I bought the one on the left at an American craft store. I also bought egg-shaped wooden boxes at a 100 yen store, so keep your eyes open. Some stores will order things for you if you want a bunch.
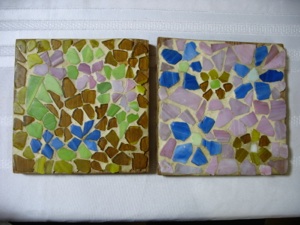
Make a tile mosaic--Although the sample mosaics shown here are flowers, so only subtly reflect the joy of new life in Christ, it can be a more direct depiction of the last week of Jesus’ life, if the picture depicts a scene from the last week. The special thing about mosaics is that it was an art form that was used in the Roman empire during Jesus’ time. I bought glass pieces at a craft store and gave them to my children to glue onto squares of plywood. After the glue died, we spread grout between the glass pieces. We have used these trivets almost every day for the last 10 years. Many 100 yen stores sell tiny colored tiles, and if you can’t find any there, hardware/home improvement centers sell bigger tiles--buy tile nippers to cut the tiles to fit the design. If these materials are not available to you, you can still make mosaic pictures using squares of wood chips or paper, sheet magnets cut into shapes, or even crushed eggshells left over from dying real eggs.
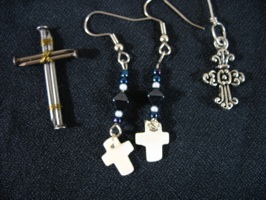
Make cross jewelry with material you can find cheaply. Often you can find crosses and jewelry components at dollar stores (100 yen stores--look at their jewelry, keychains and cellphone straps, and the craft section for making jewelry.) You can just use the parts that you like, and take off the parts that you don’t like. Needle nosed pliers and wire cutters can be helpful in making jewelry. These are also sold at dollar stores (hundred yen stores.)
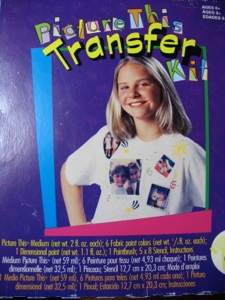
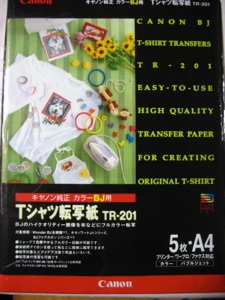
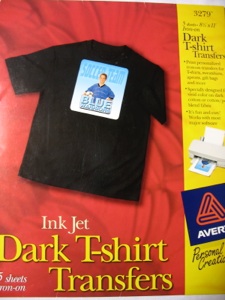
Make a t-shirt to wear as a witness tool. There are many different ways to do this--it can be as simple as buying a T-shirt at a hundred yen store, and drawing on it with markers or fabric paint. You can use a craft kit like the one on the left, sold at craft stores, or you can design one on the computer, print it onto special paper, and iron it on to a T-shirt or canvas bag. If you really like making these, you can make one for everyone in the family, or one for each of your friends.
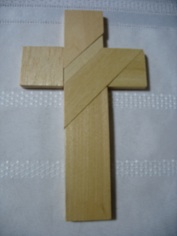
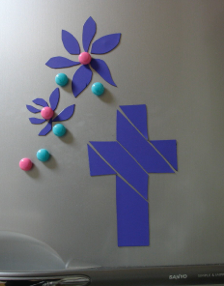
Make a cross puzzle. If your child knows how to use woodworking tools, he or she can make one out of wood. If they know how to use scissors, they can cut one out of EVA foam, or a sheet magnet, and display it on the refrigerator. An even easier method is to cut the pieces out of light weight modeling clay such as Hearty (Karui Kaminendo, sold at 100 yen stores). If the pieces aren’t perfect, don’t worry about it, you can trim them with scissors after they have dried. The pieces could also be cut out of thin cardboard such as cereal boxes. But making the puzzle may be easier than putting it together once it is finished! This looks simple, but it is really hard to figure out how to make a cross out of the pieces provided. So if your children know the trick, and adults can’t figure it out, they feel smart. If you put it away until the next Easter, your child will probably forget the trick, and have to figure it out all over again, so it’s almost as good as making a new puzzle.
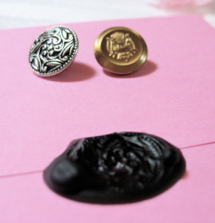
Make wax seals by pressing buttons into warm wax dripped from a candle. Make sure there is a skin of cooled wax over the top before pressing the button into it, or it will be too liquid to make an impression. If you make an Easter garden, your children could seal the grave stone until Easter morning. Another option is to buy sealing wax and a seal with your child’s initial--sold at many stationary/card shops.
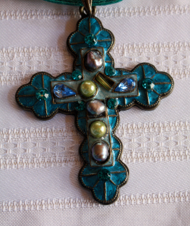
This cross is made out of metal, but a similar cross could be made by dribbling fabric paint onto a wooden or cardboard shape, then press “jewels” into it while it is still wet. The base could be wood, EVA foam, dried modeling clay such as Hearty (Karui Kaminendo) Another option is to a cross shape cut out of a tin can, if you happen to own tin snips. Many American craft stores sell unfinished wooden crosses that could be used as a base.
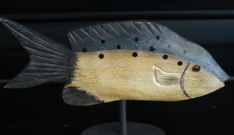
Fish represents Jesus’ two resurrection appearances (easiest project)
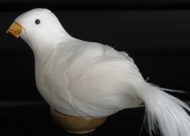
Dove represents the coming of the Holy Spirit at Pentecost ( easier project)
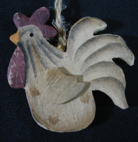
Rooster represents Peter’s denial of knowing Jesus (more difficult project)
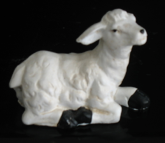
Lamb represents the Lamb of God (most difficult project, easier if lying down)
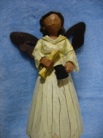
Angel represents the angels who verified Jesus’ resurrection (difficult project)
wooden cross puzzle
sheet magnet cross puzzle and flowers
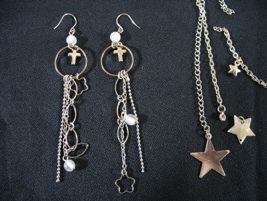
I bought these earrings at a 100 yen store, and took off the parts on the right.
The cross on the left is made by wrapping brass wire around 4 nails. The earrings in the middle were made from beads purchased at hundred yen stores. I also found the cross earring on the right at a hundred yen store.
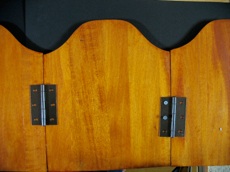
wood and hinges sold at hundred yen stores