


Sunday School or Bible Clubs > Crafts > 4 Pop Up Easter Scenes for Sunday School Crafts
1. Print out one copy per student, both of the background sheet, and the sheet with the pop-up figures. (if you want pre-colored copies for the children, print one copy, color with markers or colored pencils, then make color copies for each student. )
-
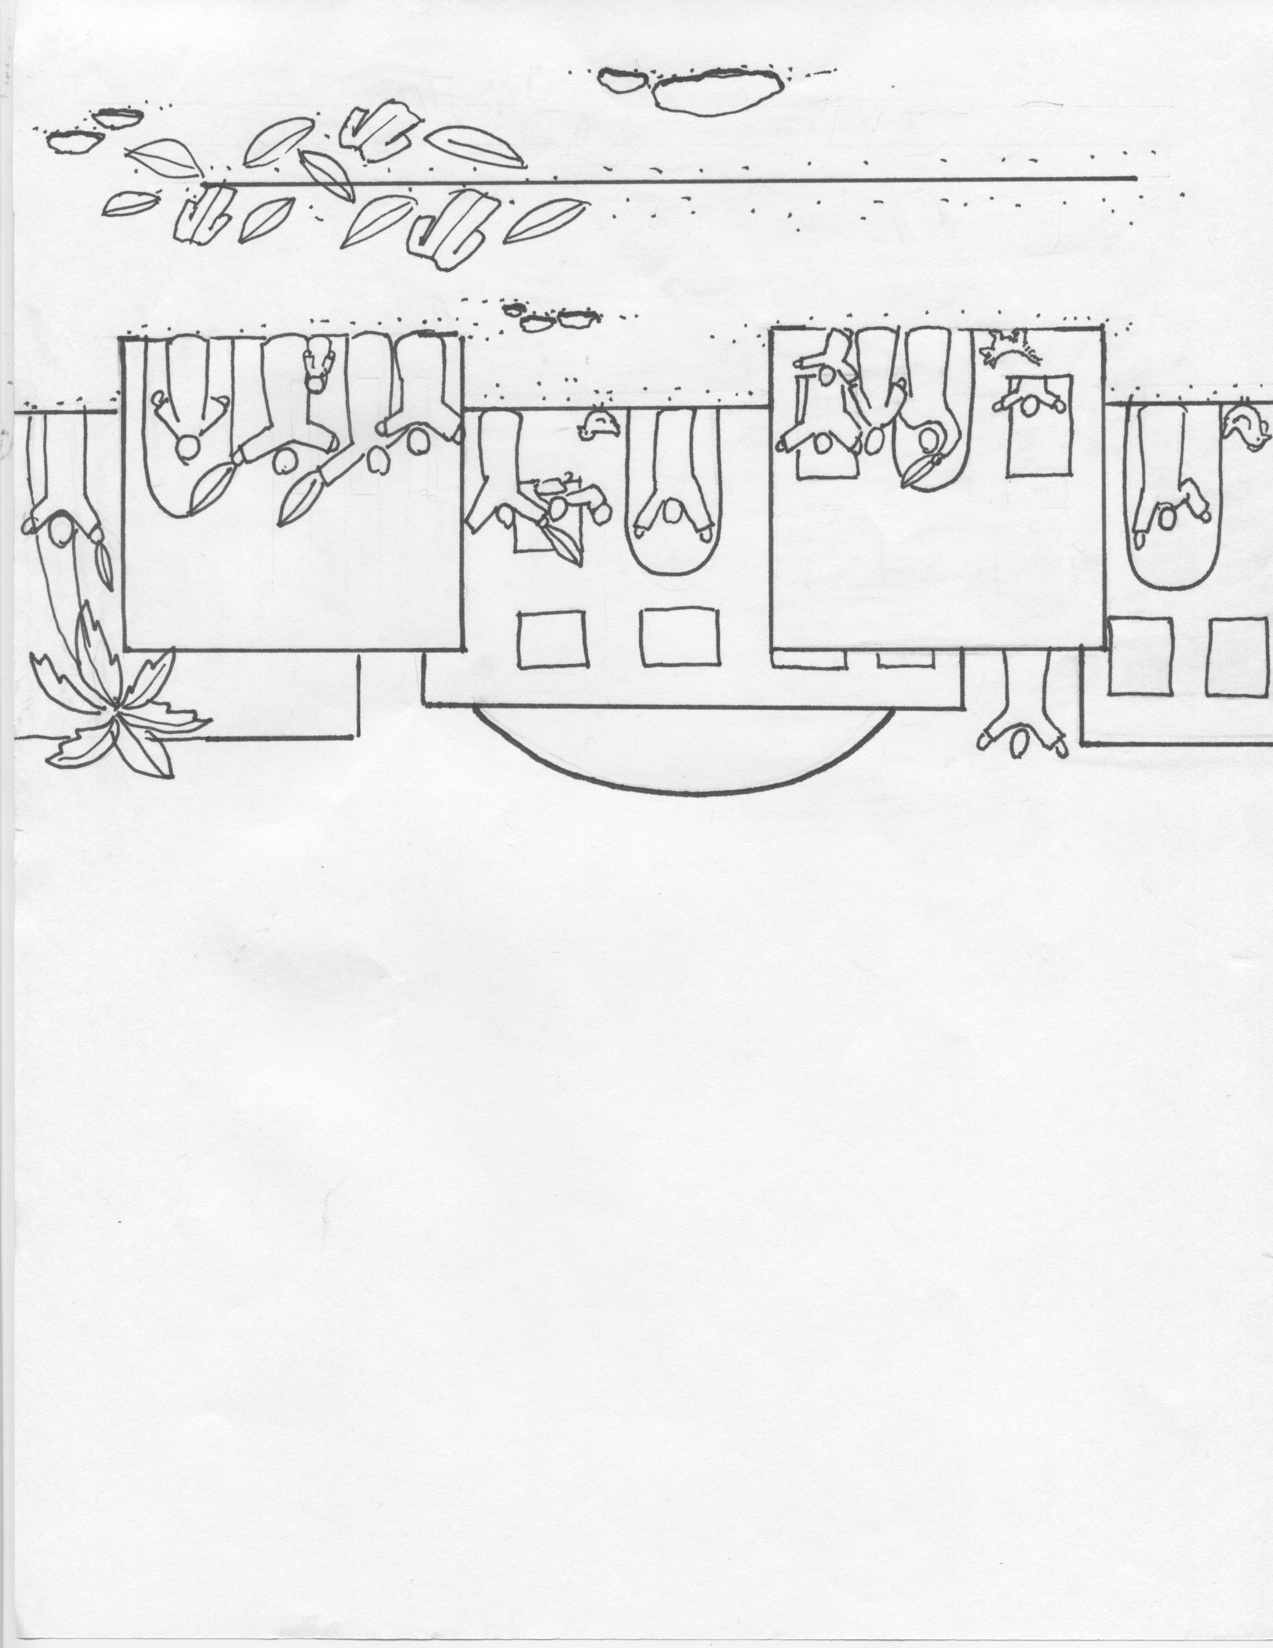
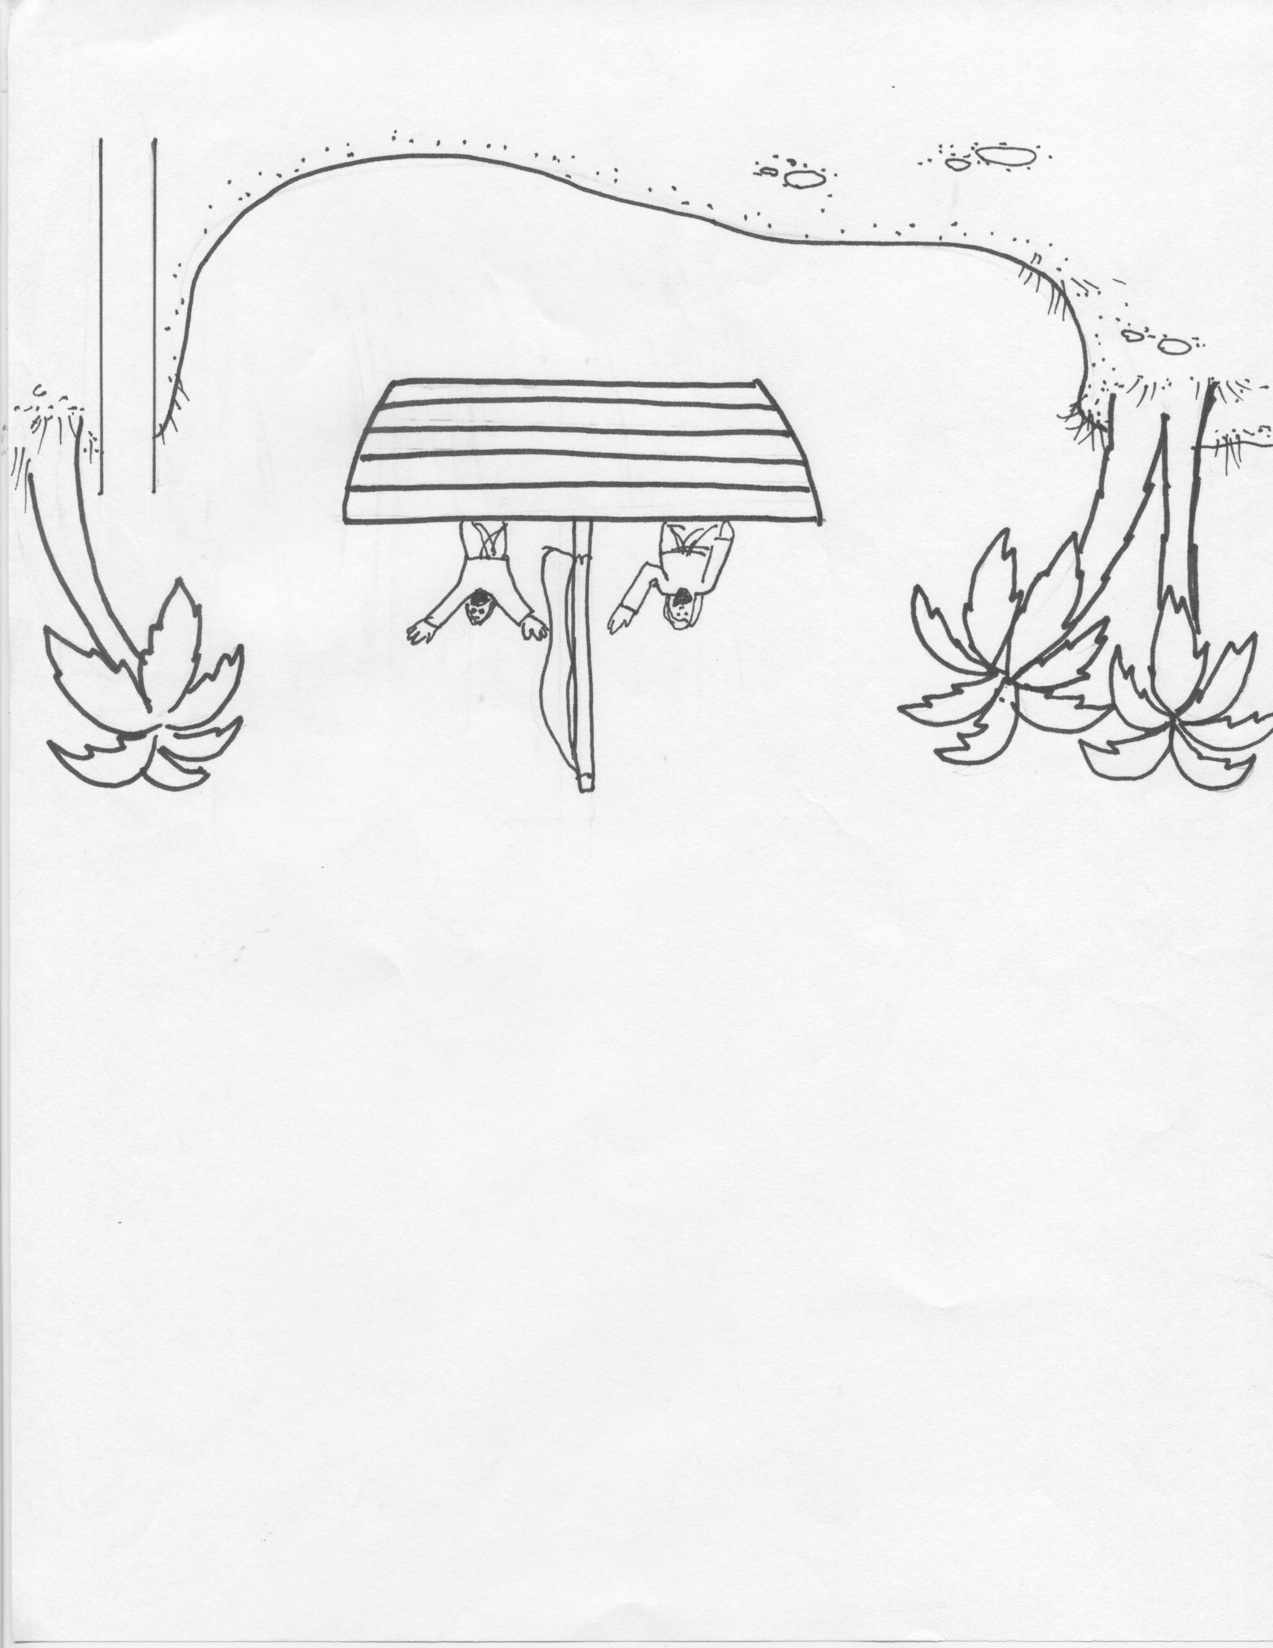
2.Use a box cutter/craft knife to cut both sides of the boat. Also cut the strip to make the Jesus figure stand or have the students cut this strip once the background has been folded. Cut several sheets at once to save time. Use a cutting board or piece of thick cardboard to avoid damaging your table.
-
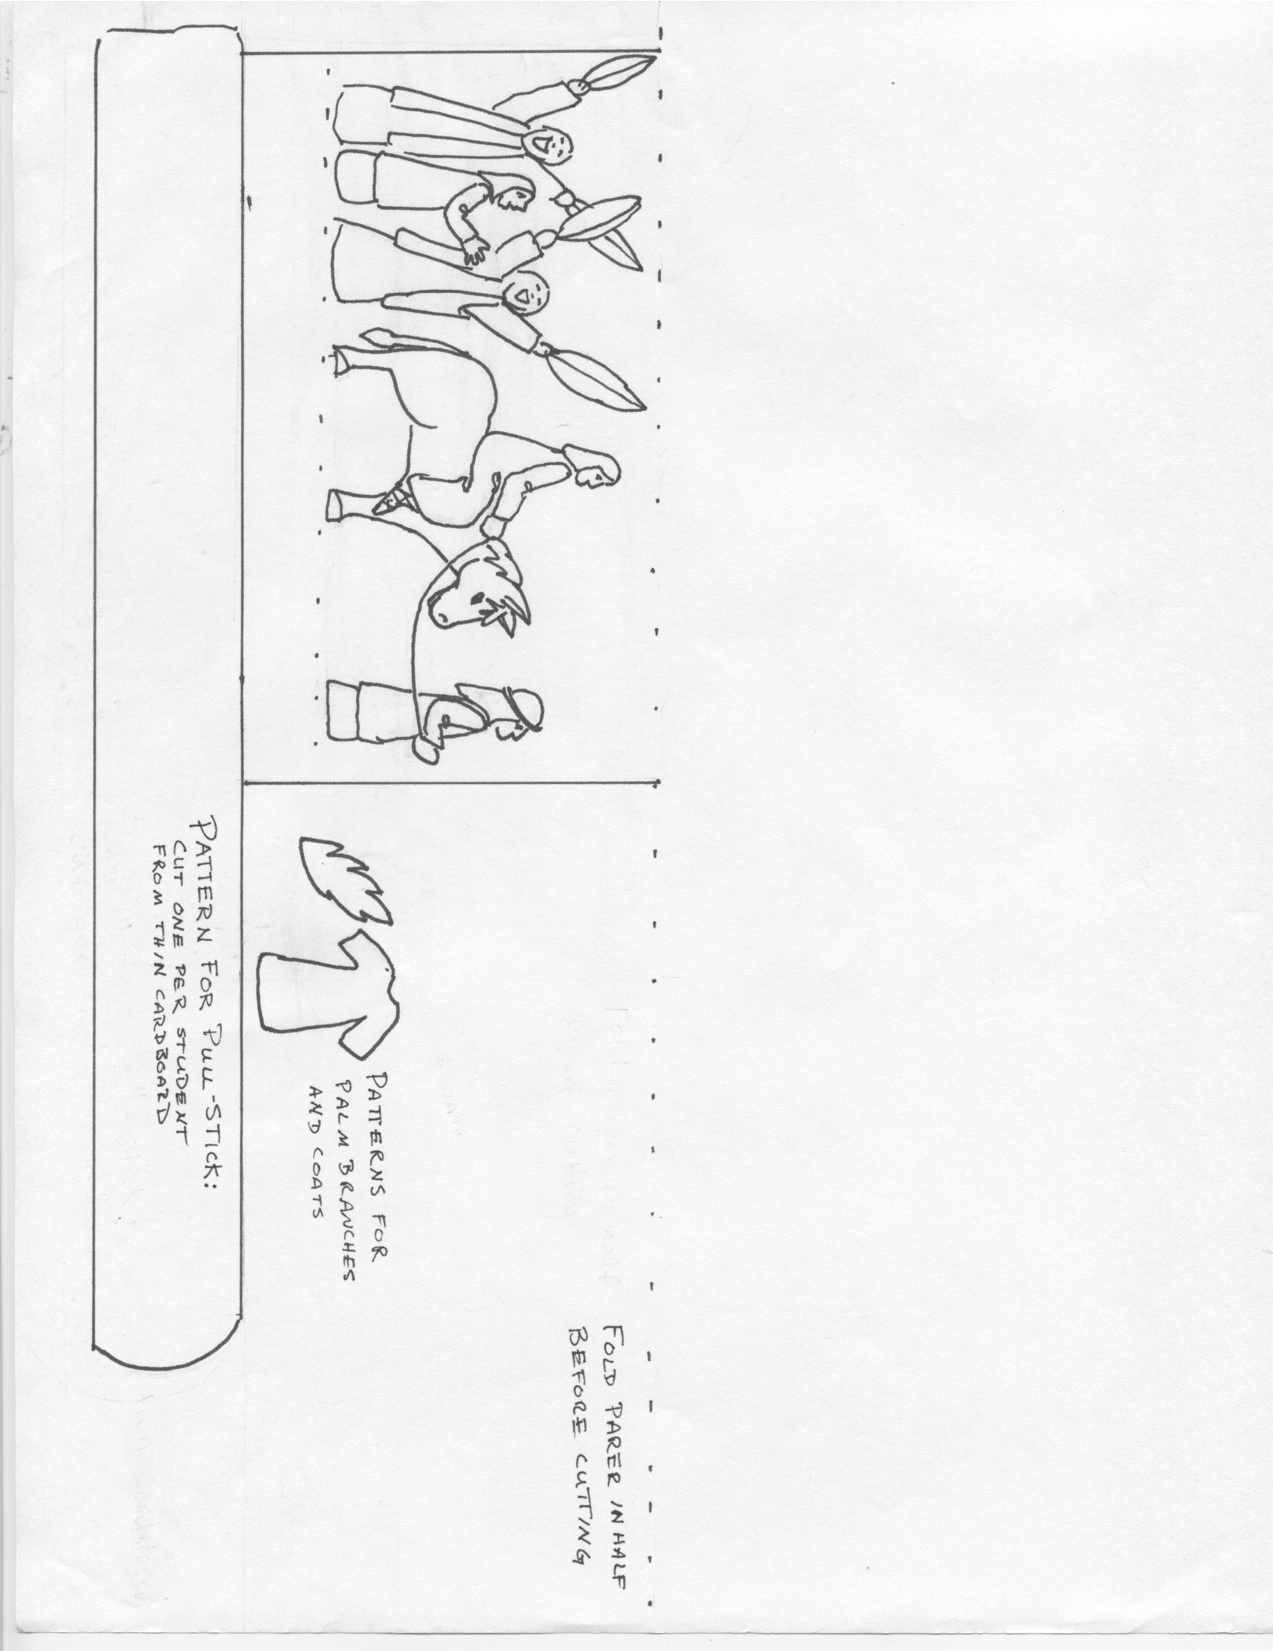
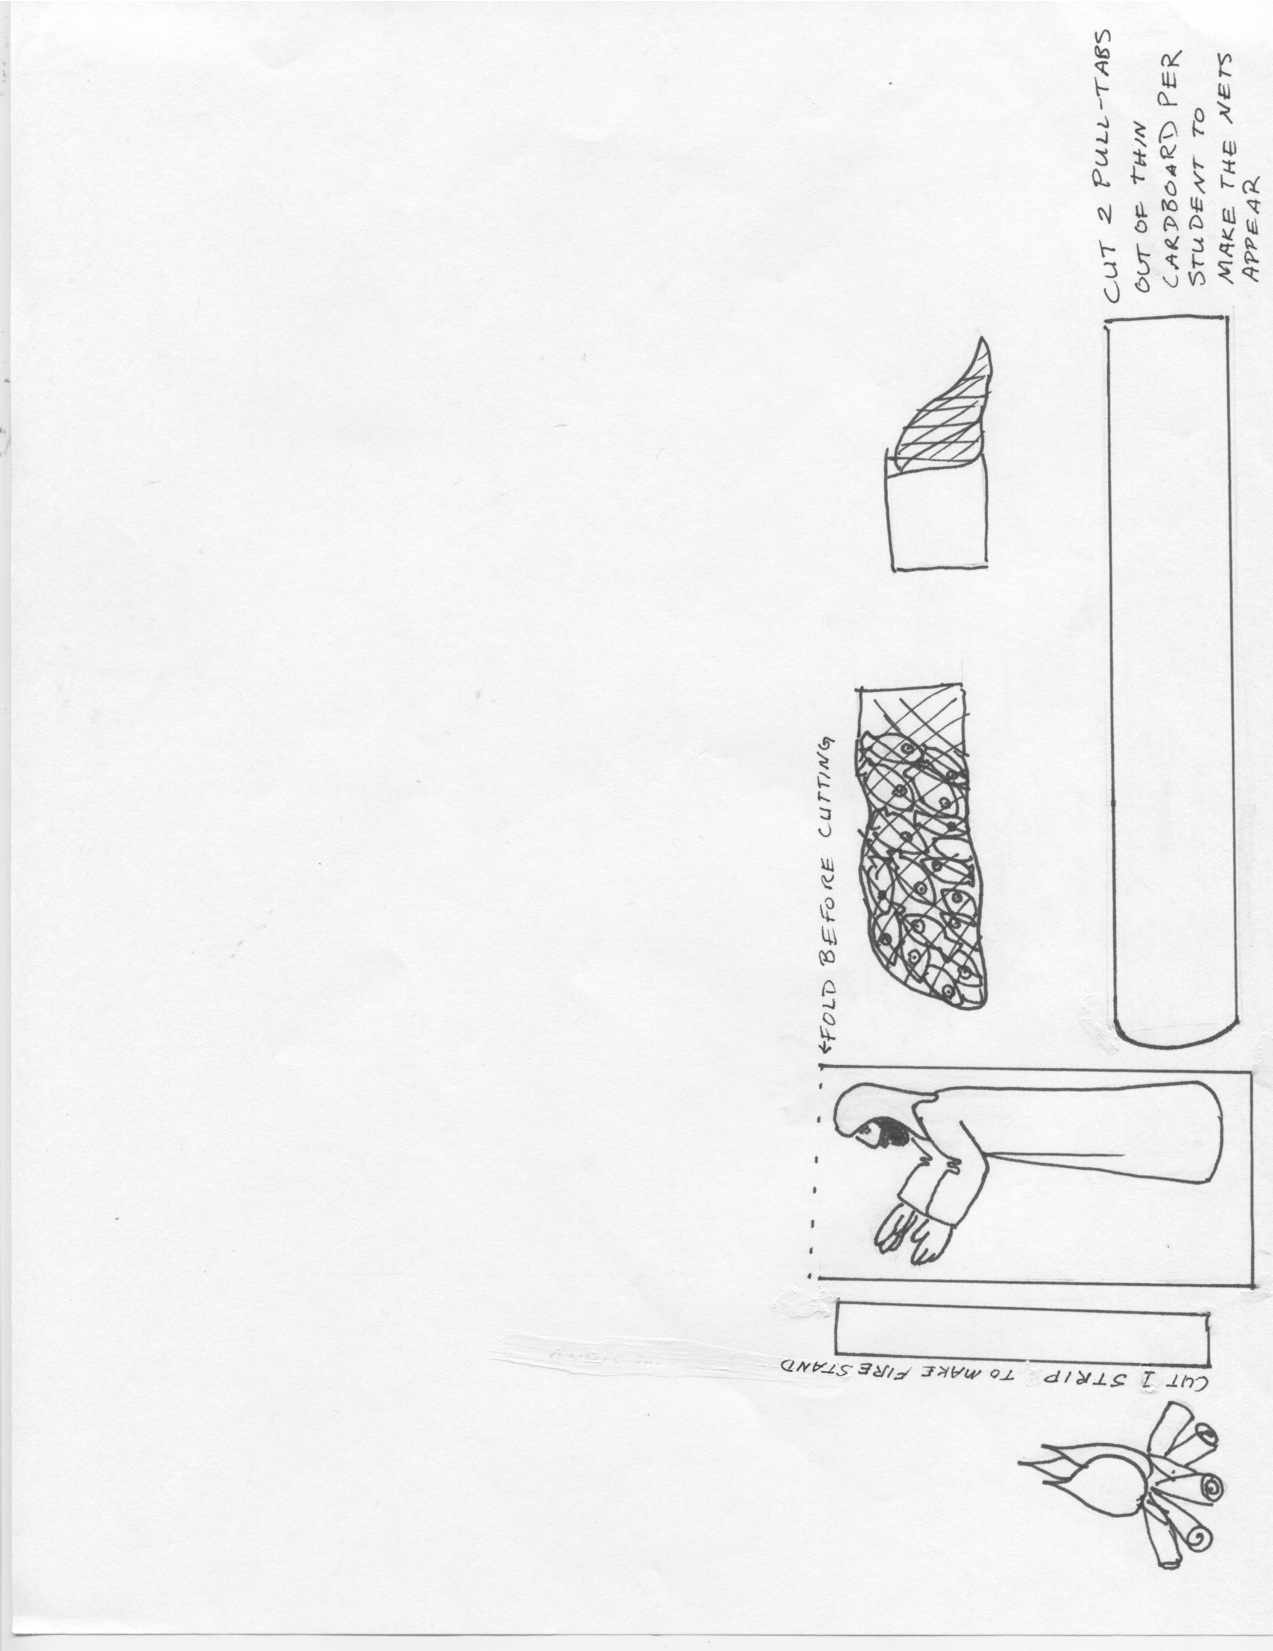
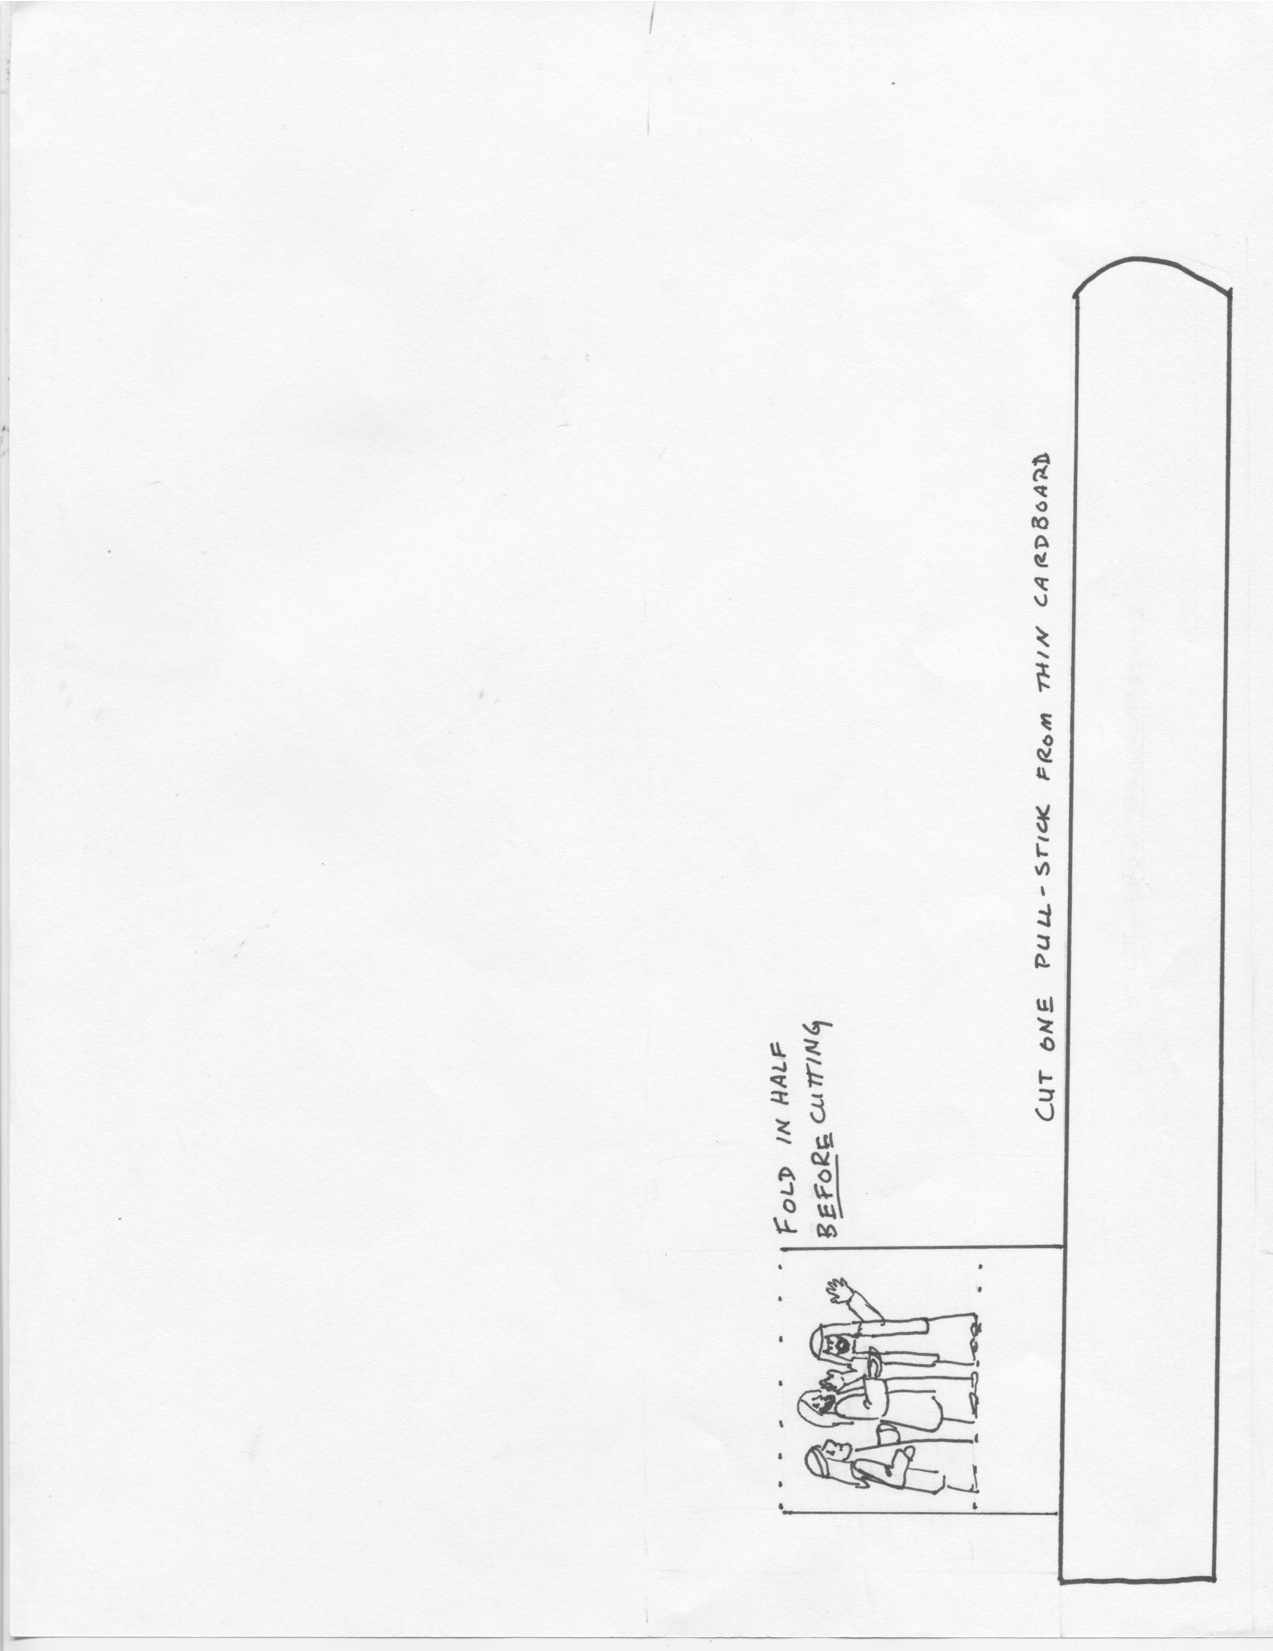
3.Cut two pull tabs per student out of thin cardboard (such as a cereal or cracker box.) See pattern on pop-up figure sheet.
-
4.Students color in the details on both sheets, if you have time.
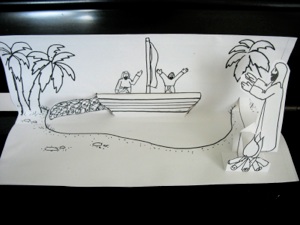
1. Jesus calls to the disciples and asks if they have caught any fish. The disciples reply, “No.” The tab should be in the middle so no net is showing.
2. Pull the right tab so the empty net shows. Jesus tells to the disciples to put their nets on the other side of the boat.
3. Pull the left tab so the full net shows.
How to make it:
5.Fold the background sheet in half so the picture is all on one side, then fold it in half again so that half is the ground, and the other half is a wall in the back.
Note: If you print this on A4 sized paper rather than US letter, you need to fold the page where the drawing ends rather than in half, then cut off the excess paper that sticks out. Also, a bit of the side will not print since A4 is narrower than US letter.
6. Stick your finger through the boat slit on the background sheet and pull the boat forward as you fold the background shut--this should make the boat stand out. Do this for the strip to to the right of the lake to make the Jesus figure stand, as well.
7. Fold the pop-up figure sheet on the dotted line and cut out the figures.
8. Put one cardboard pull-tab between the two layers of the background and glue or tape the empty fish net to the pull-tab on the right side of the boat.
9. Put the other tab to the left of the boat, and tape or glue the full net to the pull-tab on the left side of the boat.
10. When both pull-tabs are in the middle, both nets should be hidden behind the boat.
11. To form the square that makes the fire stand, glue both ends of the strip of paper together to form a ring then fold it flat. Open the ring, and line up the 2 folds and fold it flat the other way. When you open it, the ring should now be a square.
12. Glue the Jesus figure to the strip that sticks out to the right of the lake. Glue the square “ring” to the front of the Jesus figure and ground, and glue the fire to the the front of that square. When you close the scene, the Jesus figure and the fire should fold both flat. When you open the scene, they should stand up.
13. Glue the two layers of the background sheet together, but be sure to leave the area where the pull-tabs slide unglued, or you won’t be able to make the figures move!
1. Print out one copy per student, both of the background sheet, and the sheet with the pop-up figures. (if you want pre-colored copies for the children, print one copy, color with markers or colored pencils, then make color copies for each student.
-
2.Use a box cutter/craft knife and metal edged ruler to cut a slit along the black line. Cut several sheets at once to save time. Use a cutting board or piece of thick cardboard to avoid damaging your table.
-
3.Cut one pull tab per student out of thin cardboard (such as a cereal or cracker box.) This should be at least one inch (2 cm) longer than the background sheet.
-
4.Students color in the details on both sheets, if you have time.
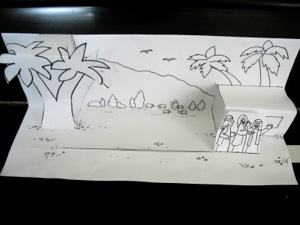
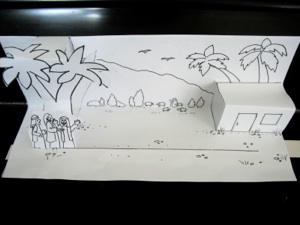
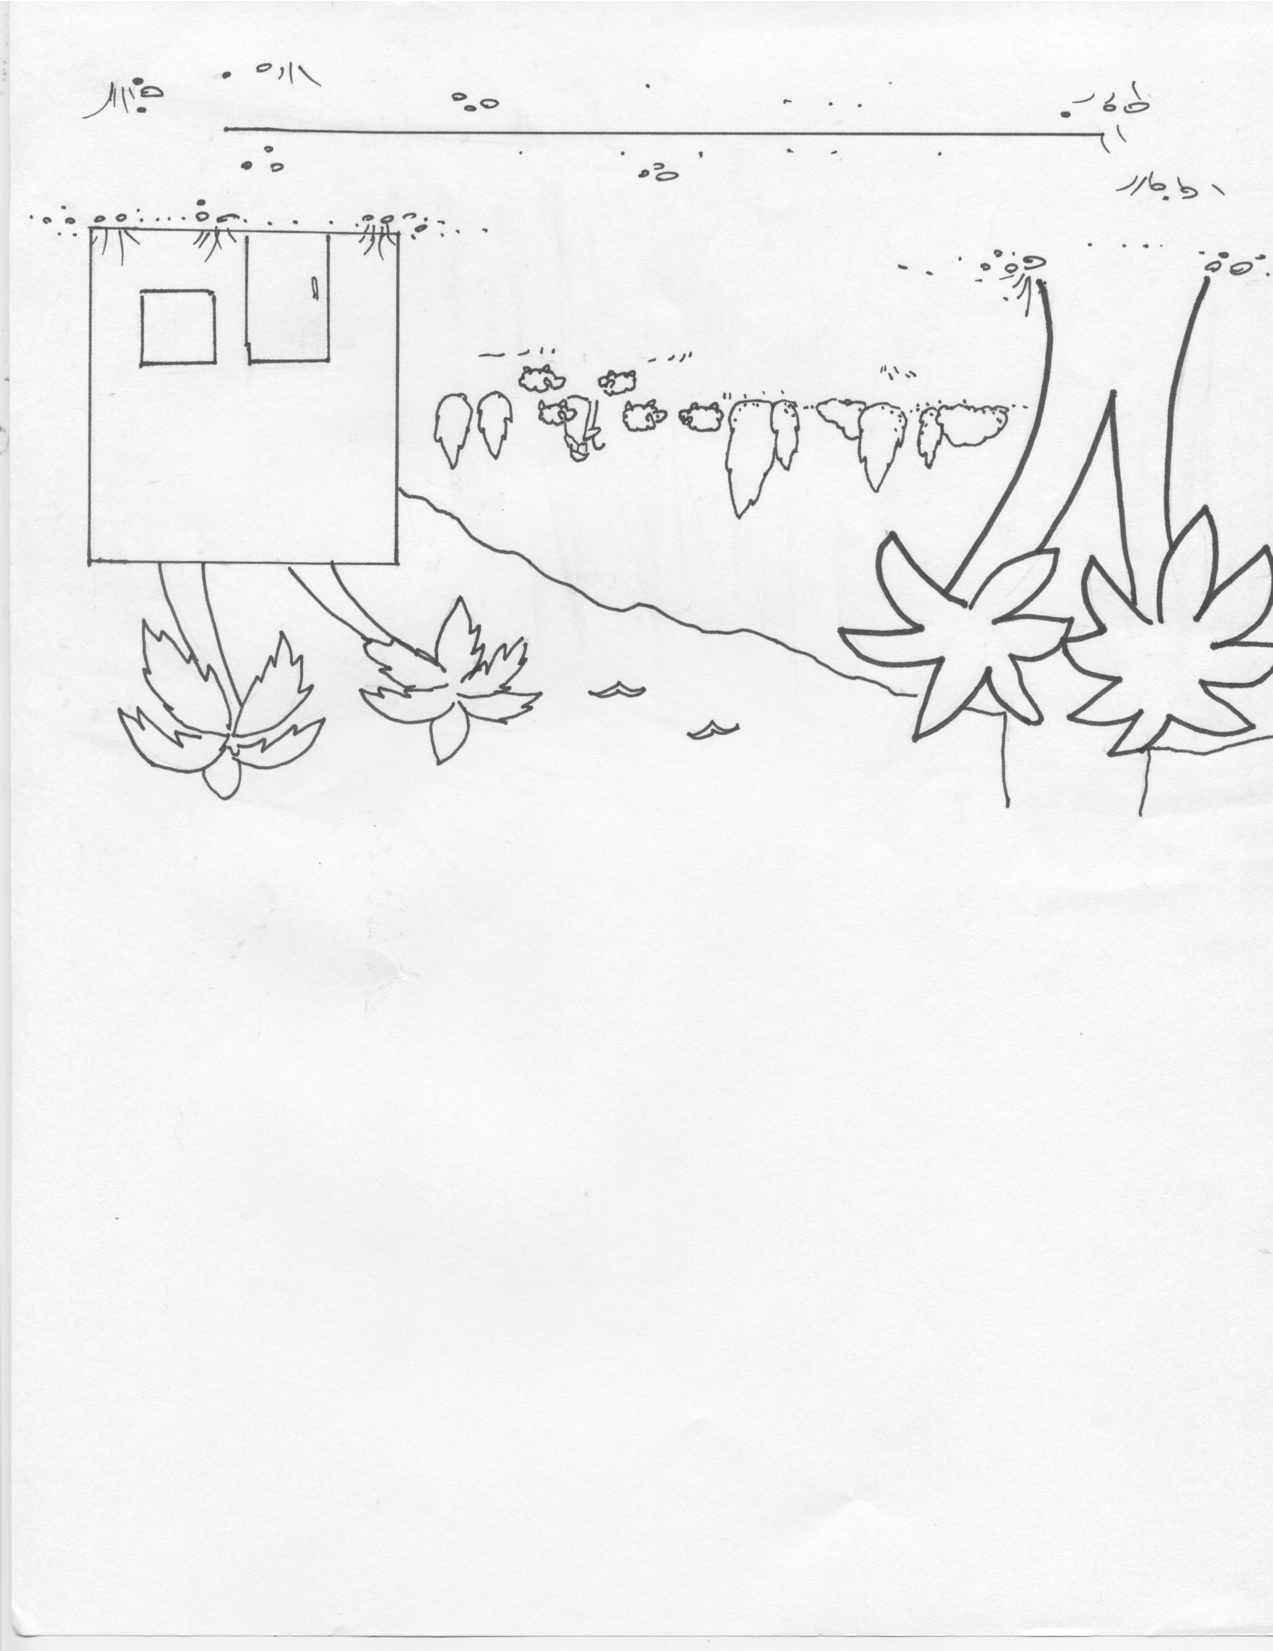
1. Jesus met to the 2 disciples on the Road to Emmaus.
2. Pull the tab to the right to make the disciples move along the road.
3. Pull the tab until the figures are in front of the house.
How to make it:
5. Fold the background sheet in half so the picture is all on one side, then fold it in half again so that half is the ground, and the other half is a wall in the back. Note: If you print this on A4 sized paper rather than US letter, you need to fold the page where the drawing ends rather than in half, then cut off the excess paper that sticks out. Also, a bit of the side will not print since A4 is narrower than US letter.
6. Use scissors to cut the side of the house in the front layer only. Do not cut the top or bottom of the house. Open the scene and stick your finger in the slit on the side of the house. Pull it forward as you fold the scene shut again. When you open it, the house should stand out.
7. Do the same for the tree, if you like.
8.Fold the pop-up figure sheet on the dotted line and cut out the figures.
9. Slide the ends of the figures through the slit in the background and fold the bottom flaps to the side on the back side of the background. The figures should be standing on the ground.
10. Glue or tape the flaps of the figures to the pull-tab between the layers of the background.
11. Glue the two layers of the the background sheet together, but be sure to leave the area where the pull-tab slides unglued, or you won’t be able to make the figures move!
Miraculous Catch: Jesus Told Put Them to Put Their Nets on the Other Side
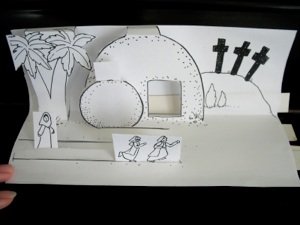
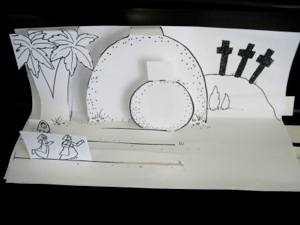
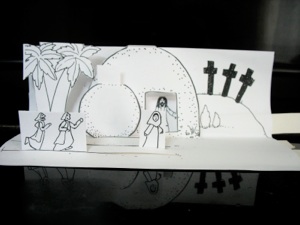
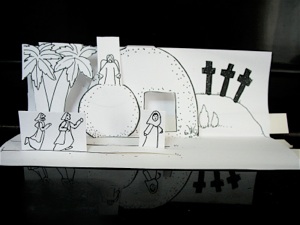
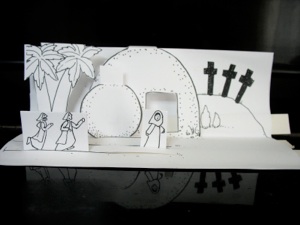
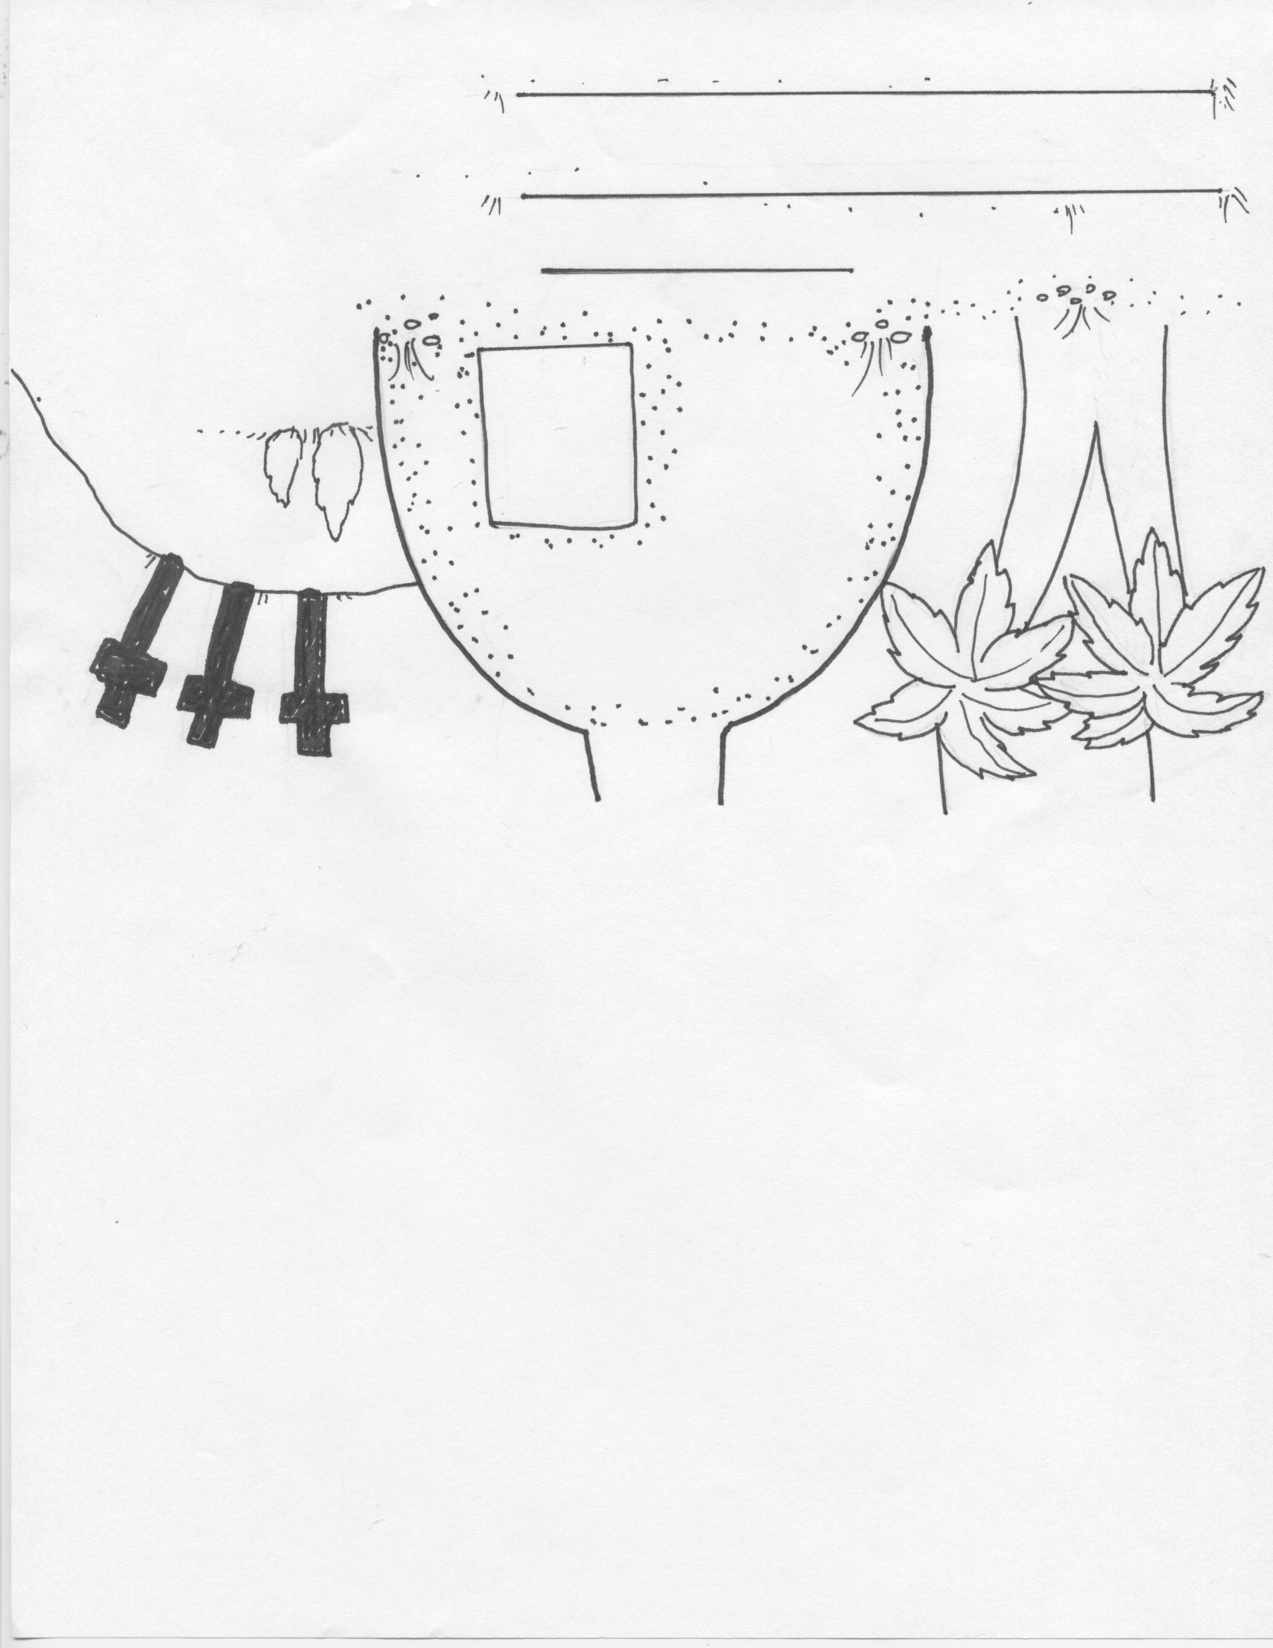
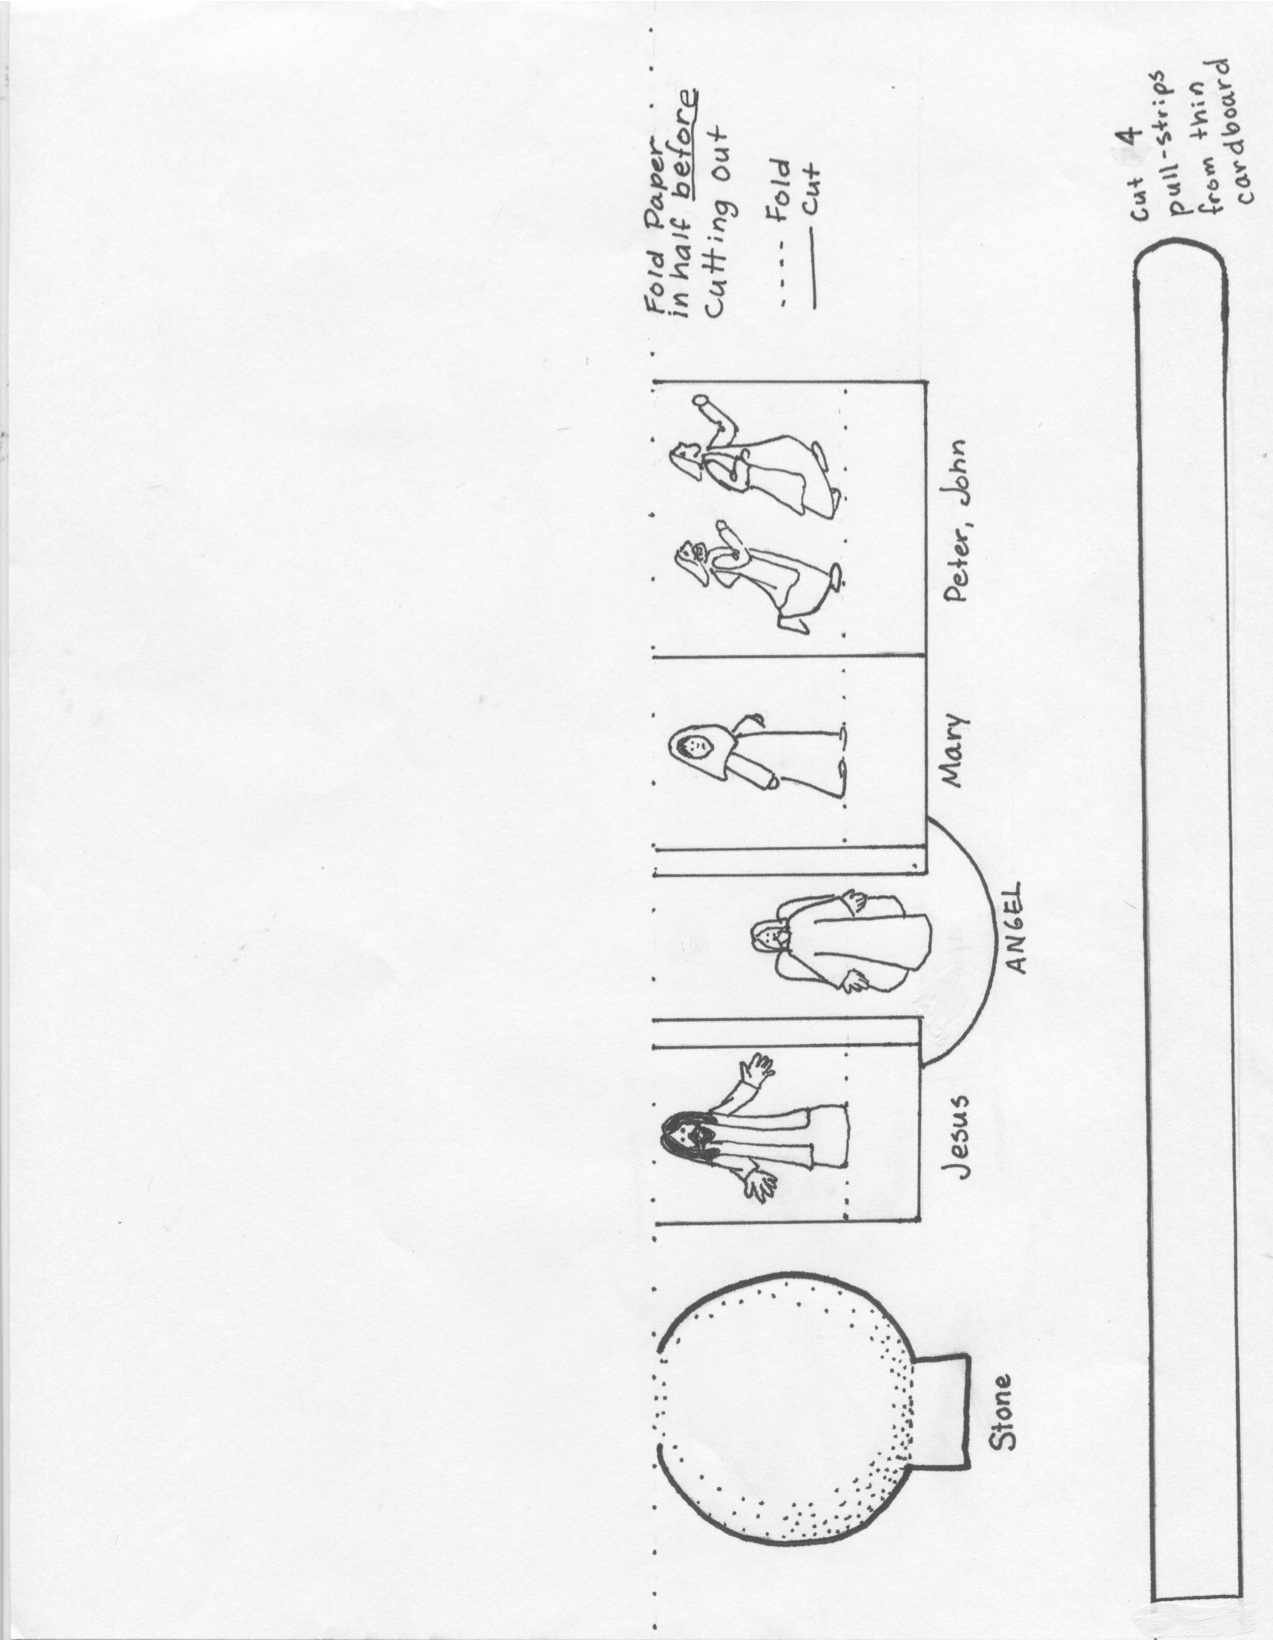
Resurrection: Jesus Appears to Mary, and Peter and John see the empty grave
1. Print out one copy per student, both of the background sheet, and the sheet with the pop-up figures. (if you want pre-colored copies for the children, print one copy, color with markers or colored pencils, then make color copies for each student.
-
2.Use a box cutter/craft knife and metal edged ruler to cut slits along the black lines. Cut several sheets at once to save time. Use a cutting board or piece of thick cardboard to avoid damaging your table. Cut out the grave and doorway, too.
-
3.Cut 4 pull-tabs per student out of thin cardboard (such as a cereal or cracker box.) This should be at least one inch (2 cm) longer than the background sheet.
-
4.Students color in the details on both sheets, if you have time.
2. Mary runs to tell the disciples who run to the grave. Move Mary back to the left to the disciples. Pull the disciple’s tab to the right to make them run to the grave.
How to make it:
5. Fold the background sheet in half so the picture is all on one side, then fold it in half again so that half is the ground, and the other half is a wall in the back. Note: If you print this on A4 sized paper rather than US letter, you need to fold the page where the drawing ends rather than in half, then cut off the excess paper that sticks out. Also, a bit of the side will not print since A4 is narrower than US letter. (see left side of the palm branches)
6. Stick your finger in the slit on the side of the grave. Pull it forward as you fold the scene shut again. When you open it, the grave should stand out.
7. Do the same for the tree, if you like.
8. Fold the pop-up figure sheet on the dotted line and cut out the figures.
9. Cut a slit in the top of the grave stone. Slide the angel figure through the slit in the stone so the angel figure is inside the stone, and the tab sticks out above the stone. The bottom of the angel figure should stick out on both sides near the feet so the angel cannot be pulled all the way out of the stone.
10. Slide the ends of each of the figures through the slits in the background and fold the bottom flaps to the sides in between the two layers of the background. The figures should be standing on the ground.
11. Glue or tape the flaps of the figures to the pull-tabs in between the two layers of the background.
12. Glue the two layers of the background sheet together, but be sure to leave the areas where the pull-tabs slide unglued, or you won’t be able to make the figures move!
Note: If you want the Jesus figure to appear outside of the grave, either cut the slit for the grave stone so it “rolls” to the right and the Jesus figure can appear to the left of the grave, or cut the doorway farther to the left so the Jesus figure can be hidden in the grave and appear to the right of the grave.
On the Road to Emmaus
1. Easter Morning, the grave sone is still in place. (three tabs are pushed as far to the left as possible, but the grave tab is to the right.)
2. Push the tab to the left to roll the stone away, and pull the tab to move Mary to the right in front of the grave.
3. Pull the tab on the Grave stone to make the angel appear.
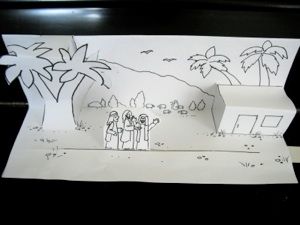
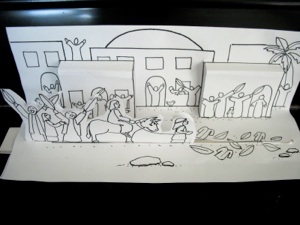
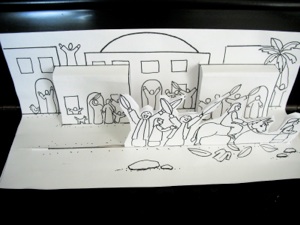
1. The Triumphal Entry for Palm Sunday
1. Print out one copy per student, both of the background sheet, and the sheet with the pop-up figures. (if you want pre-colored copies for the children, print one copy, color with markers or colored pencils, then make color copies for each student.
-
2.Use a box cutter/craft knife and metal edged ruler to cut slits along the black line and the sides of the houses. Cut several sheets at once to save time. Use a cutting board or piece of thick cardboard to avoid damaging your table.
-
3.Cut one pull tab per student out of thin cardboard (such as a cereal or cracker box.) This should be at least one inch (2 cm) longer than the background sheet.
-
4.Students color in the details on both sheets, if you have time.
1. Jesus is riding on a donkey. The tab should be pushed to the far left.
2. The people shout, “hosannah” and put their coats and branches on the ground. Pull the tab to the right to make the figures move down the road.
How to make it:
5. Fold the background sheet in half so the picture is all on one side, then fold it in half again so that half is the ground, and the other half is a wall in the back. Note: If you print this on A4 sized paper rather than US letter, you need to fold the page where the drawing ends rather than in half, then cut off the excess paper that sticks out. Also, a bit of the side will not print since A4 is narrower than US letter.
6. Stick your finger in a slit on the sides of the both houses. Pull it forward as you fold the scene shut. When you open it, the houses should stand out.
7. Fold the pop-up figure sheet on the dotted line and cut out the figures.
8. Slide the flaps of the figures through the slit in the background and fold the bottom flaps to the sides on the back side of the background. The figures should be standing on the ground.
9. Glue or tape the flaps of the figures to the pull-tab in between the 2 layers of the background.
10. Glue the two layers of the background sheet together, but be sure to leave the areas where the pull-tab slides unglued, or you won’t be able to make the figures move!


Matthew 28 account
John 20 account


1. Mary sees the empty grave. Push the tab to the left to roll the stone away, and pull the tab to move Mary to the right in front of the grave.
3. Mary sees Jesus. Move the disciples to the left. Move Mary back to the right in front of the grave. Pull the Jesus tab to the right to make Jesus appear. (See note below for making modifications.)
Sunday School or Bible Clubs > Crafts > 4 Pop Up Easter Scenes for Sunday School Crafts


