


Seasons > Mother’s Day > Ways to Celebrate Mother’s Day > Lipstick Mother’s Day cards for kids to make


What to do if you don’t have brads (paper fasteners)
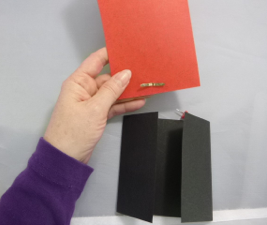
How to make a paper tab to push the lipstick up and down and reveal the message inside
Take the lid off
Push the lipstick up
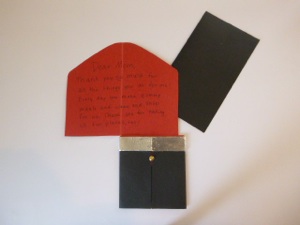
Reveal the Mother’s Day message inside
Make the Lipstick
-
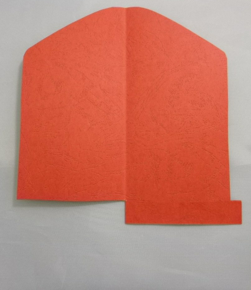
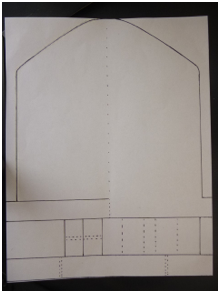
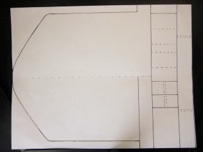
1.Print this dome shaped pattern onto red or pink paper.
-
2.Cut off the smaller pieces and set aside for later (you will not need these if you use a brad (paper fastener).
-
3.Fold the large red shape in half along the dotted line.
-
4.Cut out the shape along the solid line while it is folded.
-
5. Cut the strip at the bottom of this shape ( front side only) as indicated by the solid black line.
-
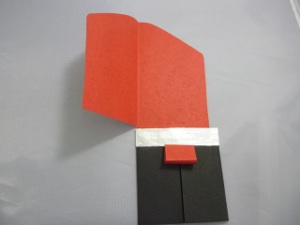
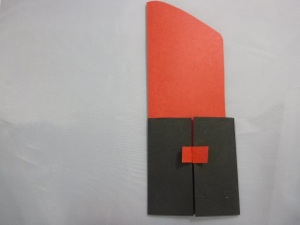
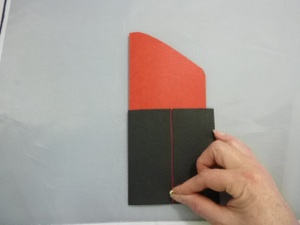
6. Glue this bottom strip of the red lipstick to the back layer (as shown in the photo above). This glued part will remain inside the base of the lipstick tube but the top part will open to reveal the message of the card.
Make the lipstick tube (case)
-
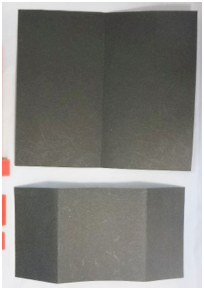
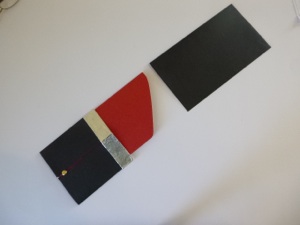
1.Print this pattern sheet on any color of paper that looks like the outside of a lipstick tube. The black lines of the pattern won’t show up on black paper, so If you want to use black paper (as in the photos), print the pattern onto white copier paper, and lay that on top of the black paper as a guide to cut the black paper--cut both at once.
-
2.Cut the black sheet on the solid line--you will have 2 rectangles.
-
3.Fold the longer piece in half along the dotted line. This will form the lid of the lipstick tube.
-
4.Fold the shorter piece so the sides meet in the middle (follow the dotted lines). This will form the bottom of the lipstick tube.
-
5.Glue the top and side edges of the lid. Make sure to only glue near the edges--if your strip of glue is too wide, the lipstick won’t fit into the lid once the glue has dried.
Put it all together
-
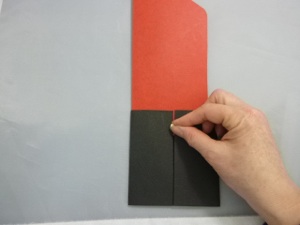
1.Slide the red lipstick part into the shorter black piece that has a slit in the middle.
-
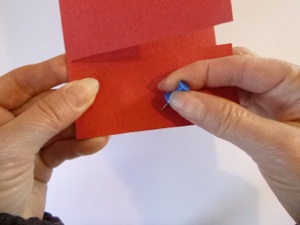
2.Poke a hole in the middle of the red lipstick with a tack, needle, or skewer. Make sure the hole is in the right place--it must line up perfectly with the slit in the black base.
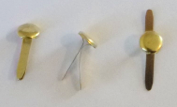
3. Take the red lipstick back out of the base, and poke the brad (paper fastener) through the hole.
4. Spread the 2 legs apart and flatten in the back.
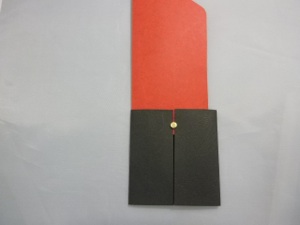
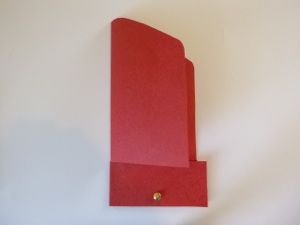
5. Slide the red lipstick back into the black base so the head of the brad is on the outside of the slit in the black base.
6. Use the brad (paper fastener) to push the lipstick up and down.
7. Glue the bottom of the base so the lipstick doesn’t come out of the bottom.
4. Before the glue dries, slide the red lipstick shape into the black base to make sure the 2 small folded pieces are in the right place. Reposition if necessary. The top flaps of the small red pieces should be on the outside of the black base.
5. Cut out the red strip that is on the same row as the smallest pieces.
6. Fold it on the dotted lines indicated. Once folded, it should form a wedge shape. Glue the end of the strip back on itself so it doesn’t come unfolded.
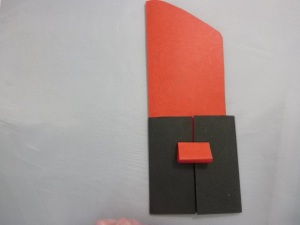
7. Glue the wedge to the 2 small red flaps on the outside of the black base of the lipstick tube. This will make the tab that pushes the red lipstick up and down. But don’t push it until the glue is completely dried!!
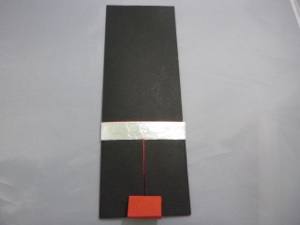
8. Slide the red lipstick down about an inch (2 cm.) to make room for the accent strip, which will also keep the lipstick from coming out of the base.
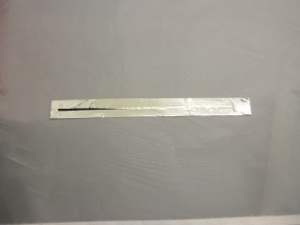
9. Cut the last red strip (the one that is as long as the width of the pattern sheet)
10. Fold the ends so they meet in the middle, following the dotted lines.
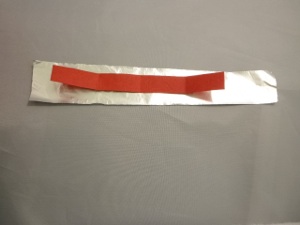
11. Make the accent strip silver instead of red, by gluing tinfoil over the red strip
-
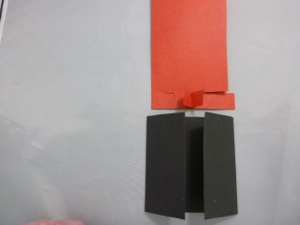
1.Cut out the 2 smallest pieces on the red sheet.
-
2.Fold them along the dotted lines.
-
3.Glue the bottom half of each piece to the middle of the glued strip of the red lipstick. The folded sides of the 2 small pieces should be back-to-back so that they can both slide down into the slit in the middle of the short black base.


11. Glue it to the top of the base with the ends touching in the back.
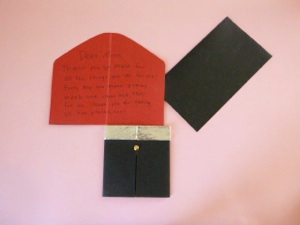
12. Once the glue is dry, write a message on the inside of the red lipstick. Test the card to make sure everything works.
13. Put the cover on the lipstick and give the card to Mom!


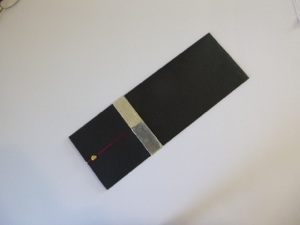
Lipstick Mother’s Day Card
Kids will love the way the lid comes off and the lipstick slides up and down, and mom will love the message they write inside. It looks more complicated than it is--just cut out 4 shapes, fold and glue them, then use a brad to make it all work. There are even instructions for how to make it without a brad, if they are not sold near you.

8. Slide the red lipstick down to make room for the accent strip, which will also keep the lipstick from coming out of the top.
9. To make the accent strip, cut out the red strip that is as long as the width of the pattern sheet, then fold it on the dotted lines so the ends meet in the middle.
10. Make it silver by gluing tinfoil over the strip.


12. Glue it to the top of the base with the ends touching in the back.
13. Once the glue is dry, write a message on the inside of the red lipstick. Test the card to make sure everything works.
14. Put the cover on the lipstick and give the card to Mom!
Seasons > Mother’s Day > Ways to Celebrate Mother’s Day > Lipstick Mother’s Day cards for kids to make