Sunday School or Bible Clubs > Seasonal Sunday School Crafts > Paper Stand-up Nativity Set
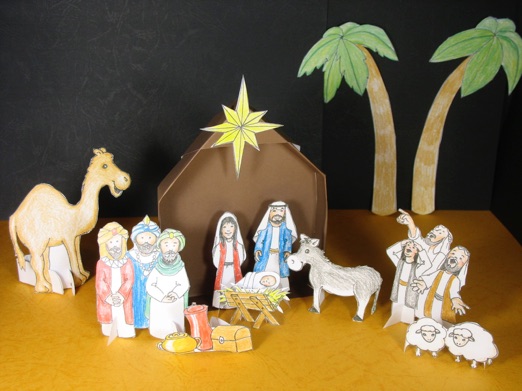
Large Paper Stand-up Nativity Set
-
1.Stable: Print the stable on brown paper and fold as instructed below.
-
2. Figures: Print and cut out the figures as described below.
-
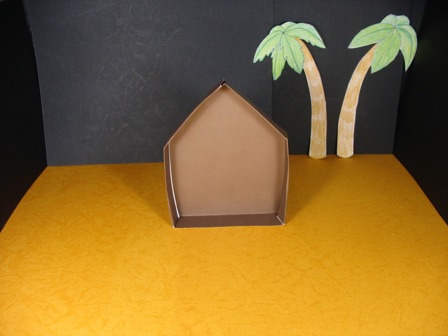
3.Optional background: glue colored paper to the inside of a large cardboard box for the ground and night sky.
-
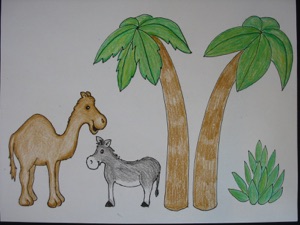
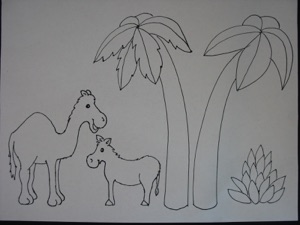
4.Optional background details: Print out the sheet including palm trees, camel, donkey, and plant. Cut out the figures, and glue to the background, or make stands. See the instructions for making stands under “stand-up figures” below. Glue trees to the background or to paper towel tubes. For an even more elaborate nativity scene, print out multiple sheets of background figures.
-
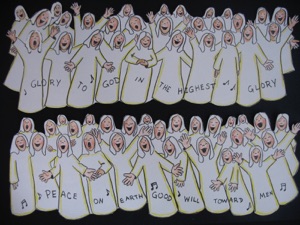
5.Optional angels: Print out the sheet with angels. Cut out the 2 groups of figures and glue to the background sky--put the top row on the left, and the bottom row on the right side of the scene. If you would like to have a “reveal” so lots of angels appear, glue the angels to a flap fastened to the background sky so when you lift the flap, all the angels appear. (make sure the angels are glued on so they appear upright when flipped up!) (Most scenes only have one angel, which only tells part of the story. I spent lots of time drawing lots of angels so you could tell the whole story! See a photo including the angels by clicking on the 12 more options below.)
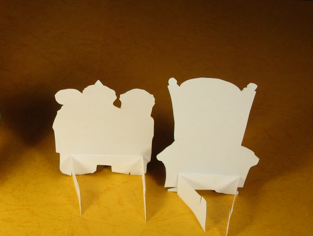
Stand-up Stable
Stand-up Figures
-
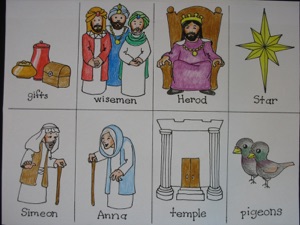
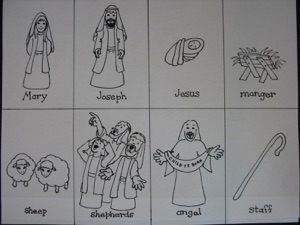
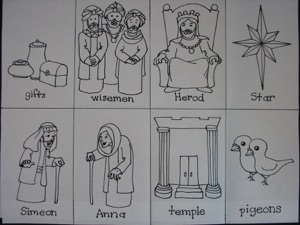
1.Print out the 2 sheets of figures, either the black and white, or colored versions. Color in the black and white version.
-
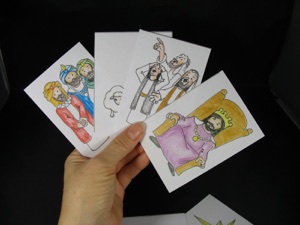
2.Discard the temple, pigeons, and staff. (these pictures are used for a Christmas card game--see 12 more ways to use these downloadable sheets on the right) Cut out all the remaining figures.
-
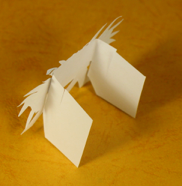
3.Make stands for the figures by cutting strips of paper three times as wide as the figures, then fold in thirds.
-
4.Glue the middle section of the strips against the backs of the figures, then unfold so the figures stand. (fold flat for storage.) If you want the figures to lean back slightly, cut a very thin wedge from the bottom of both sides of the stand.
-
5.The stands for the sheep, manger, donkey and camel should be as tall as the figures (not including the heads), then cut out the bottom of the middle section.
-
6.To put the baby in the manger, cut a slit in each side flap of the stand on the manger for the baby to slide in. (see photos above)
Small Paper Stand-up Nativity Set
Print out the downloadable sheets (shown on right) to make the stable and 3 figures, (Mary, Joseph, and the baby Jesus,) for a craft that gets done quickly. If you want to make a bigger set with wisemen, shepherds and angels, too, see the photo and instructions below.
-
1.Print out, cut and fold the stable (see detailed instructions below.)
-
2.Print out the figure sheet, but only cut out the Mary, Joseph, baby, and manger. For sturdier figures, print on card stock, or glue them to thin cardboard such as a cereal box.
-
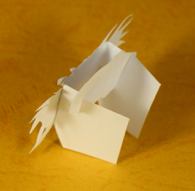
3.Cut 2 strips of paper to form the stands for Mary and Joseph. They should be a half inch wide (2 cm.) and about 3 times the width of the figures. Fold these in thirds, and glue the middle third to the backs of the figures. Unfold, and the figures should stand. Trim if necessary. (see photos below)
-
4.Cut a strip of paper the height of the manger, and three times as wide. Fold it in thirds. Cut out the bottom half of the middle section so it doesn’t show behind the legs of the manger. Cut slits in the top of the stand to slide the baby into so it appears to be in the manger. (see photo of back view above)
-
5.Optional: Cut out the star and glue it to a strip of brown paper and fold it over the top of the stable.


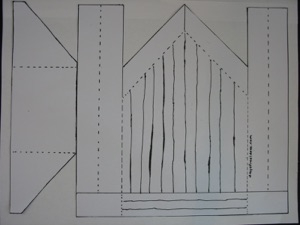
Download stable pattern (works for both U.S. letter (8 1/2 x 11) and A4 paper.) If possible, print on brown paper
Back view of manger and baby
Back view of manger with the baby
Back view of manger
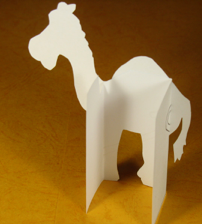
Back view of camel
Back view of the wisemen and Herod

Downloadable Sheets
-
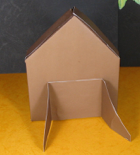
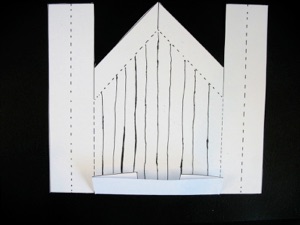
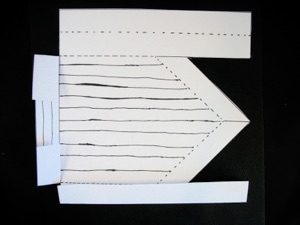
1.Print the stable on brown paper. The stable pictured here is on white paper so it is easier to see.
-
2.Cut out the stable and stand.
-
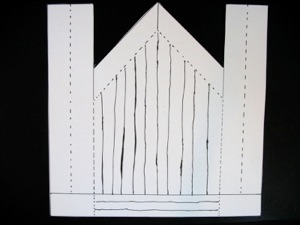
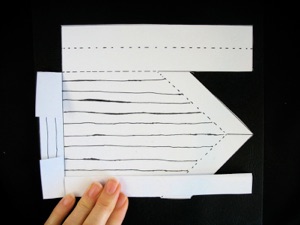
3.Fold the tabs next the “floor boards” on top of the “floor boards.”
4. Fold the floor boards up onto the back wall, then unfold.
5. Fold the side wall on the dotted line.
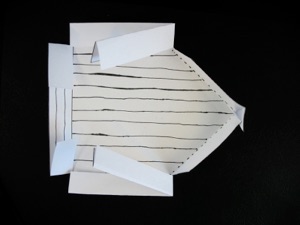
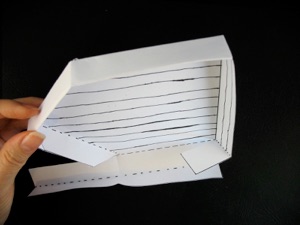
6. Fold the side wall again so it is against the back wall, then unfold one fold. Do this for both side walls.
7. Fold both side walls where the cut ends to form a nice sharp edge for the roof.
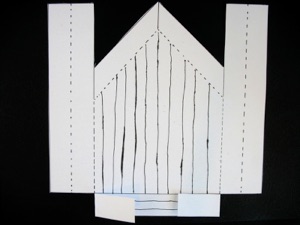
8. Fold both roof flaps flat agains the back wall.
9. Unfold the roof flaps so they are perpendicular to the back wall.
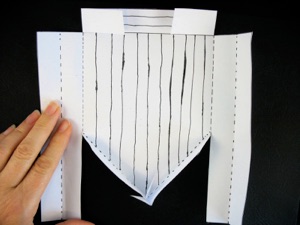
10. Put glue over the whole side wall and fold it over the roof flap and the floor flap.
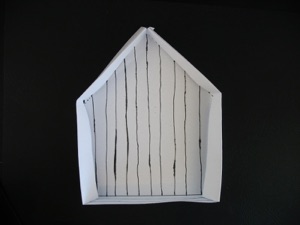
11. Fold both sides in the same way.
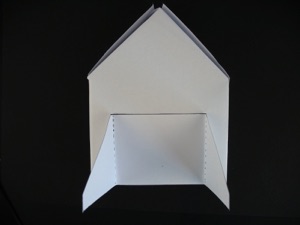
12. Fold the stand on the dotted lines and glue to the back of the stable.


2
3
Sunday School or Bible Clubs > Seasonal Sunday School Crafts > Paper Stand-up Nativity Set