


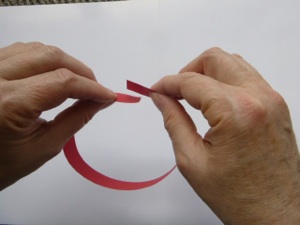
Shape each red strip into a ring and glue the ends.
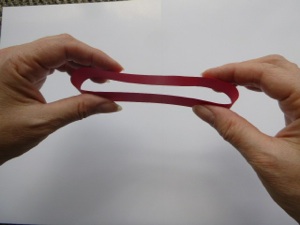
Press all six red rings flat into the basic leaf shape. Make 4 green leaf shapes out of the 4 green strips of paper in the same way as the 6 red strips.
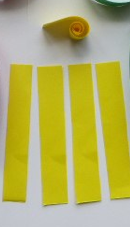
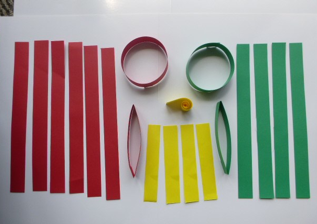
Cut six red strips and 4 green strips from the short side of colored paper. The width of each strip can be anywhere from a half inch to a whole inch (1-2 cm.) Cut 4 yellow strips half the length of the red and green strips.
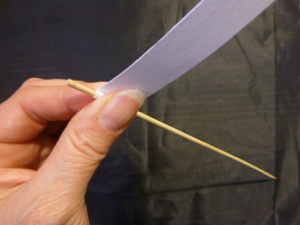
Roll one end of each yellow strip around a skewer, toothpick, or nail.
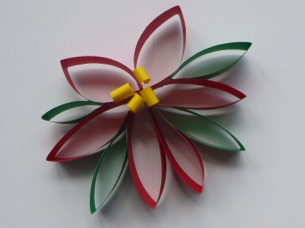
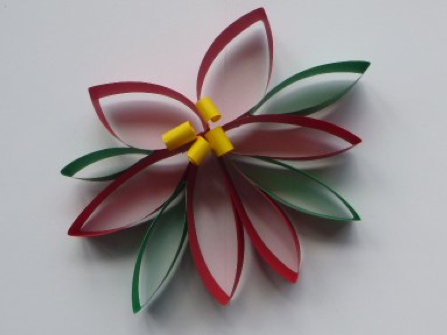
Glue the 6 red leaves to each other. Glue the yellow spirals to the inside of the red leaves, or between the red leaves. Glue the 4 green leaves between some of the red leaves. Glue a loop of string or ribbon between 2 leaves if these will be hung on a real Christmas tree.
Poinsettias are red flowers that are quite popular to decorate with for Christmas in the U.S. The interesting thing about poinsettias is that the red “petals” are actually leaves, and the little yellow balls in the middle are actually the flowers! These paper versions of the poinsettia are not too hard to make.
If you plan for a classroom of kids to make these, cut out strips of paper with a paper cutter ahead of time, then in class, all the kids have to do is fold and glue them. If you don’t have a paper cutter, use lined notebook paper as a guide, but cut on every other line rather than every line, since the strips would be too narrow if you cut every line. Save time by cutting 3-4 sheets of paper at a time with the same effort as cutting one. You do need a good pair of scissors to do this. The sheets of paper do tend to slide, so readjust the sheets after every few cuts.
Crafts > Crafts for Adults by Season > 15 Paper Christmas Tree Ornaments > Paper Poinsettia Christmas Tree Ornament
Crafts > Crafts for Adults by Season > 15 Paper Christmas Tree Ornaments > Paper Poinsettia Christmas Tree Ornament