


Seasons > Easter > Activities for the Home > Easter crafts and decorations to make > How to Make Unbreakable Easter Eggs
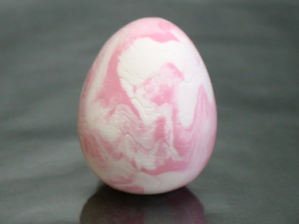


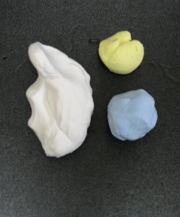
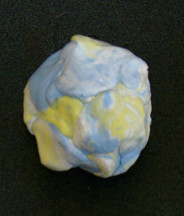
Squeeze two or three colors of clay together, but stop mixing before the colors are completely combine.
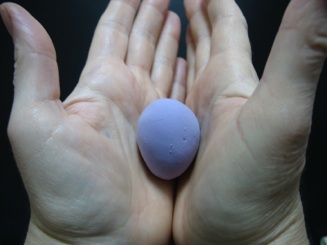
Roll mixed clay into a ball.
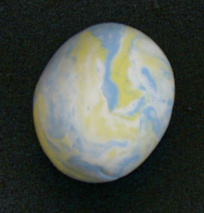
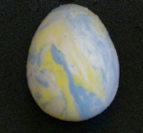
Hold your hands together with palms up, pinky fingers touching. Place the clay ball in your hands and gently roll the ball back and forth until the bottom end of the ball is smaller--an egg shape. Let dry for several days or up to a week.
Make small balls of different colors of clay and smash them flat.
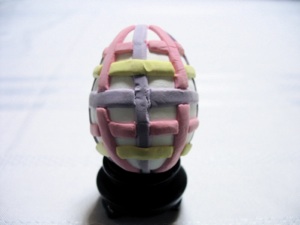
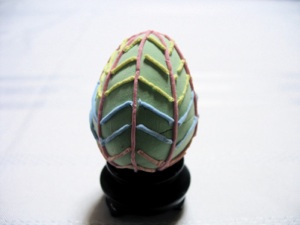
Stack 3 or more colors and wet with a bit of water. Squeegee the layers back and forth to make them stick together better.
Form egg shape as described above. Rolling the eggs so the stripes are vertical is much easier than if the stripes are horizontal because the horizontal stripes tend to separate.


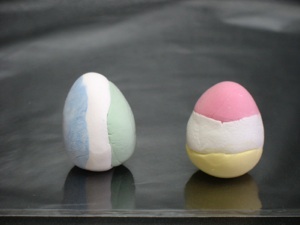
Layered Eggs
Chunked Eggs
This is a good way to use up left over clay from other craft projects. Gently squeeze together several pieces of left over clay (but don’t squish them together as in the marbled eggs above). Roll them into a ball, then into an egg shape (explained above.) The sections will stick together better if you dampen them slightly before squeezing them together. But don’t add too much water, or the clay will become goopy and hard to work with. If that happens, just wait a minute--the surface dries pretty quickly.
If you don’t have clay left over from another project, simply cut different colors of new clay into small cubes and gently squeeze together. Roll into a ball and then into an egg shape.

-
+ =
-
+ =
-
+ =
-
+ =
-
+ =

-
+ =
The trick for making an egg shape is to first roll the clay into a ball, then gently roll it back and forth between your palms to form the narrow end (the narrow end will be on the bottom.)
How to mix colors: if a store near you doesn’t sell pastel colored clay--mix white with each color!
Light weight air drying clay such as Hearty (Karui Kamienendo) is usually sold in several colors at craft stores (100 yen stores.)
Seasons > Easter > Activities for the Home > Easter crafts and decorations to make > Unbreakable Easter Eggs
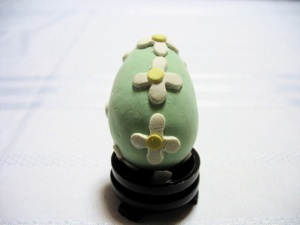
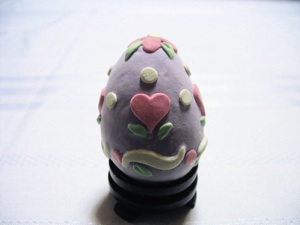
Eggs Decorated with cut out shapes
After making clay eggs, roll out more clay into a thin layer, and cut out small shapes. Wet your finger and rub on the egg, then press the shape onto the egg on the moistened spot. Some craft stores sell various small cutters, extruders and molds for making design elements in clay.
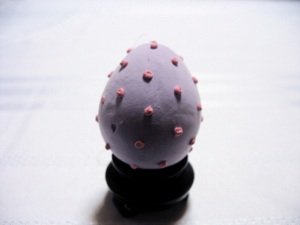
“Icing” Decorations
One of the main problems with this way of decorating eggs, is that it is hard to find cutters small enough to make designs for eggs. Cookie cutters are way, way too big. You can use plastic drinking straws (the right size), but then it is hard to get the clay out of the straw without ruining the shape.
You can also cut out strips of clay with scissors, even scrapbooking scissors that have an interesting design (not shown here, but sold at 100 yen stores.) Be sure not to wet the egg too much, or the pressed on design can melt.
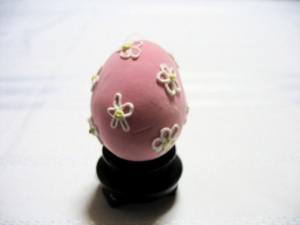
After making clay eggs (don’t let them dry out), soften dough in a contrasting color in a zip-lock bag with a little water--just knead it right in the bag. Cut off a tiny corner and squeeze the clay out of that hole and decorate the egg as you if were decorating a cake.
People who have never decorated cakes find this method rather difficult. However, if you are used to decorating cakes, this really is the easiest way to decorate clay eggs.
You can even make decorations using cake decorating tips (not shown here). Just make sure that it is a good consistency to squeeze out of the bag, and still hold it’s shape.
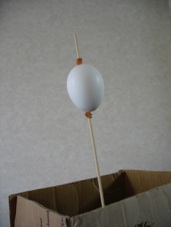
With this method, it is easiest to decorate the eggs if you can spin the egg around on a skewer, so you don’t have to worry about smashing the delicate decorations by holding it with your fingers. The skewer should not go all the way through as in the photo (the photo shows real eggs, so the skewer has to go all the way through.) Oasis, a cardboard box, or a potato all make good stands to poke the skewers into until the decorated eggs can dry--about a week since they are so thick.
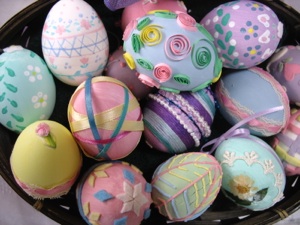
You can also decorate eggs as if they were real eggs--without the worry that they might break.
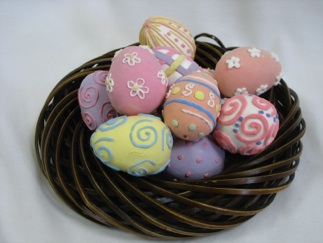
Ways to decorate with clay eggs
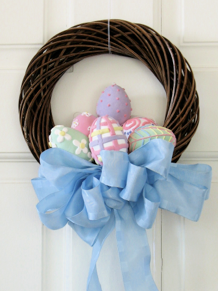
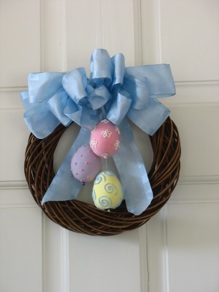
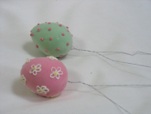
Decorate wreaths with these eggs. Once the clay eggs have dried for a week, you can easily poke florist’s wire through them to fasten them to a wreath (both photos above.) You can poke wires or needles through these eggs as much as 6 months after you have made them. But 2-3 years after they are made, they are rock hard, and that is no longer an option.
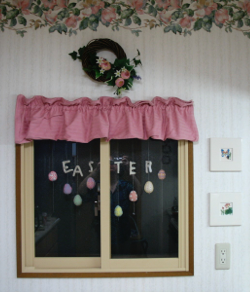
As an alternative, you can poke a needle through the eggs to hang them by thread. Just make sure the needle is longer than the egg, and that you tie the end of the thread to a bead or sequin, or both. If you just tie a knot in the end of the thread, it pulls right through the egg. Pliers can be useful to finish pulling the needle through if it is only slightly longer than the egg.
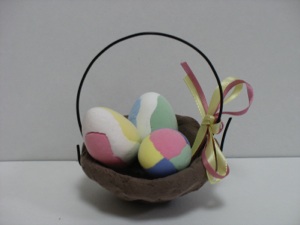
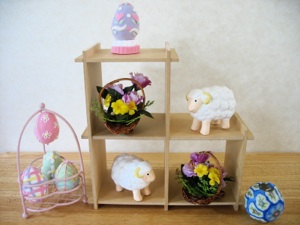
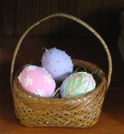
Put the eggs in a cute little basket, or on an egg stand. Napkin rings make good egg stands, or you can make one from clay as shown in the photo. Cut two discs or flowers from clay, stack them, then press a real or plastic egg into the top to make an impression for the clay egg to sit in.
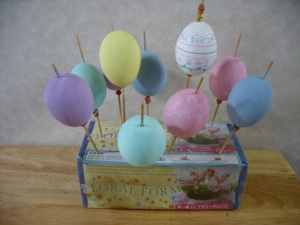
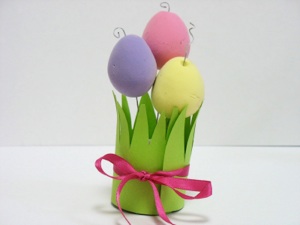
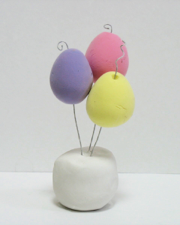
Make an egg “bouquet.” Poke florist’s wire through the eggs, and wind the ends around the tip of a pencil to form tendrils. Poke the other end into a base of heavier air-drying clay and allow to dry for a week. Cut paper “grass” and tie it on with a ribbon. If the clay base leaves a chalky residue, glue a piece of felt to the bottom.


3-D Clay Eggs
Marbled Eggs