


Seasons > Easter > Activities for the Home > Easter crafts and decorations to make > 13 Ways to Decorate Plain Crosses
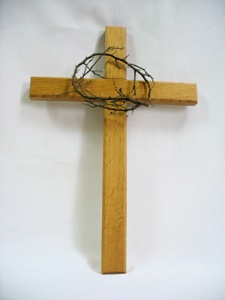


Buy or make a small crown of thorns (Rose or Pyracantha bushes work well.) Fasten it to the cross with florist’s wire.
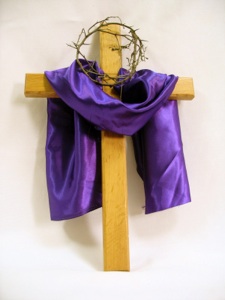
If you want more color, drape a purple cloth across the arms of the cross to represent the robe put on Jesus during his trial, and to indicate the royalty of the King of Kings.
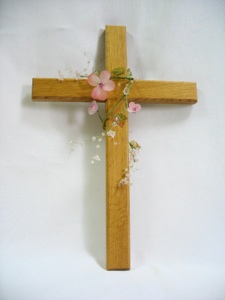
Buy bead flowers like those shown above (purchased at a hundred yen store) or twist a vine of silk flowers around the cross.
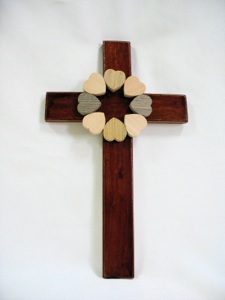
Buy wooden hearts (these were purchased at a hundred yen store) and glue them into a circle. Glue the heart circle to the cross to remind viewers of God’s love for us.
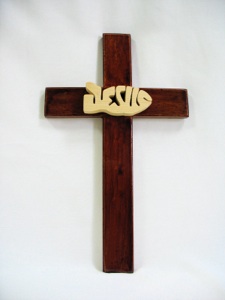
The ichthus was the first Christian symbol. It is the Greek word for “fish” but It is also a Greek acronym that reads, “Jesus Christ, God’s Son, Savior.” Early Christians drew a simple fish as a secret symbol. <>< Here is an English version, “Jesus” written in a fish.
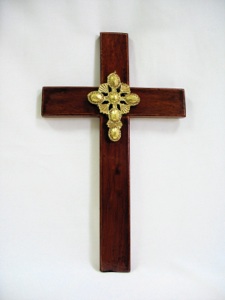
Glue a smaller gold cross on top of a wooden cross. This one was a Christmas ornament that only cost a dollar.
If you have a standing cross, you can add flowers and palm branches (fresh or artificial) along with a ribbon at it’s base.
This is actually an African carving of a fish carved into part of a gourd. Make your own fish carving and glue it to a cross.
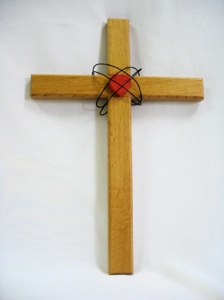
Glue a red heart to the cross and leave it plain, or add wire loops around both.
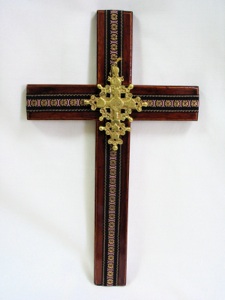
Buy brocade ribbons and glue them to a cross. If you don’t want this as a permanent decoration on your cross, you can use double stick tape to fasten it on as a temporary decoration. Glue a smaller cross on top for an added embellishment.
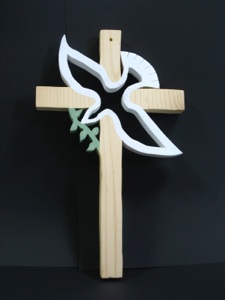
Unless you are a woodworker, or your child signs up for shop class in high school, you are not likely to be able to duplicate this. However, it wouldn’t be too hard to find a solid wooden dove to paint and glue on top of a cross.
Seasons > Easter > Activities for the Home > Easter crafts and decorations to make > 13 Ways to Decorate Plain Crosses
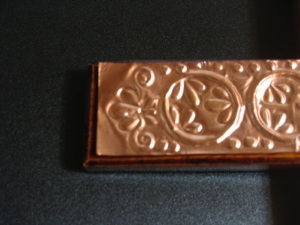

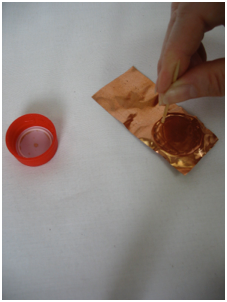
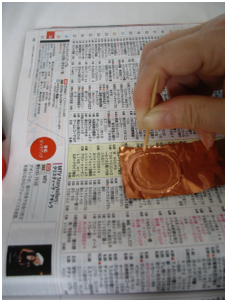
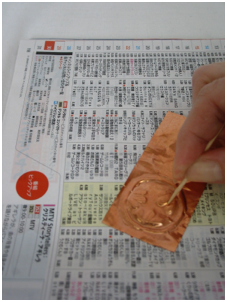
Use soft padding such as a phone book or magazine to press the design with the toothpick. When the toothpick looses it’s point use a new one.
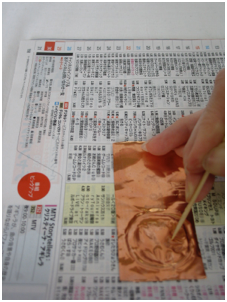
Draw 3 groups of 3 teardrops in each circle on the BACK side (fatter toward the center of the circle, and then narrow down to a point next to the outer edge. )
Flip it over and use the toothpick to OUTLINE each teardrop shape on the FRONT side.
Flip it over one more time and press in each tear drop shape to make the design more distinct on the BACK side. Repeat this design all the way down the cross.
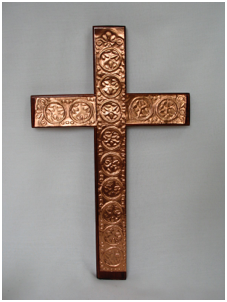
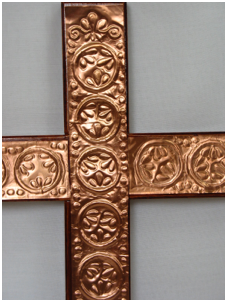
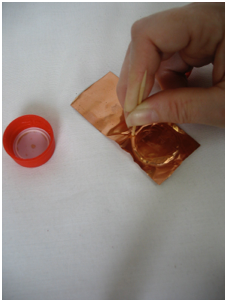
Decorate the cross with copper sheeting. You can buy it at craft stores, but if you can find strips of copper that are for putting on plants to keep slugs off, it will be a lot cheaper! I bought a pack at a dollar store (hundred yen store.) and used a toothpick to draw the design. The design looks complicated, but is actually fairly simple. There are 9 circles down the vertical piece, and 2 circles on each side arm.
Each circle has 3 groups of 3 tear drops. Between each circle are 3 dots on both sides. The 4 ends have similar designs without circles.
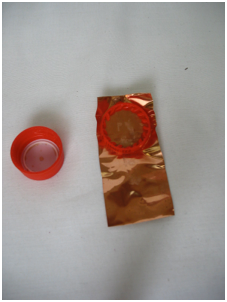
Press a plastic bottle cap (or the ring) into the copper.
Flip it over and use a toothpick to outline on both sides of the circle--the outside and inside edges. This will form the front side.
Flip it over and press the toothpick in the circle to make the design more distinct on the back side.
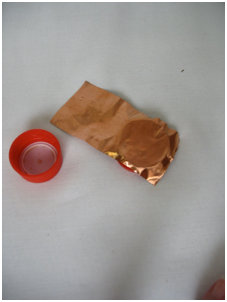
Drew 3 dots between each circle. As with the other design elements, begin by drawing them on the back side, outline them on the front side, then draw inside the dots on the back side one last time to make them more distinct. Each of the 4 ends of the cross has 3 teardrop shapes without a circle. There is a spiral shape on each side, then 3 smaller teardrop shapes under the top teardrop shapes.
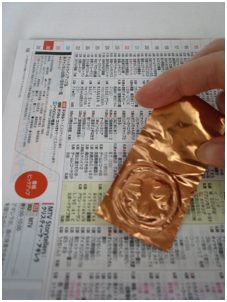
Glue the decorated copper strips to the cross, then coat it with lacquer, varnish, or modge-podge (used for decopage) to keep it from turning brown like copper coins.
Easter Decorations for the Church > 13 Ways to Decorate Plain Crosses
Easter Decorations for the Church > 13 Ways to Decorate Plain Crosses