


Sunday School or Bible Clubs > Crafts > Easter crafts--Jesus’ last week
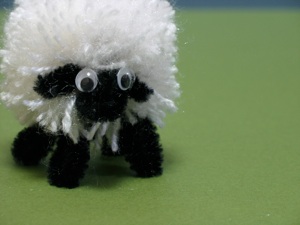

Pom-pom lamb I
-
1.Wrap yarn around cardboard or fingers until there is a thick layer of yarn. (spread fingers to guard against getting too tight.)
-
2.Wrap 3 pipe cleaners around the middle of the yarn
-
3. Cut loops of yarn at both ends
-
4.Bend 4 pipe cleaners in half to form legs
-
5.Bend remaining 2 ends to form the face and 2 ears
-
6.Glue on eyes
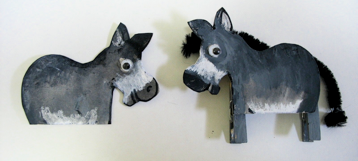
Cardboard and clothespin donkey I
-
1.Cut out body and head from thin grey cardboard
-
2.Clip on tiny wooden clothespins (sold at 100 yen stores--paint gray if you wish)
-
3. Glue on eyes or draw eyes and details on face
-
4.There are several options for the tail and mane--glue on pipe cleaner (chenille wire) , or sandwich thread between 2 layers of cardboard (pictured here)
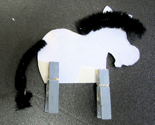
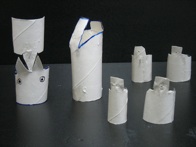
Cardboard and clothespin donkey II
-
1.Cut out 2 forms for body and head from thin cardboard
-
2.Paint body and tiny wooden clothespins (sold at 100 yen stores)
-
3. Glue on eyes and tail and mane (thread or pipe cleaner or cording for drawstrings partially unravelled )
-
4.Glue body to outside of clothespins (stand up once to make sure legs are even so it can stand up, then lay flat to dry)
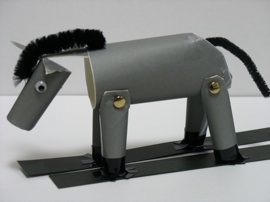
Toilet paper tube donkey
-
1.Stick gray paper onto 4 toilet paper tubes with double stick tape. Cut out body, head and legs from 4 toilet paper tubes as shown in photo below.
-
2.Wind legs into tubes and tape shut.
-
3.Poke holes in legs and body with a metal skewer or ice pick and fasten them on with brads.
-
4.Roll head tighter, and tape shut. Bend ears over face.
-
5.Insert neck portion into body and fasten with double stick tape or glue
-
6. Glue on eyes, tail and a chenille wire mane. Tape rump shut.
-
7.Tape the feet onto 2 strips of cardboard so when you move the strips of cardboard alternately, the donkey walks.
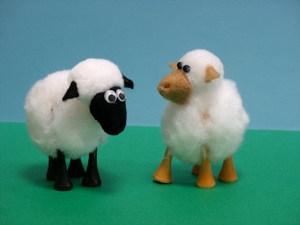
Pom-pom lamb II
-
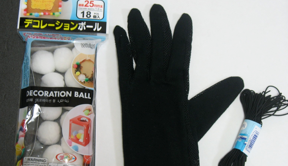
1.Purchase 2 sizes of pompoms, golf tees and a pair of cotton gloves
-
2.Poke 4 golf tees into large pompom for legs, and glue in place (cut off tips if they are too long) Paint black if you wish.
-
3. Glue small pompom to large pompom for head.
-
4.Cut one finger tip off glove for each lamb face. Tuck in ends and glue to small pompom.(A wooden bead works, but the lamb looks a lot like a monkey!)
-
5.Cut ears out of felt and glue to small pompom. Glue on beads or googly eyes.
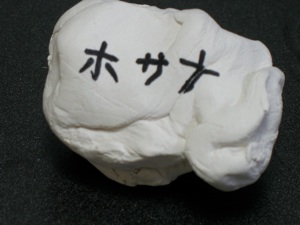
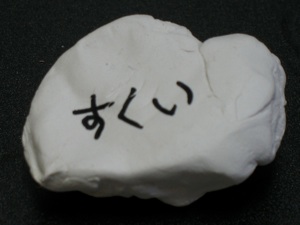
Clay “Stone”
-
1.Squeeze a piece of clay into a rock shape
-
2.Let air dry or bake according to package directions
-
3. Write “Hosannah” on one side, and “Saves” on the other
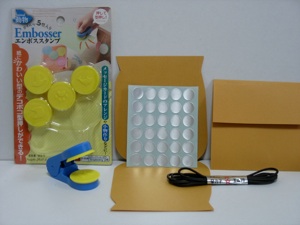
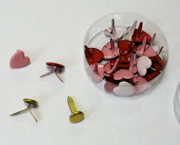
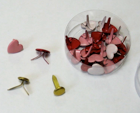
Paper Wallet and 30 silver coins
-
1.Cut out paper wallets or draw string bags
-
2.Glue or tape together, or punch holes and “sew” edges with shoestrings
-
3. Put 30 silver stickers on one or more cards, and print the verse on the back of the card
-
4.Put the card of “coins” into the wallet
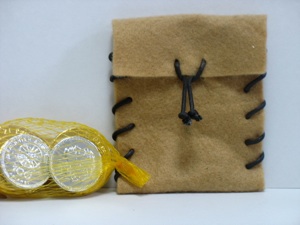
Felt or Leather Wallet and 30 silver coins
-
1.Cut out felt or leather wallets or draw string bags
-
2.Sew together, or punch holes and “sew” edges with shoestrings
-
3.Add a drawstring for drawstring bags or bead for wallet fasteners
-
4.Fill wallets with 30 pieces of “silver” (see ideas to the right)
30 silver coins
-
1.Emboss silver paper and cut out paper “coins” (shown in photo on far left) Both embosser and silver paper are sold at some hundred yen stores in the stationary section
-
2.Spray paint 30 rocks each (some hundred yen stores sell silver rocks in the gardening section--which is much cheaper than buying silver spray paint)
-
3. Buy foil covered chocolate coins (These are sold at 100 yen stores in the fall, but are hard to find in the spring, so buy ahead. Some grocery stores sell them, too.)
-
4.Mint your own coins--Press a button that has a raised pattern into oil based play dough and fill indentation with melted silver crayon or candle. Once the “coins” have cooled, pull “coins” out of clay and put in wallets. This does not work with Hearty or Sculpy, only play dough.
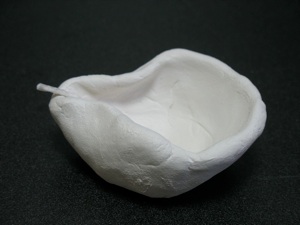
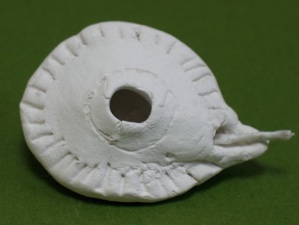
Oil Lamp I
-
1.Form a ball of clay (air drying or oven baking modeling compound)
-
2.Poke a hole in the middle and gradually squeeze the edges until it forms a bowl shape (be careful that the edges don’t get too thin)
-
3. Squeeze the sides together on one side to form the place for the wick
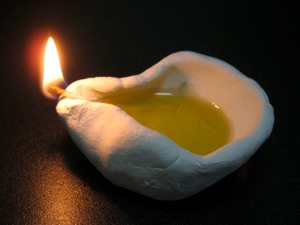
It really works!
-
1.Fill with olive oil
-
2.Pull the wick out of a candle stub--it can just be an inch or two long
-
3.Light: Never leave it unattended--adult supervision required
Note: This shape of oil lamp was used during the O.T. times.)
Oil Lamp II
-
1.Follow the instructions of oil lamp I to form the base of the lamp.
-
2.Form a second ball of clay for the top, just like the bottom. Without smashing it, carefully poke a hole in the middle, and draw designs on it with a toothpick.
-
3.Wet the rim with water, and gently squeeze the edges of the top and bottom together, being careful to leave a hole for the wick, too. (Shape used during N.T.)
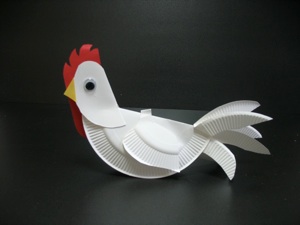
Paper Plate Rooster
-
1.Fold a dessert sized paper plate in half for the body
-
2.Fold another plate in half and cut off the rim to form the tail feathers, and use the remaining middle to form the head (cut a 1 inch (2 cm) slit on one side of the fold to slide the head onto the body.)
-
3. Fold a third plate in half and cut out the wings. Use any excess to make more tail feathers.
-
4.Cut red paper for the cockscomb and orange for the beak.
-
5.Glue the cockscomb and beak between the 2 layers of the head.
-
6.Glue on the head, eyes, wings, and tail.
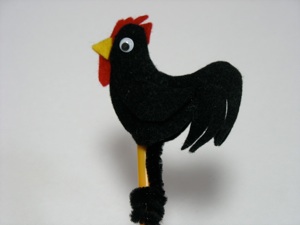
Felt Rooster Pencil-topper or Backpack decoration
-
1.Cut out 2 black or white felt shapes for the body and tail
-
2.Cut out red felt for the cockscomb and orange for the beak, and 2 black wings.
-
3. Glue the beak and cockscomb between the 2 layers, and glue the rest of the edges, but DO NOT glue the bottom or tail.
-
4.Wrap a black or yellow pipe cleaner (chenille wire) around a pencil and glue inside the open body.
-
5.As a backpack alternative, instead of glueing the pipe cleaner, fill the body with batting and glue shut. Sew an elastic loop to the top of the body.
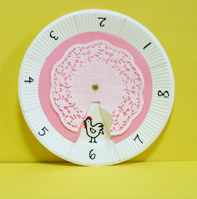
Final Week Story Wheel or Spinner
-
1.Print out story wheel pictures onto sticker paper (sold at 100 yen stores) (or print it on regular copier paper and glue to the plate)
-
2.Cut out story circle and fasten it to the paper plate, and write corresponding numbers on the rim.
-
3.Cut out colored paper and a doily with a window to show one picture (leave the flap attached to the right side as a handle to spin the window around.)
-
4. Poke a hole through all layers with a metal skewer or ice pick and fasten them together with a brad.
-
5.To use the story wheel, the children can either move the window to the next portion as they listen to the story, or after they hear the story, they can try to guess what portion of the story number one depicts, etc.
-
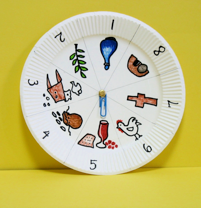
6.As an alternative, leave off the top layer and make it into a spinner: fasten a paper clip or safety pin onto the plate with a brad.
-
7.Use it as a story telling game (review Easter story.) Children pass the plate around. Each child takes a turn to spin the spinner, then tells that portion of the story.
Sunday School or Bible Clubs > Crafts > Easter crafts--Jesus’ last week
Story Wheel
Spinner game
Triumphal Entry: Donkey or Stone craft
Talking Point: As the children are working on making the craft, lead a discussion about how important it is to praise Jesus--if people don’t do it, the rocks will start shouting!! For middle school children, the discussion can focus on how the crowds were shouting praise for Jesus on Sunday, but by Friday, the crowds were shouting, “Crucify Him!” Challenge them to think about how they might sing praises to Jesus in church on Sunday, but during the week might use the same mouth to make fun of other kids or call a brother names. If time allows, encourage them to think of strategies to avoid using their mouths for evil when their friends or class mates expect them to join in the “fun.”
Cleansing of the Temple or Judas’ Betrayal : Coin Purse and Coins
Cleansing temple talking Point: As the children are working on making the craft, lead a discussion about why it was important for Jesus to rid the temple of bad things, and what Jesus might want to clean out of their lives
Judas’ betrayal talking Point: We like to believe that we would never turn our backs on Jesus like Judas did, but many children do quit coming to church when they join a baseball team that plays all their games on Sunday, or when they reach middle school. Encourage the children to list more ways people turn away from Jesus and how to not follow Judas’ example .
Last Supper: Oil Lamp or Lamb
Talking Point: As the children are working on making the craft, lead a discussion about how to be servants.
Option #2: Use the craft time to explain about communion and how they can join the celebration once they are baptized..
Option #3: Explain how Jesus (the sacrificial lamb) took the penalty for our sins, and how important it is to ask His forgiveness each time we sin. Ask the kids to name sins that they have seen other kids do (easier than naming their own sins in front of everybody.)
Jesus’ Trial--Peter’s Denial: Rooster
Talking Point: As the children are working on making the craft, lead a discussion about how we may think that we would never deny Christ the way Peter did, but there are lots of ways that many people do it every day--not praying before lunch at school, not telling any of their friends about Jesus, or inviting them to go to church with them.
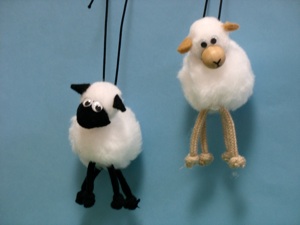


To make sheep into backpack decorations, make legs from cording for drawstrings, and tie knots for feet. Tie elastic around the sheep (and legs) to fasten to backpack.
head
body
legs
brads
brads


HOSANNAH
SAVES