


Seasons > Christmas > Decorations for the home > Fun Christmas Centerpieces and Place Settings for Kids, New for 2013


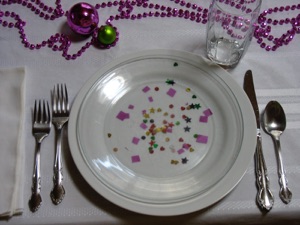
Confetti always makes it seem like a party. You can sprinkle it on the table, or under a clear plate. Make your own confetti by cutting up bits of color coordinated paper or use packets of purchased sequins or stars. Many party goods stores and dollar stores sell packets of confetti just for parties like this, so there are lots of options for shapes, colors and even words.
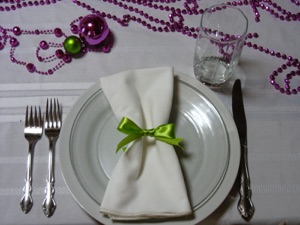
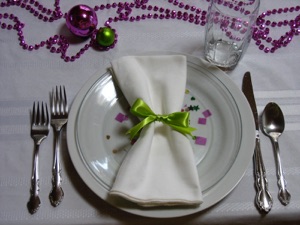
Tie a color coordinated ribbon around a napkin for a simple napkin ring that blends in with the rest of the decorations. You could string some Christmas balls to the ribbon before tying the bow for a more festive touch.
Combine the two ideas with the confetti and the napkin to create more interesting layers. Optional ideas for using name tags to let people know where to sit (or keep fights from erupting!) 1) Write names on color co-ordinated paper and put one name under each clear plate along with the confetti, or punch a hole in the corner of the card with the name, and slide it onto the ribbon before tying it around the napkin.
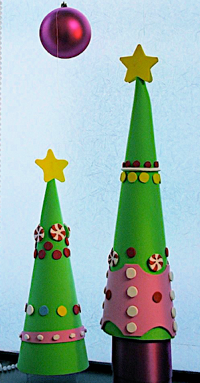
Sometimes it is fun to play around with the customary Christmas colors--exchange hot pink for the typical red, and lime green for the usual dark green, especially now that so many colors of decorations are available. Pictured here are strings of beads and Christmas balls that are draped along the middle of the table like a three dimensional table runner (from a dollar store, of course). If you don’t want to use tropical colors like the ones shown here, use the same design elements (foam trees, Christmas balls and strands of beads) in any color combination that you want--it will still look great. The Christmas trees are quite easy to make. Buy a large sheet of EVA foam or poster board for each tree, and roll each into a cone. Glue it in place, and cut the excess off of the bottom so it stands upright. Then cut out candy shapes from other colors of foam and glue them to the trees. Glue guns work great with foam. Another option is to buy packs of pre-cut foam shapes, that often come with adhesive backing. These make it a super quick project. Decorating the trees could be part of the entertainment for the children who come for dinner. Hint: if you don’t have quite enough foam when rolling the tree into a cone, so there is a hole on one side of the bottom edge, glue a wide band of another color of foam on top of the green layer to hide the hole. Another trick to make one tree a little taller than the other one is to put the finished tree on top of an empty ribbon spool. Cover the cardboard spool with a short length of ribbon, or cut color coordinated paper to fit (see photo on right).
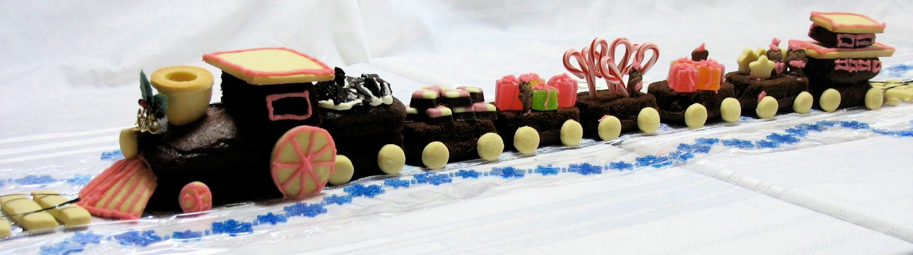
A train you can eat--it is sure to please any child! If you want the train to look fabulous, you better make it yourself. If you want it to be a fun activity, let the kids join in to make it (Don’t expect it to look very good. But who cares? If you want the kids to have fun, you can’t go wrong making it together! Just don’t use a tablecloth!) If you buy all the parts to assemble, the drawback is that it gets expensive. If you make everything yourself, obviously, it takes a lot of time. The other option is to do some of both--bake some and buy some. In the photo above, I baked chocolate cake and sugar cookies for making the train, then bought candy to fill the cars. You don’t have to make a cake chocolate, but it is a great color for the engine. So if you can make cupcakes and sugar cookies, you can make this train. If not, you can still make it--just buy baked cake and different sizes of cookies.
Here are 4 different ways to make the train:
-
1.Bake cake in 2 loaf pans, or buy 2 or more pound cakes. Leave one whole for the engine at the front. Then slice the second loaf for cars--lay each slice flat--one for each car. Also stack a slice on top of the engine and caboose (last car ) to make them taller.
-
2.Bake a cake in a sheet pan, then cut it up into parts--a long rectangle for the engine, and smaller rectangles for the cars and caboose, and also to stack on top of the engine and caboose to make them taller. Cutting the pieces will make them more crumbly (than if they are baked in those shapes) which could make it harder to fasten the wheels on with icing.
-
3.Buy or bake a swiss roll cake for the engine. If it is long enough, cut off one short end to be the front of the engine (horizontal), then turn the long “half” on it’s end to be the tall part at the back of the engine (vertical). If the swiss roll is too short to make both parts, use 2 cakes. Make the cars in one of the ways listed above or below.
-
4.Use a cupcake pan that has rectangular cups (rather than the usual round ones) to make the train cars and also to stack on top of the engine and caboose to make them taller. If you don’t have anything but a regular cupcake pan with round holes, you can probably make the cars with round cupcakes anyway--by the time you add wheels on the sides, and candy on top, probably no one will notice that they are round cars!
Details to make it look like a train:
-
1.Wheels: make or buy small round cookies for both sides of each car, the front of the engine, and for a headlight for the front of the engine. I used an apple corer to cut out these small cookies. A bottle cap could be used instead. If you are buying cookies, mini Oreos are about the right size. Make or buy 2 large round cookies for the back of the engine. Fasten them all on with icing. Optional: decorate with icing such as drawing outlines and spokes.
-
2.Chimney: buy an ice cream cone, or shape cookie dough into a cone shape and bake. Cut a round hole into the top front of the engine (with an apple corer or paring knife) and press the cone into the hole.
-
3.Roofs and “Cow Catcher”: bake or buy square cookies to make a roof for the engine and caboose. Cut a pentagon in halfto make the “Cow Catcher on the front of the engine. To cut store-bought cookies, use a serrated knife and cut them with a sawing motion and almost no downward pressure. You are likely to break some, so be sure to buy extra cookies.

-
4.Optional extras: Railroad ties: bake or buy rectangular cookies for railroad ties in the front and back of the train. Lay wire or black licorice strips on top of the cookies for rails. Bell: Put a small bell in front of the chimney by running a wire (such as twist-tie) through the top of the bell, twist the wire once to hold the bell in place, then bend the wire down on both sides of the bell to form a frame (upside down “U”) and poke the ends of the wire into the cake--far enough into the cake to hold it in place, but with enough space left so the bell dangles from the wire. Fake holly leaves look cute, too, if you happen to have some.
If you already own a set of duplo blocks (like giant legos) that can be made into a train with tracks, you can make an edible train that really moves! Set up the track, wash the cars, then hook together the block train cars. Then put pieces of cake on each car and “glue” them on with icing. Pile candy or cookies on each car. Move the train VERY slowly so you don’t have a cake train crash!
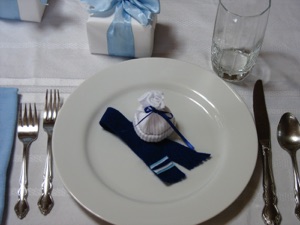
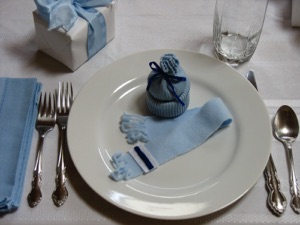
Cute little hats and scarves continue the snow theme on each plate. They are so easy to make. Cut the scarves out of narrow strips of felt or fleece. Glue on smaller strips of felt for a design element near each end, and cut a fringe on both ends of the scarf. The cool thing about fleece is that if you gently pull each fringe strip, they curl up. If you want to make the scarves into place cards, use fabric paint to write the names.
Make tiny knit caps from pairs of children’s socks--dollar stores often sell these. Each sock makes 2 hats--one pair makes 4. Cut each sock in the middle. For the toe end, simply fold the raw edge over twice to hide the raw edge and form the brim of the hat. It’s done. For the other half of the sock, roll up the cuff of the sock once, then tie the cut end with a ribbon. It’s done! Kids love a treat--tuck a wrapped piece of candy into the hat for a surprise!
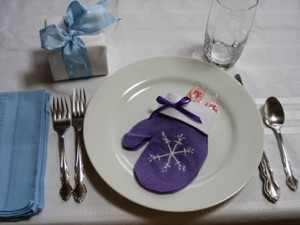
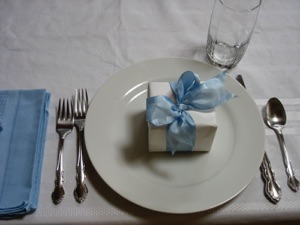
If you don’t have the time or interest to make tiny hats, scarves, or mittens, continue the color theme with wrapped gifts for each person. Fill the boxes with small gifts such as candy, cookies, or inexpensive toys. If you put name tags on them, you can customize the gifts to fit each person.
Mittens go along with the snow theme as well. Make one for each guest to hold a small treat. Cut 2 mitten shapes out of felt. Stitch a simple design on the front piece, then sew both shapes together around the edges. Fill with wrapped candy or cookies. Save time by making them just one layer (obviously, these can’t be filled.) Another option is to buy children’s mittens or gloves at a dollar store.
If you don’t sew, you can glue the front and back pieces together to make the mittens. Be careful to use as little glue as possible--if you use too much, the glue will soak through the felt, and looks ugly. Use fabric paint to make a design on the mitten, or glue on sequins. Another option is to cut out felt shapes to glue on for decorations. Sometimes craft stores have packages of felt shapes with adhesive backing--so easy!
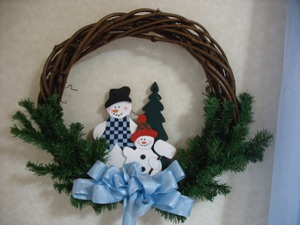
Keep the snowman theme going through the whole room with a snowman wreath on the wall. To make one like this, Make or buy a vine wreath. Sometimes you can find these at dollar stores. Buy unpainted wooden snowman cut outs at a craft store and paint with acrylic paints. Fasten a bow and artificial greenery to the wreath with florist’s wire.
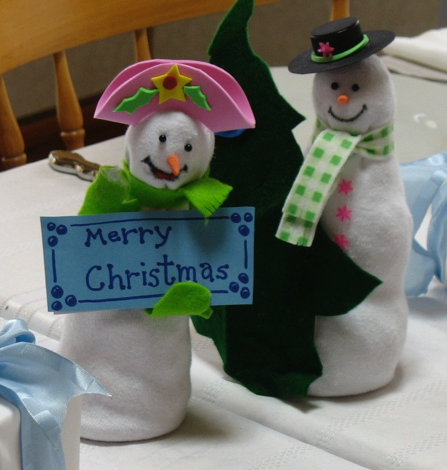
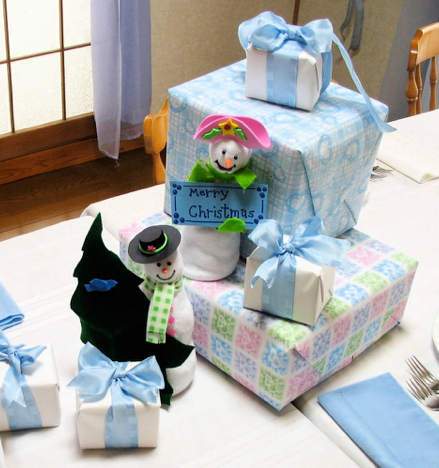
Make a centerpiece with a couple of cute snowmen. If they seem a little too small by themselves, put them on top of a stack of color-coordinated gift boxes. Make your own snowmen out of a pair of socks (from a dollar store, for the cheapest option.) Stuff them with empty plastic shopping bags (good way to recycle!) Wad them into 3 balls, each one bigger than the next by wadding up more than one bag to form a bigger ball. Push the smallest ball into the toe of each sock to form the head. Then push in the other two “balls” to form the middle and large balls. Push in a jar lid to form a bottom for the snowman to stand on. Glue the opening of the sock closed. If there is too much excess sock, stuff with larger balls, or cut off the excess. Now use details to transform the stuffed socks into snowmen. Tie a ribbon or strip of felt around the neck to make a scarf. The pink hat is a doughnut shape cut out of EVA foam that has been folded in half and glued in place. The black hat is a doughnut shape cut out of foam or cardboard for the brim, and a black bottle cap for the top. The eyes and buttons are beads. Make a carrot nose out of foam or felt. Draw the mouth on with a fine tipped permanent marker.

Seasons > Christmas > Decorations for the home > Fun Christmas Centerpieces and Place Settings for Kids