

Advanced--only middle school and above should attempt these
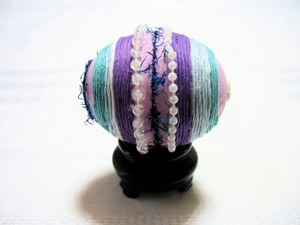
String wrapped--The design is simple, so it would seem that they would be easy to to make, but they are not. Here, again, if the lines are not straight, it does not look good. I tried gluing a wide swath, then wrapping the embroidery thread around the egg. But the glue dried long before I could get it wound around the egg. So I ended up putting glue on the egg for one or 2 cm. with a bamboo skewer--just the width of the floss, and gluing that length of floss down, then putting more glue on the egg. It also helps to have a ruler or straight edge to straighten out any curves in the freshly glued floss. Surely there is a faster way, but I have not discovered it yet.
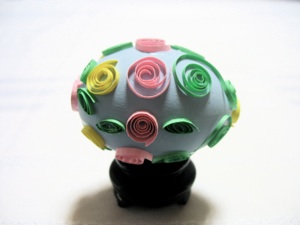
Quilling--Cut narrow strips of paper--this is best done with a paper cutter. Then put double stick tape on the pointy end of a bamboo skewer. Stick one end of the paper to the double stick tape, and wrap the whole length of the paper around itself--either holding the roll between thumb and forefinger and rolling the skewer in place until it makes a coil around the skewer, or lay it along your hand, and keep rolling the skewer across hill and veil until it forms a coil around the skewer. Remove the coil from the skewer, being careful not to lose it’s shape, since the end is still stuck to the double stick tape. The coils can also be smashed to form petals or leaves. Dip each coil in glue, being careful not to lose it’s shape, and glue it in place on the egg. You can buy special quilling tools, and pre-cut paper, but if you are only making one or 2 eggs, you don’t need it--this method works.
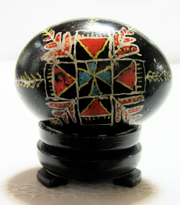
Pysanky--Traditional Ukrainian Easter eggs are made by dipping a kitska into wax, melting the wax over a candle, then drawing a design on the egg with the kitska. The egg is then dipped in the lightest color of dye, then another layer of wax is put on. This process continues until the last dye bath is black. Finally the wax is all melted off the egg, and an intricate design is revealed. My daughters made these eggs when they were in middle school. This is one technique that you must buy the special tool, wax, and dye.
Link to Hearthsong website that sells these sets
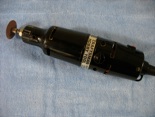
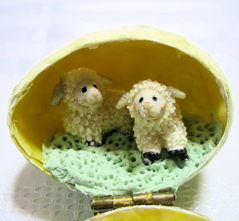
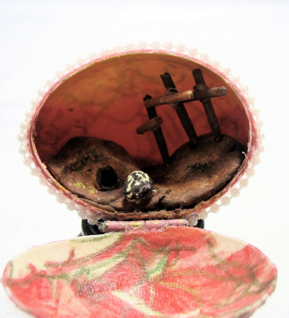
Window or Door--These eggs never cease to amaze people. To make them, you have to have a tool that can saw a door or window in the egg. I use a drummel-style miniature power saw. Don’t try to skip the step of blowing the insides out of the egg, though--you will have raw egg flying all over the room! (Don’t ask me how I know this!) Once the door is cut, glue a small hinge to the door and the egg. (I bend the corners of the hinge so that they don’t stick out once the hinge is glued on. Then decorate and fill as you please. The one with the grave and crosses, was made with a modeling compound like Hearty (Karui Kaminenedo sold at most 100 yen stores), and the crosses were made out of toothpicks. The sheep were purchased in a set of 12 from Oriental Trading company.
Link to craft website that sells Hearty
Link to Oriental Trading Company website that sells miniature sheep and tons of other Easter goods
Seasons > Easter > Activities for the Home > 10 ways to decorate blown Easter Eggs
Easy--elementary kids can make these
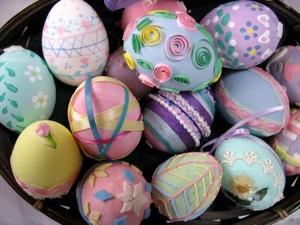
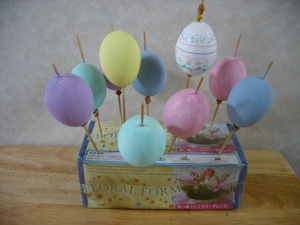
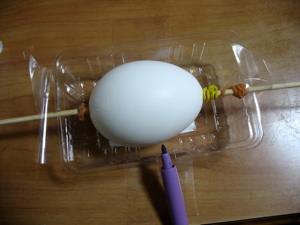
Paint--All of the eggs on this page (except the one decorated with marker) have a base of acrylic paint. The best way to keep from getting any marks on the egg while you are painting it and then while the paint is drying, is to put the egg on a bamboo skewer with a rubber band above and below to hold it in place. Then poke the skewer into oasis ( foam for flower arranging) or the sides of a cardboard box, or into a potato, or into a glob of your kids’ play dough until the paint has dried.
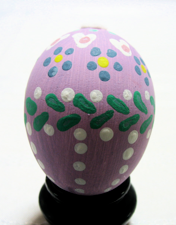
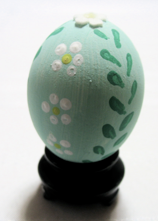
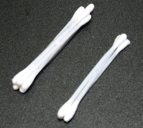
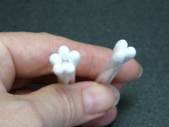
Stamps--the designs on these eggs were all “painted” with q-tips dipped in acrylic paint. The flowers and dots were made with the ends of q-tips, and the leaves were “painted” with the sides of q-tips. If you want to make a flower “stamp”, tape 6 q-tips together to form a flower--5 form the petals, and the 6th q-tip is in the center to hold the other 5 petals in place, so it sticks out past the others on the non-flower end. Or you can carve an eraser to make a stamp to stamp designs onto the egg.
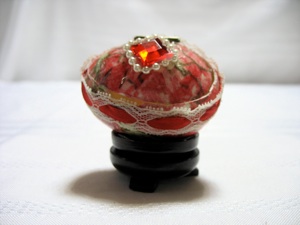
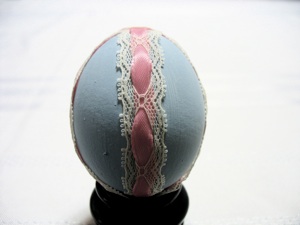
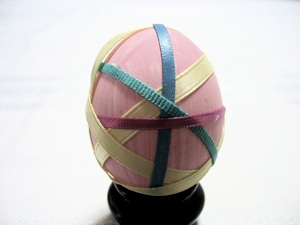
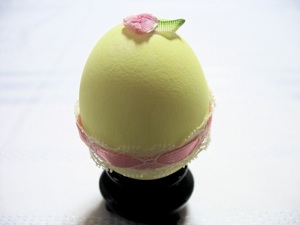
Ribbons and lace--just measure cut, and glue on. It is quick, and it looks so fancy. Kids especially like to glue on “jewels.”
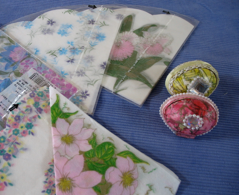
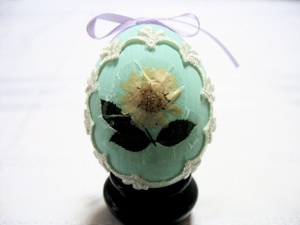
Pressed flowers--Once your flowers and leaves have been glued in place, paint with lacquer or varnish to protect the flowers. Some craft stores sell pressed flowers. If you press your own flowers, it isn’t hard--just pick flowers and put them under a book, or in between the pages of the phone book. You do have to plan ahead to have them pressed in time for decorating the egg. Lace and ribbon also look pretty pared with flowers. This flower is actually a sticker with a real pressed flower from a hundred yen store (in the stationery section.)
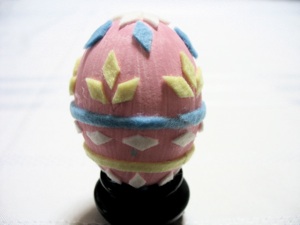
Felt--cutting out round shapes can be time consuming. But this egg was designed with diamonds, which are a snap to cut. Just cut narrow strips, then snip each strip diagonally, which forms diamond shapes. The hard part is holding such tiny pieces and getting the glue on just one side, and then gluing each piece in the spot you want it. Tweezers can make the job easier. If the diamonds are green, they look like leaves, and if they are pink or yellow, and glued on with their points touching, they look like flowers.
Decoupage--you can glue on any cute paper shapes, then paint over them with lacquer or varnish. You may have to clip around the edges to help the flat picture wrap around the round egg shape. The eggs in these photos aren’t technically decoupaged, since they do not have a picture, but they are similar, in that they have torn pieces of napkin painted on with varnish--super simple.
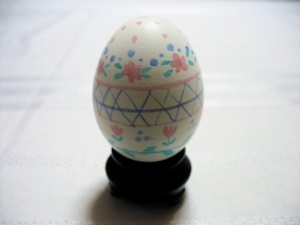
Marker--at first blush, this would seem to be the simplest of all eggs to decorate--just grab some markers and have at it. If the designs are random, then, indeed, nothing is simpler. But if you intend to draw lines or rows of designs, such as flowers or hearts, then it becomes one of the most difficult. Here are 3 techniques that might help you make it all work out right.
1. Use rubber bands as guidelines-- but be careful not to nudge them, or your line will curve and dip
OR
2. Cut a strip of paper just long enough to go around the egg. Fold it in half again and again until it is the length you want the design elements to be separated by. Then unfold it, and tape it around the egg--to itself, not the egg, and look at it from all sides to be sure you have not taped it on crooked. Use the paper edge to draw lines, and the fold marks to show where to draw each design.
OR
3. Find paper tubes (like toilet paper tubes, paper towel tubes, wrapping paper tube, scotch tape rings, etc.) Rest the egg on the tube, and make sure the egg is not crooked. Draw along the edge of the tube. Different sized tubes will allow lines to be drawn in different places on the egg.
More hints:
1. Practice drawing designs on paper until you like the way the design looks.
2. Draw lots of details--the more there are, the harder it is to see flaws--sometimes you can even draw new designs to cover up mistakes.
3. Count the first egg as a practice egg, and throw it away. The second one always looks better
4. Don’t point out the flaws, and no one will notice. Even though mistakes seem huge and obvious to you, people really don’t study it that carefully--they just look at the egg as a whole.
5. Turn the ugly side toward the back when you are displaying them.
Decorate Blown Eggs
a Different way each year, and you will soon have a great collection
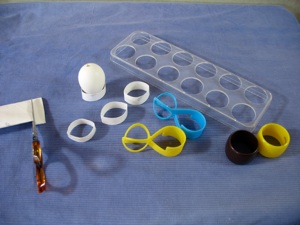
How to remove the insides of a raw egg
1. Make a stand for the egg by cutting a strip off a paper towel tube, or a toilet paper tube, or use a napkin ring or a metal washer
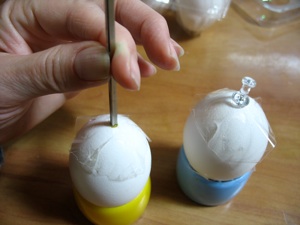
2. Use a hammer and push pin (tack) to make a small hole in both the top and bottom of the egg. Don’t worry, it won’t leak yet.
3. Use a nail or metal skewer to enlarge the holes at both ends--do this by twisting the skewer back and forth without putting any pressure on it--keep “drilling” until the hole is large enough for the nail or skewer to fit inside.
4. Use the metal skewer or a bamboo skewer to poke the egg and break the yoke.
5. Blow into the top hole in the egg until the whole egg has been blown out the bottom hole into a bowl. Sometimes part of the egg will get lodged in the hole, and if you pull on it, it will come loose and you can keep blowing until it is all out.
6. Rinse off the eggs, and leave them on a stand to finish draining. If the egg holder in your refrigerator is removable, this is ideal. If you put the eggs on skewers with rubber bands without letting them drain first, you have to deal with lots of dripping raw egg during and after the egg has been decorated--so don’t skip this step!
I like to put tape on the egg to keep it from cracking, and so I don’t have to put my mouth on a raw egg. But in the end, I don’t think it really helps for either of those things.

Seasons > Easter > Activities for the Home > 10 ways to decorate blown Easter Eggs
cut